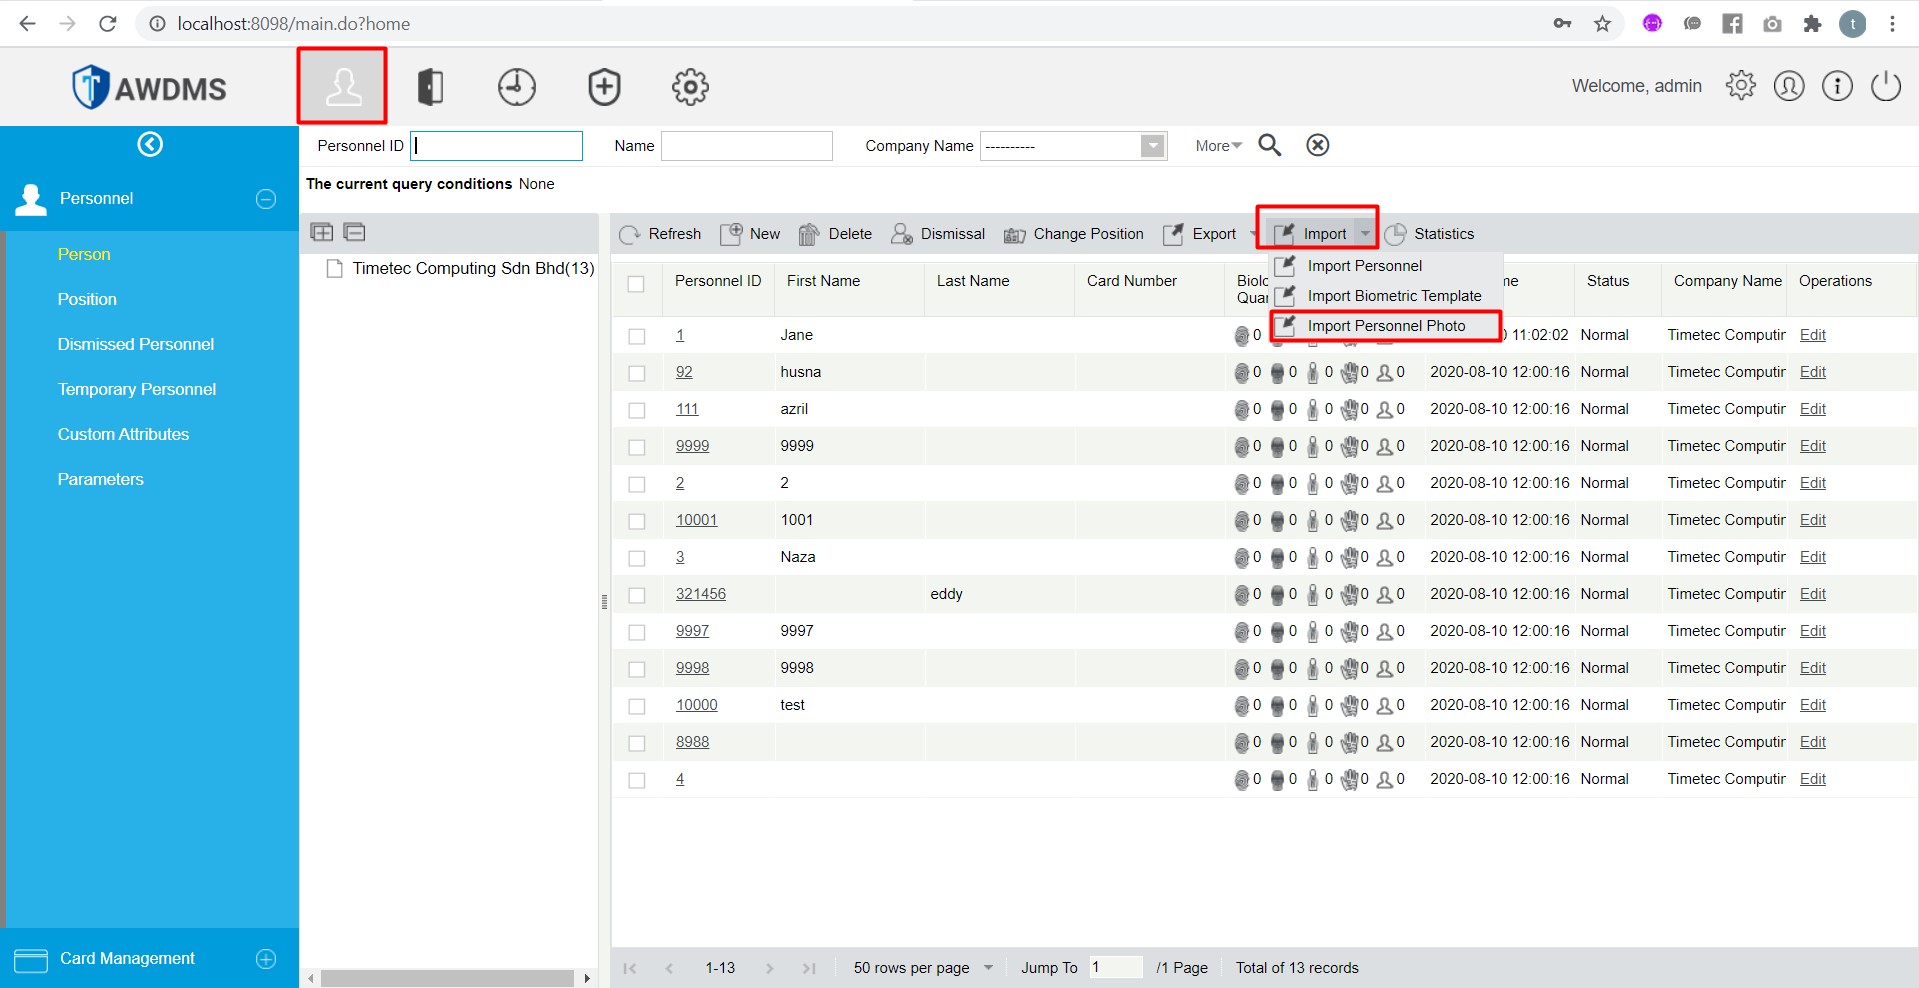
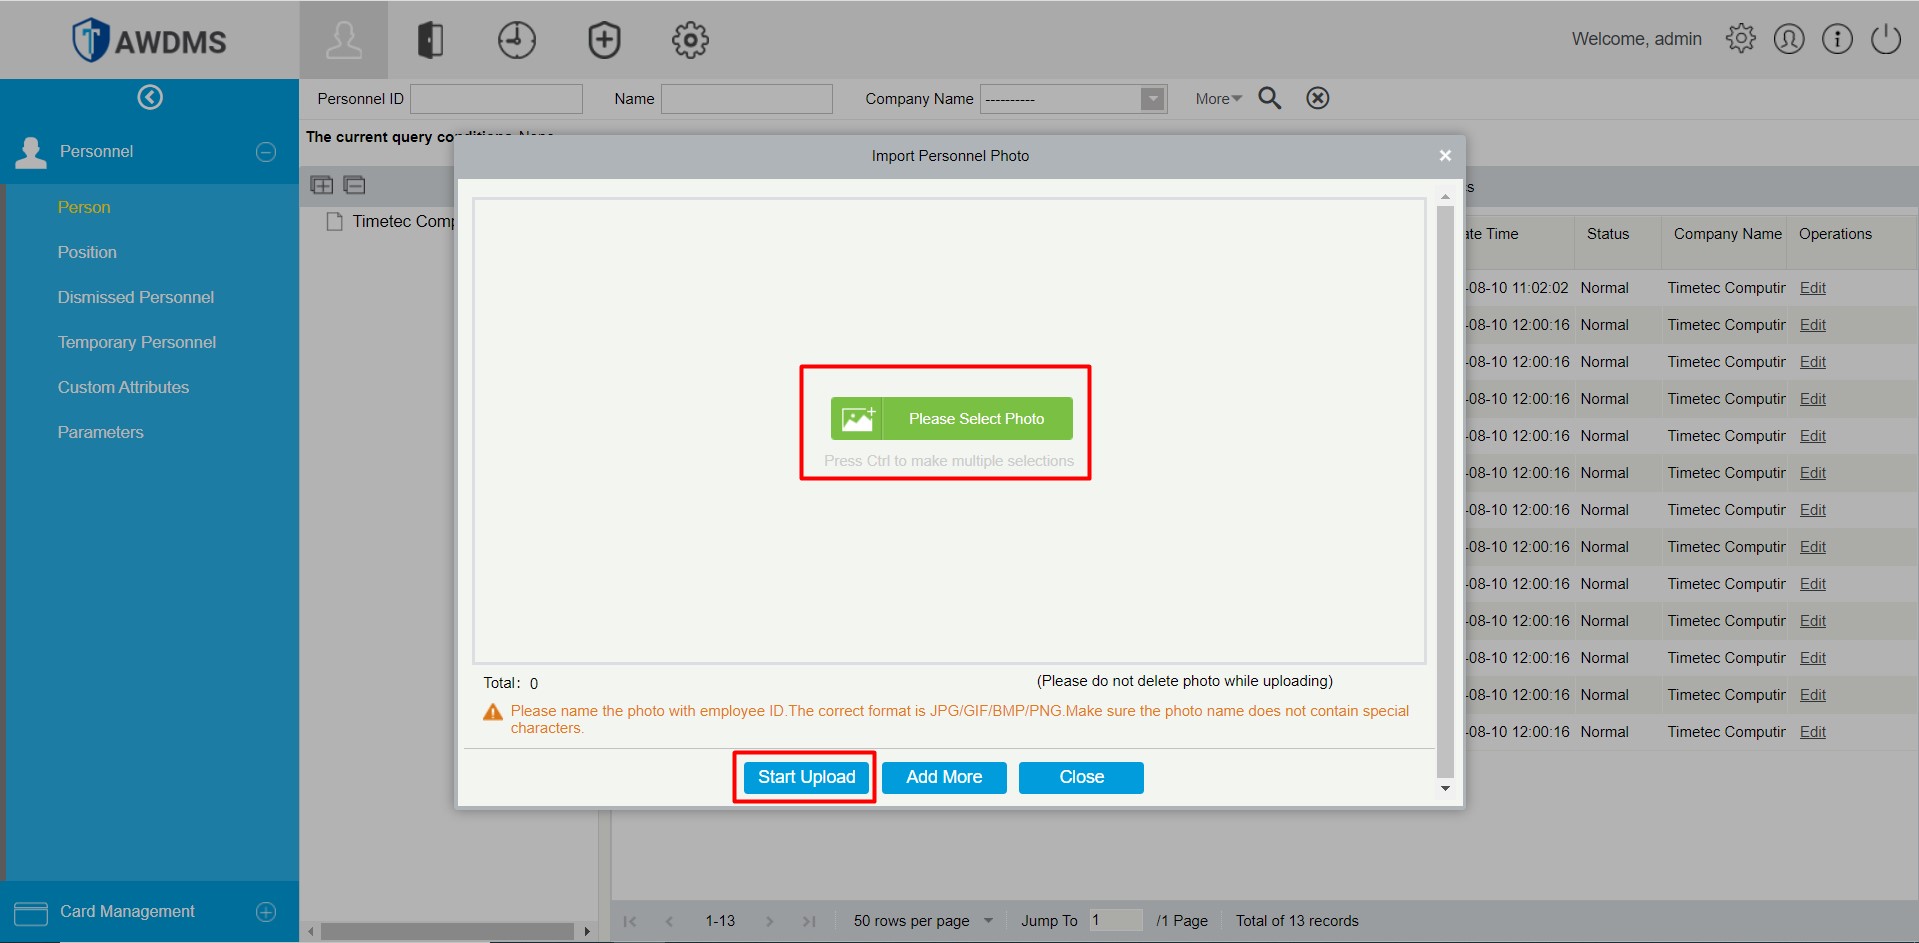
How To Perform Uploading Photos by Batch To Smart AC Series/FaceID 5 Series
Photo Requirements
1.File Size & Format : JPG format compressed image with not more than 20kb size. Image Format Should be in BMP, JPG or JPEG.
2.Photo resolution & Dimension : 24bit true color mode. Definition rate between 358 x 441 to 1080 x 1920.
3.Black & White or Color Image : Requirements for Visible Light Digital Face Image Data Digital photo should be straight edged, colored, half-portrayed with only one person, and the person should be uncharted and not in uniform.
4.Environment & Background : White background with dark-colored apparel. The captured person should be clearly seen, natural in color, and without image obvious twist, no shadow, light spot or reflection in face or background, and appropriate contrast and lightness level. Face Complete face with clear contour, real scale, evenly distributed light, and no shadow. Facial Expression Plain face or smile with eyes naturally open are recommended.
5.Glasses or No Glasses : Persons who wear eyeglasses should remain to put on eyeglasses for photo capturing. Accessories Masks and colored eyeglasses are not allowed. The frame of the eyeglasses should not shield eyes and should not reflect light.
6.Distance & Scale : Eye Distance 200 pixels or above are recommended with no less than 115 pixels of distance. Gesture and Angel Horizontal rotating angle should not exceed ±10°, elevation should not exceed ±10°, and depression angle should not exceed ±10°. The vertical scale of head and body should be 2:1. The photo should include the captured person’s shoulders at the same horizontal level. The captured person should be eyes-open and with clearly seen iris. Plain face or smile is preferred, showing teeth is not preferred.
Related Articles
Frequently Asked Questions (FAQ): Smart AC Series/FaceID 5 Series with AWDMS/Ingress
Introduction This article is prepared to explain further on frequently asked question regarding Smart AC and Face ID5 with the AWDMS and Ingress software. 1. Can Ingress work well with these devices? Yes, the Ingress version 4.0.1.x or above supports ...How To Download Transaction Data From Smart AC1 Series/ FaceID 5 Series
Introduction Enrolling users into Smart AC1/ Smart AC1-TD/ Smart AC1-FTD/ FaceID 5/ FaceID 5-TD/ FaceiD 5- FTD before installing TimeTec AWDMS and Ingress software might lead to problems of downloading user transaction data from the terminal(s). This ...Steps to Change Username on Smart AC1 Series / Face ID 5 Series via Ingress Software
Introduction The Smart AC 1 series and the Face ID 5 series are connected to Ingress software via AWDMS. Since these new models are using middleware AWDMS, the process of changing username via Ingress software is different and needs to be done ...A Simple Tool to Upload User Photos into Devices That Runs on FEM Series Coreboards
The newest version of TCMS V2 and TCMS V3 are compiled with the latest Software Development Kit (SDK) to build an advance adaptation of TA100C and AC100, which are equipped with the new Core Board version known as FMM 100, replacing its older ...How to Download Missing Personnel Information (Fingerprint/Palm/Face) from Device (Smart AC/ Face ID5) into Awdms & Ingress Software
Introduction The Smart AC1 and Face ID 5 series are the new facial recognition devices with multiple verification mode options such as Fingerprint/Palm/Face/Card/Password. These new devices require connection to the AWDMS before it can be connected ...