Camera Calibration for Face Recognition
Introduction
Face recognition quality can be compromised due to many factors, for example, the position of the face ID device facing a direct light source, low quality face template enrolled, a defective camera module, etc.One of the solutions to overcome this problem is by calibrating the camera of the face ID device.
Face recognition quality can be compromised due to many factors, for example, the position of the face ID device facing a direct light source, low quality face template enrolled, a defective camera module, etc.One of the solutions to overcome this problem is by calibrating the camera of the face ID device.
This article explains the steps to calibrate the camera for better performance.
For better results, it is advisable that calibration is done on the location where the device is used or mounted.
Process
The first step is to make sure that the camera module is working.
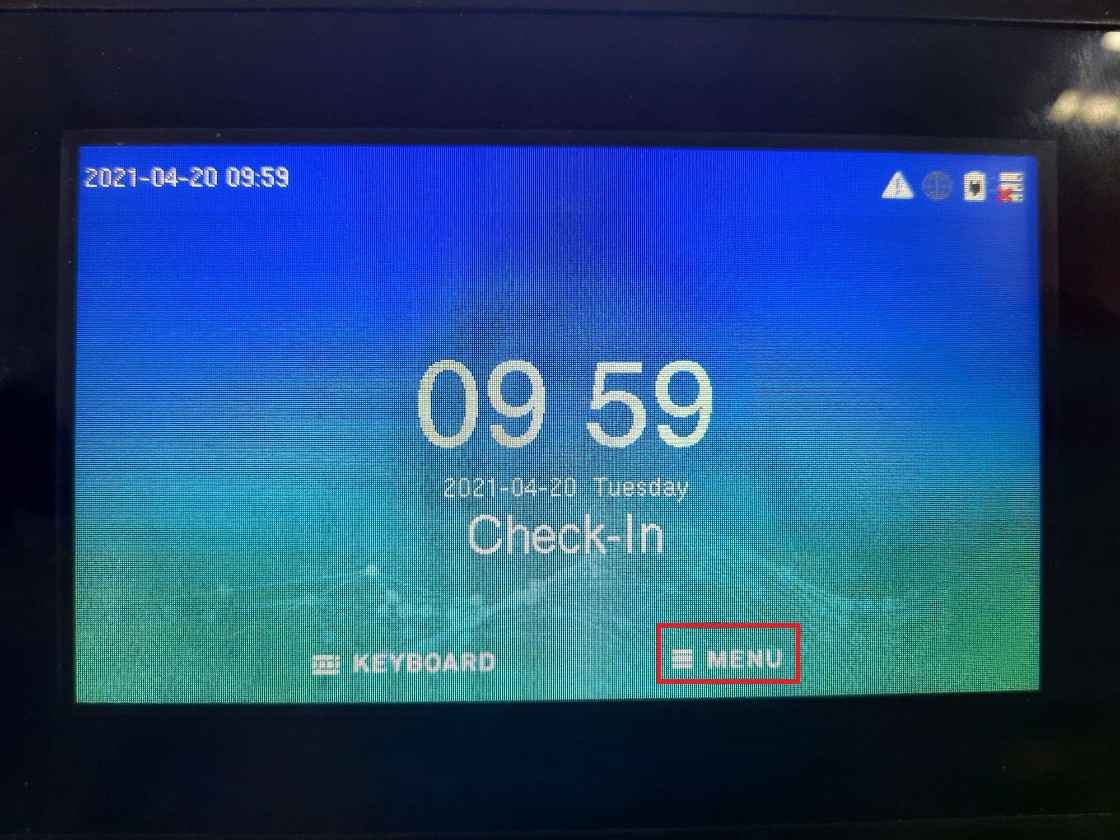
1. Choose MENU
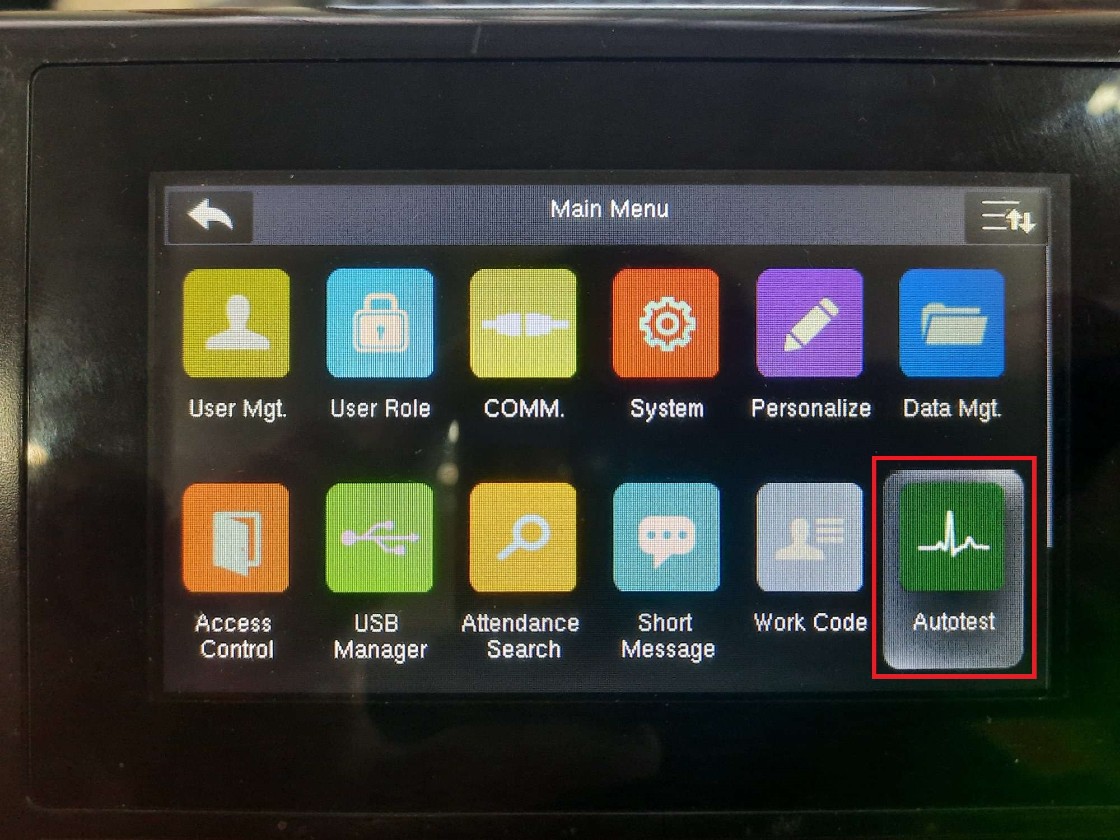
2. Choose Autotest
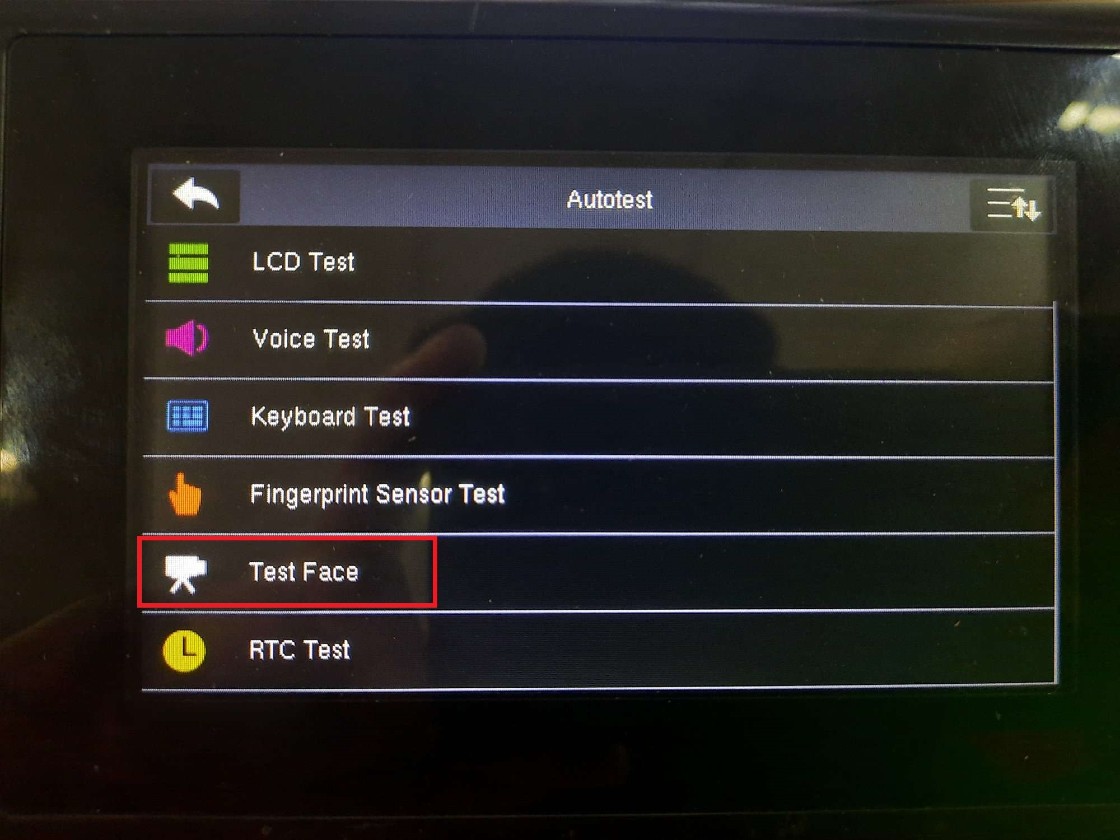
3. Choose Test Face
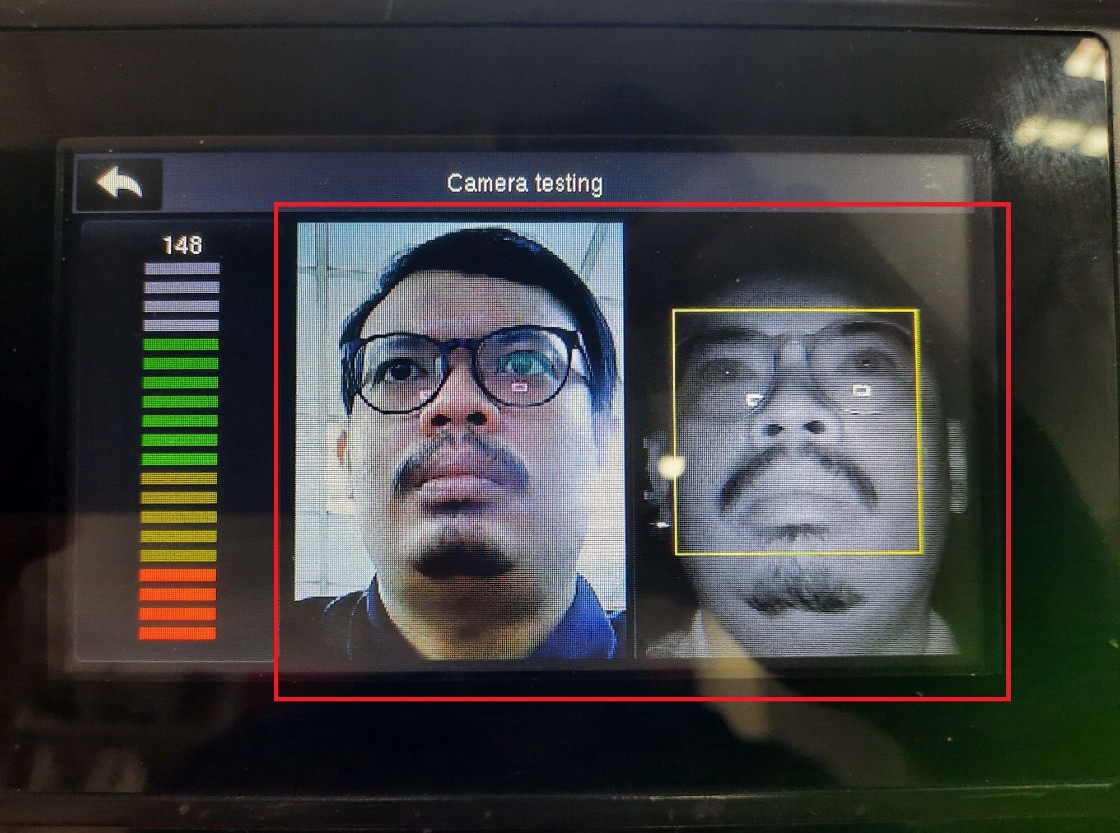
4. Make sure the camera module display a normal picture and an infrared picture
*If one or both don't display properly, there is a high possibility that the camera module is defective. Email FingerTec support at support@fingertec.com for assistance.
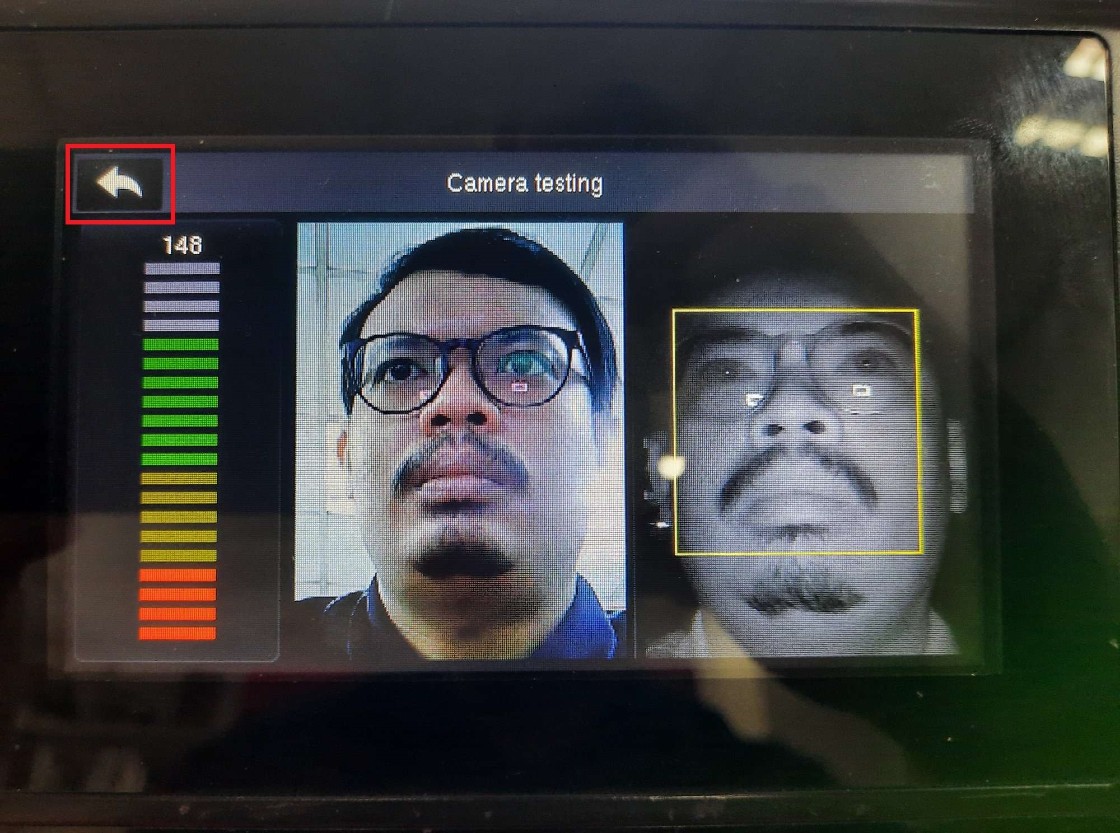
5. After testing the camera, choose Back to start the camera calibration mode.
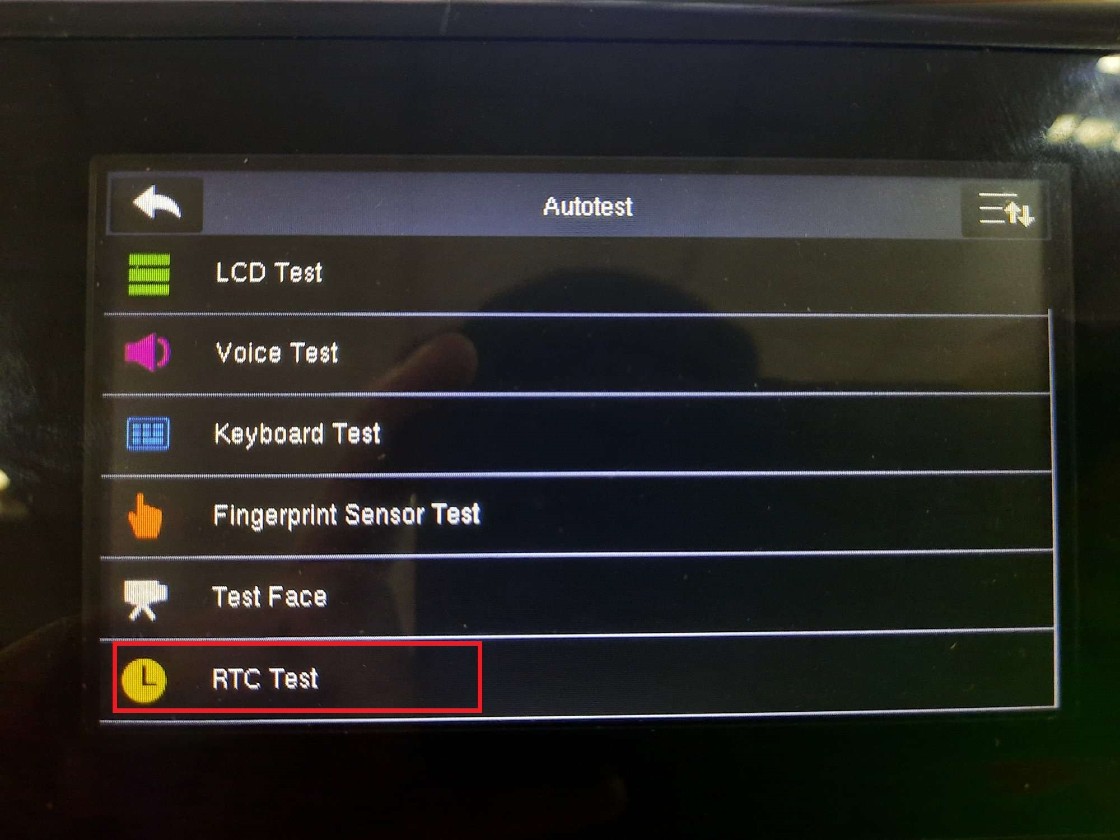
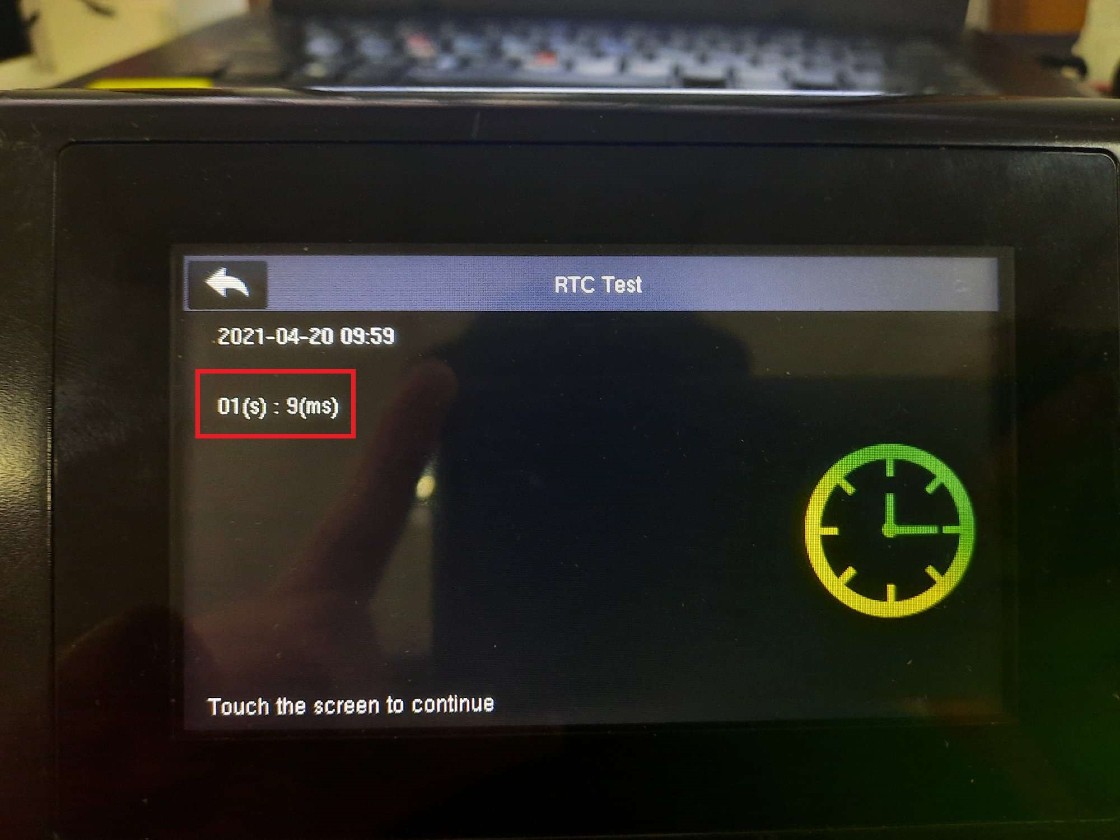
6. Choose RTC Test
7. The device will show 00(s) : 0(ms)
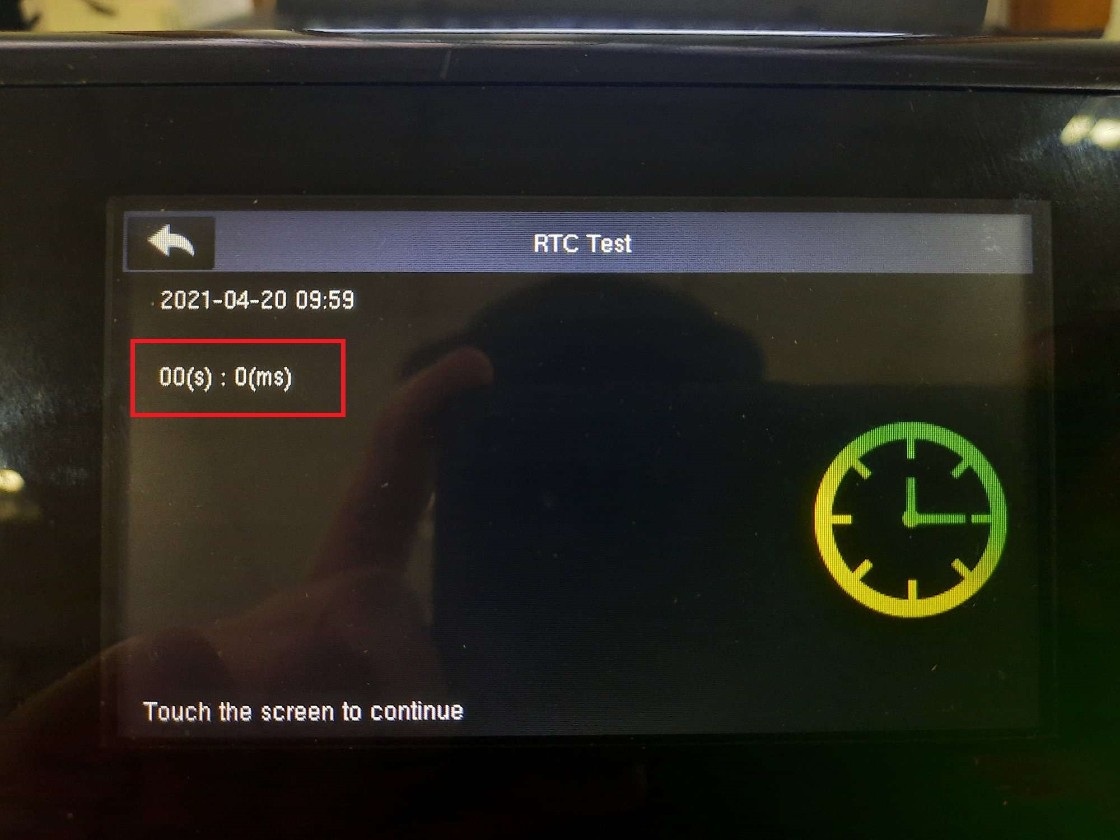
8. Click on the screen and the time will run.
Wait until the time runs to 01(s) : ++(ms) and click one more time to stop it.
Repeat 3 times.
9. After done, choose Back
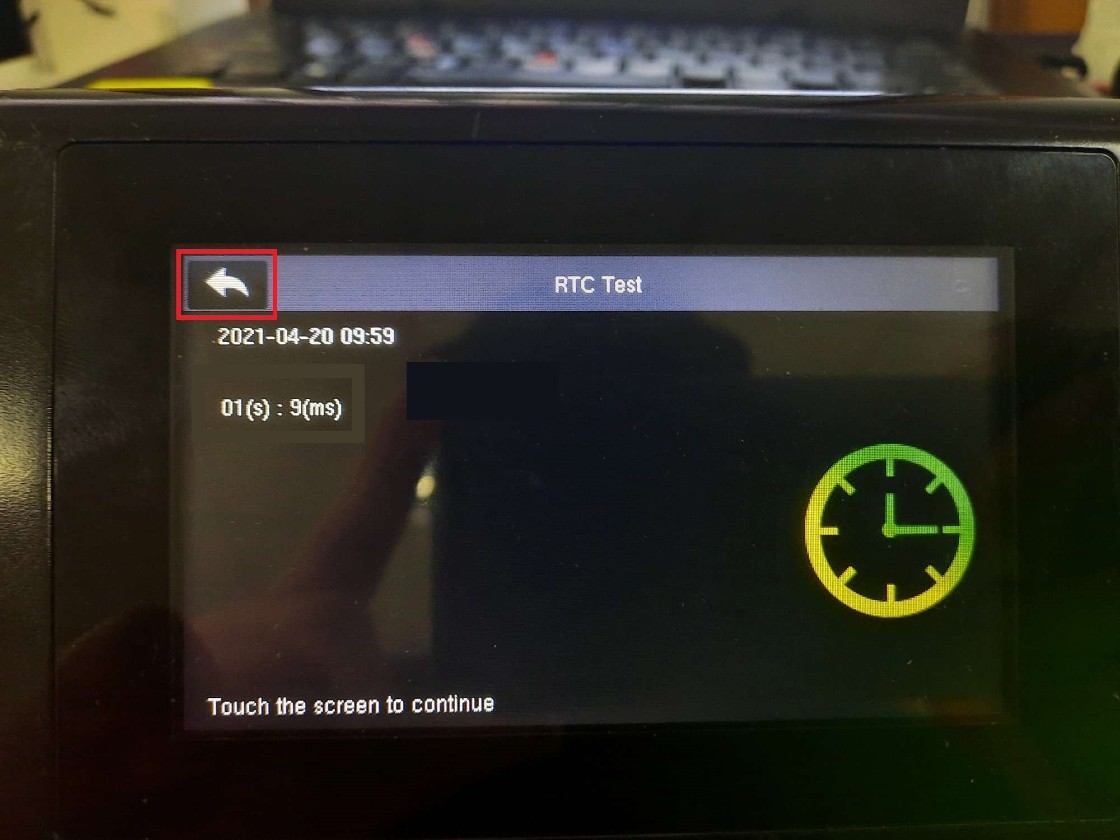
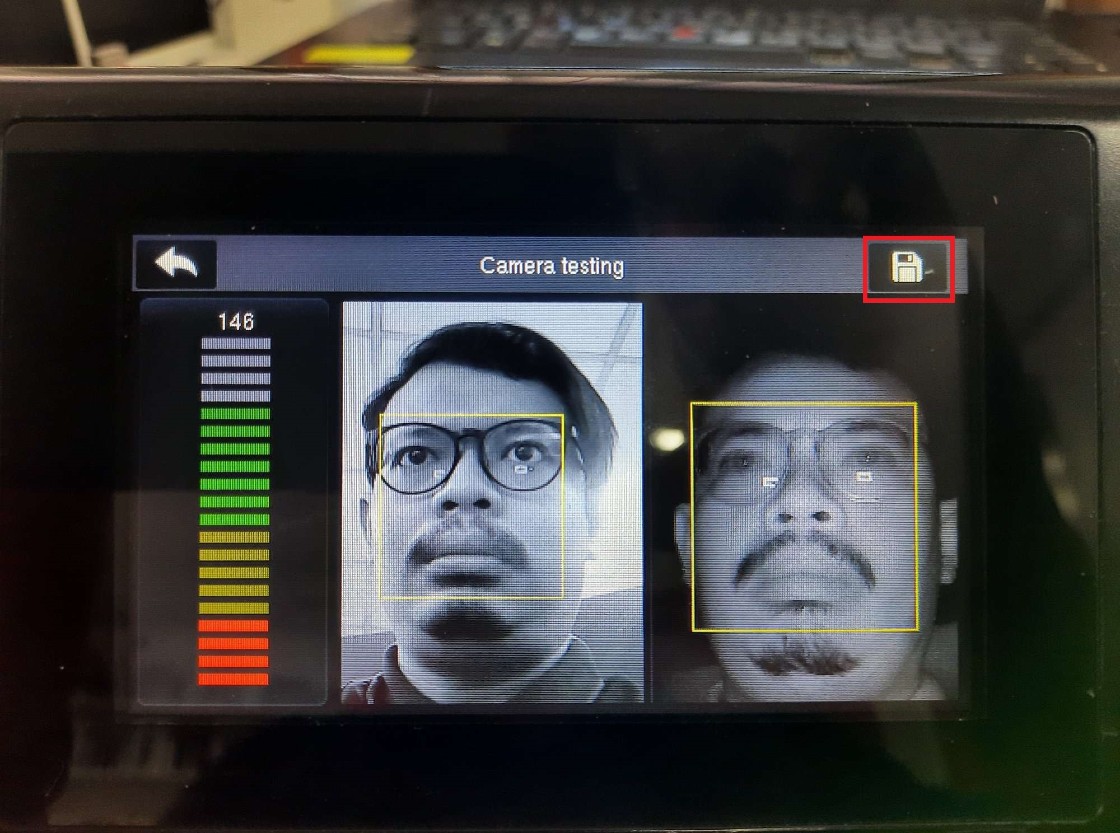
10. Choose Test Face
11. To confirm that the device is in the camera calibration mode, both displays are in black and white, and the screen has a Save icon on the top right corner

12. Place your face in front of the camera and place it according to the display box.
Do the step until the bar reaches 140 and above, and that the face displays have nearly the same size and display quality. Once this step is done, your camera is good to go.

13. After that choose the Save icon to save the calibration
Note: If some of the screenshots or steps viewed here are different from the ones in the current system, this is due to our continuous effort to improve our system from time to time. Please notify us at info@fingertec.com, we will update it as soon as possible.
Related Articles
New Face ID 4 (FMM) - Improving Face Recognition Process
Introduction The new version of Face ID 4 has been installed with a new version of coreboard (FMM). Some of the options or settings are different from the previous version. In this version, we have improved the registration process for face ...Face Recognition Terminal Installation Guide
Introduction Face recognition device is light-sensitive, hence the surrounding condition’s lighting must be controlled from the terminal. The intensity of the light like brightness is measured as the rate at which light energy is delivered to a unit ...Improved Face ID 2 FMM simplifies face registration process for users with glasses
Introduction Face recognition reader, such as Face ID 2, detects its users by matching the face templates stored in the device with the live human face. The face verification works on normal face templates except on these two occasions: User who ...Installation Guide for Face ID 6
Installation Guide for Face ID 6 Face ID 6 series is the all-new face and palm verification terminal equipped with the latest facial recognition technology, an all-rounded upgrade that results in greater performance and reliability. Not only is it ...FACE ID5 with FACE ID5 (Master & Master) Wiring Connection
Introduction Face ID5 has a versatility function that can cater attendant record and access control needs for an organization. It can be equipped with temperature record and control, face recognition, mask detection, touch-less access recognition ...