How to Check Transactions of Previous Owners in i-Account
Introduction
Eventually, there will be instances of sale or sub-sale of a unit in a property. When this happens, and the management is notified, the Admin has to change the unit owner information and add the new owner into iNeighbour. Refer to the steps for changing owner in this link: https://support.timeteccloud.com/portal/en/kb/articles/changing-unit-owner-in-i-account
The previous owner will be deactivated in i-Account and hidden from the dropdown menu selection on all the transaction entry pages. To activate or reactivate the previous owner for entry of new transactions (e.g. issue receipt) or to check records, please refer to the following steps:
A. Reactivate the Previous Owner Account
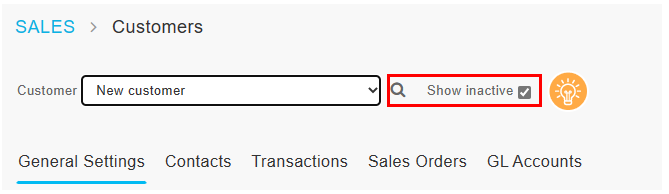
1. Go to Accounting > Sales > Maintenance > Customer to reactivate the status for the previous owner.

2. Firstly, the Admin needs to tick this checkbox to view the dropdown listing that includes all Inactive owners.
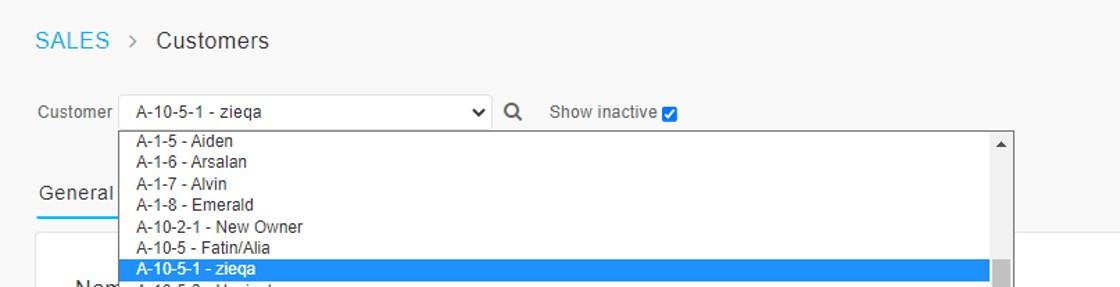
3. Select the previous owner name from the dropdown listing.
4. Change the Customer Status to Active.
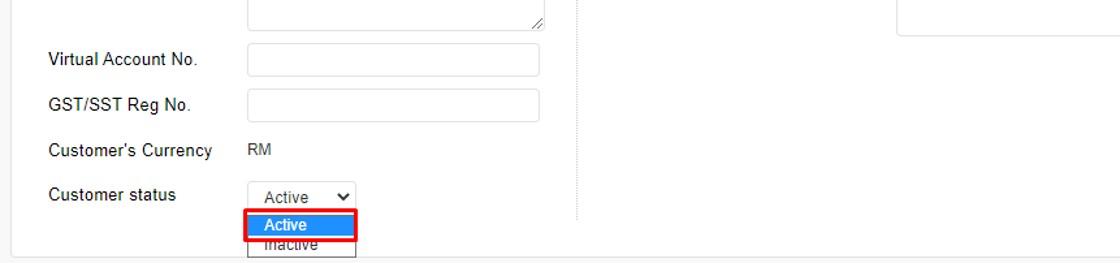
5. Click “Update Customer” to save the changes.

6. This pop up message will appear once the changes are successfully updated.

B. Check the Transactions for Previous Owner
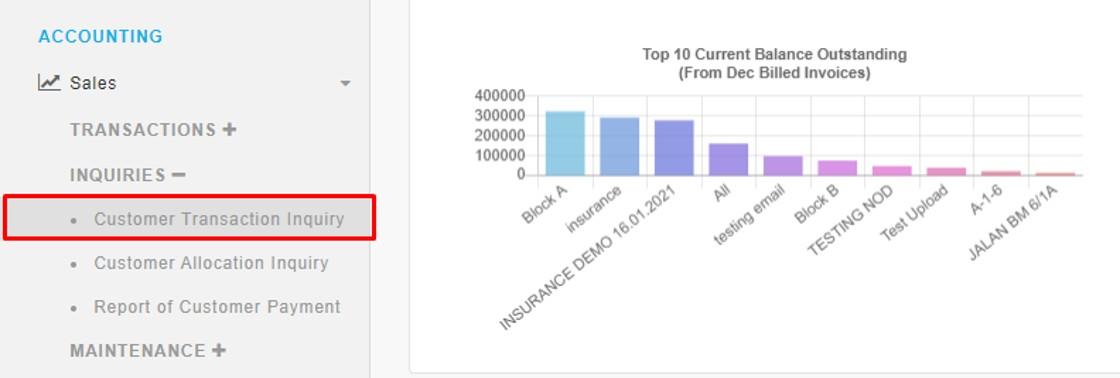
1. Go to Accounting > Sales > Inquiries > Customer Transaction Inquiry to check all transactions of the previous owner.
2. Select the previous owner name from the drop down listing.

3. Select “All Type” and set the appropriate date range for the transaction period. Click the “Search” icon to proceed.
4. The system will list down all transactions of the previous owner based on the date range settings. The Admin has the options to print or export the listing into Excel.

5. Once the Admin has reactivated the previous owner, he can issue transactions to the previous owner such as issue receipt or invoices.
C. Deactivate the Previous Owner Account
1. If Admin needs to deactivate the ex-owner account, Admin can refer to the steps and example at section “A. Reactivate the Previous Owner Account”.
2. Change the Customer Status back to Inactive and click on “Update Customer”.
Note: If some of the screenshots or steps viewed here are different from the ones in the current system, this is due to our continuous effort to improve our system from time to time. Please notify us at info@timeteccloud.com, we will update it as soon as possible.
Related Articles
i-Account User Guide Pages
Billing, Account Statement & Notice Generate Quarterly Billing (SCI Statement) Automatically with Auto Recurring SCI Feature Link How to Charge Late Payment Interest (LPI) Link How to Issue Direct Invoice Link How to Upload Water (or Electricity) ...Changing Unit Owner in i-Account
Introduction Periodically, there will be instances of sale or sub sale of a unit in a property. When this happens and management is notified, the Admin has to change the unit owner information and add the new owner into the system. This step is to ...How to Close and Reopen GL Transactions in i-Account
Introduction A general ledger (GL) represents the record-keeping system for an organization's financial data, with debit and credit account records validated by a trial balance. In i-Account, for example, Admins can close and lock a GL after ...How to Check Bounce Invoices in i-Account
Introduction In i-Account, you can perform billing and upload invoices to i-Neighbour for the owners to view their invoices through the i-Neighbour app. However, even after clicking on upload, there can be instances where specific invoices are not ...i-Account - How Owners Can View Receipts in the App
Introduction Currently, some i-Neighbour communities are subscribed to the i-Account accounting system. With this setup, residents in these communities can directly view or download their payment receipts when they login to the i-Neighbour app > ...