Set your Clocking Boundary with TimeTec TA GPS Geofence Feature
Introducing our latest option for GPS clocking in TimeTec TA: Geofence. What is Geofence? Geofence is a virtual geographical perimeter or barrier made for a specific location, i.e your office. By setting a geofence in TimeTec TA, employees can clock their attendance using GPS clocking only if they are within the permitted area. This restriction will ensure employees are present within the assigned location during the clocking process.
Setup Process
Let's say you are setting up a Geofence for your company’s employees, for Site A.
1. Set your Geofence location
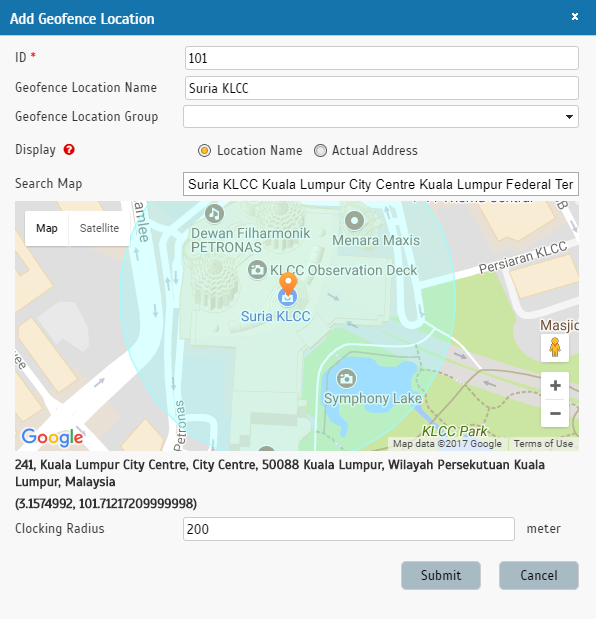
Go to Device > GPS Geofence and click Add. Create an ID and insert the Geofence Name. Select the Geofence Group to group this location. However, if you don’t have any Geofence Group created yet, you can skip this and do the grouping later at Geofence Group tab. Choose whether to display the location name as per the Location Name set or as per actual address.
Put the address in Search Map and drag the GPS pointer to the desired location. Set the Clocking Radius in meter. The boundary of the location (permitted clocking area) will be highlighted in the map for your reference.
Repeat these steps to add other locations.
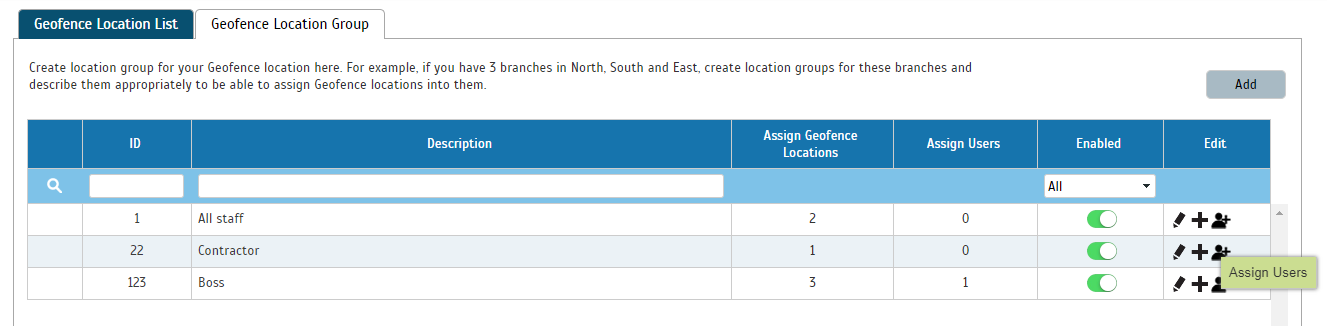
2. Group Geofence Location & assign Users in Geofence Group
Geofence Group is made to allow users to manage Geofence locations and assign users into group easier. Click “Add” to create a new Geofence Group. Create an ID, name the group and click Save.
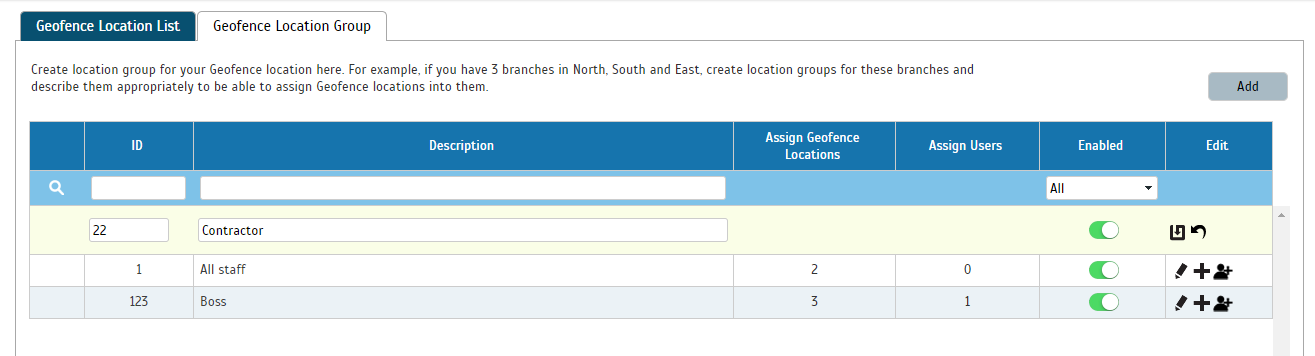
Once you have created the Geofence Group, click the Add icon under the Edit column to add Geofence Location into the group.
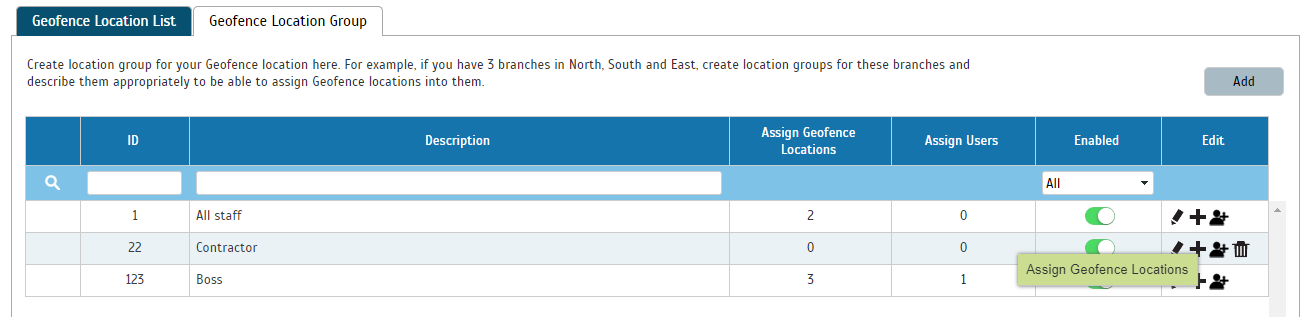
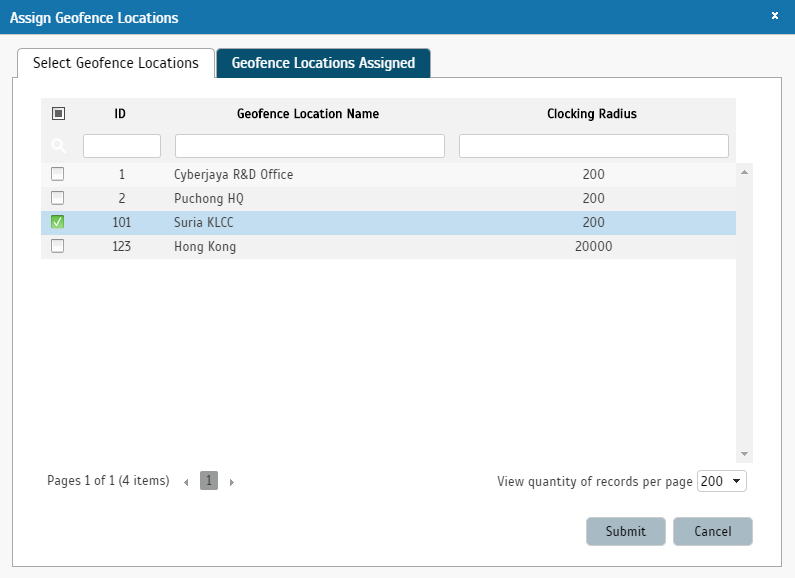
Select the Geofence location(s) that you want to add under this group.
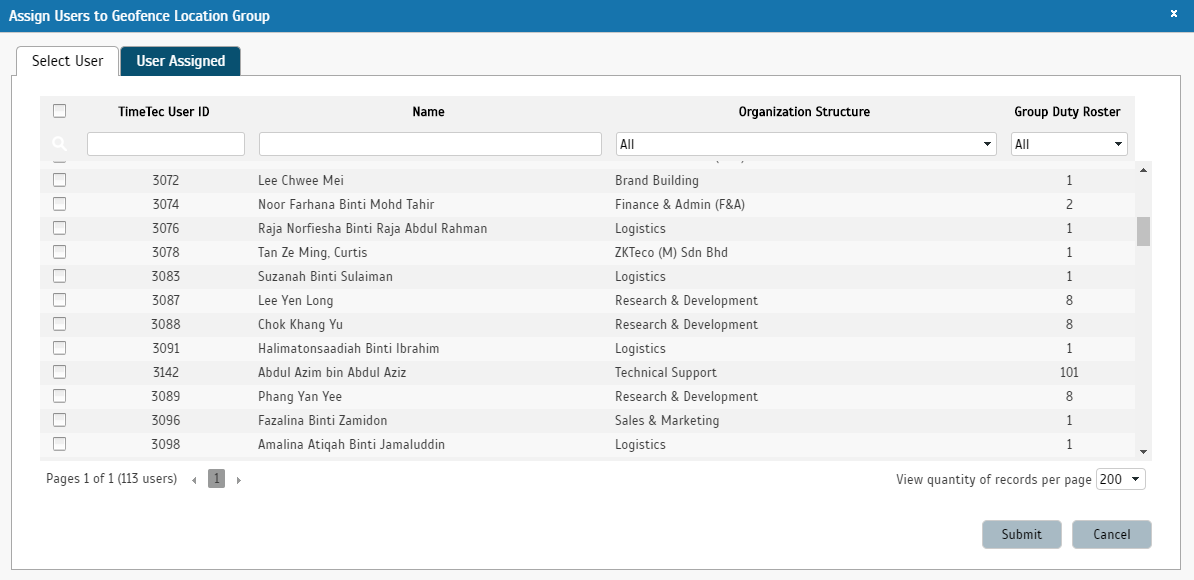
Click the User icon under Edit column to assign users to this group.
Select the user(s) you want to assign under this group. Click Submit to confirm.
Once the setup is done, the assigned users can only clock their attendance via GPS clocking within the permitted area.
Related Articles
TimeTec TA: How To Manage Geofence Feature For Out of Area Clocking
Introduction: Geofence is a virtual geographical perimeter or barrier made for a specific location, i.e your office. By setting a Geofence in TimeTec TA, employees can clock their attendance using GPS clocking only if they are within the permitted ...How To Add New User to TimeTec TA (Geofence User)
Introduction Time attendance, scheduling management & work from home are effective solutions for the modern workforce. The TimeTec TA automates your time data collection process and seamlessly integrates it with biometrics identification devices. ...How to Set Location in GPS Clocking Method as Compulsory in TimeTec TA
Introduction Global Positioning System (GPS) clocking uses a device such as a smartphone or a tablet to pinpoint a location. For example, with the GPS clocking method, a company can identify who got to work on time and who haven't turned up. This ...TimeTec TA Mobile App - Personal Clocking
Introduction To cater to employees who are always on the go and those with flexible working arrangements, TimeTec TA offers 4 different ways for users to clock their attendance from a smartphone. The options available for personal clocking in ...How To Enable/Disable GPS & Web Clocking In TimeTec TA
Introduction: TimeTec TA is a versatile smart solution that provides employees with various clocking methods to assist in enhancing the productivity within the workplace. Hence, in this article, we will be discussing on how to enable/disable GPS & ...