Linking GPS clocking with Timetec Claim during applying Mileage Claim
Introduction
Every organization has its own set of claim types that employees are entitled to. For someone who always travels, mileage claim has been synonymous with their monthly routine. This guideline will show you how to create claim types that can link with your GPS clocking.
Process
1. Create a claim type with Category Mileage. Go to Claim Settings > Claim Type > search for Mileage Claim Type. Set the claim rate accordingly based on your requirements. (Make sure the category is ‘Mileage’)

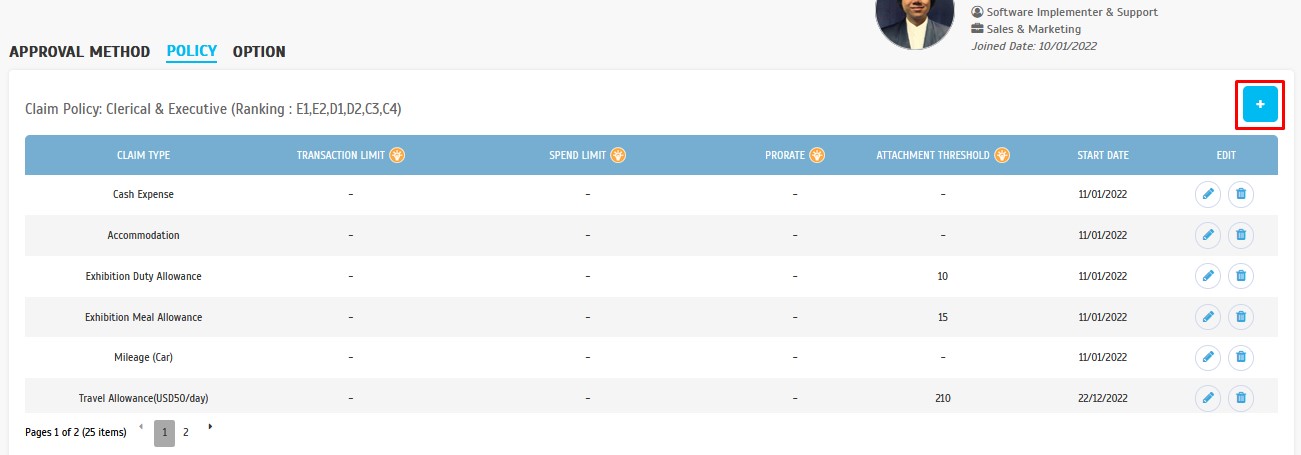
2. After successfully creating the mileage claim type, we need to assign it to the users. It can be done in two methods, the first one is by ‘Policy Assign’:
i) Set the mileage claim type into a Claim Policy, and then you can assign it to the users you choose by clicking the ‘Add User’ button.


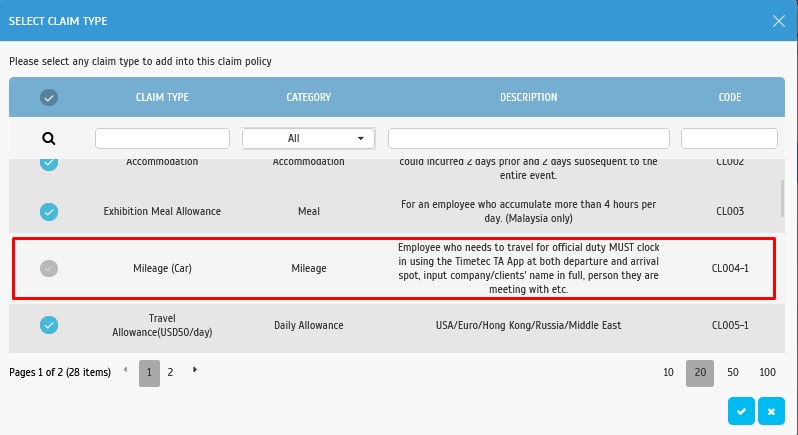
ii) Set the mileage claim type to a single person, go to User > Manage User > Settings (gear icon) of that specific user. Go to the ‘Policy’ Tab and click on the ‘+’ button to add a new claim type.
Tick on Claim type Mileage and Click Submit.
That’s it, we have done the setup process to add the ‘Mileage’ claim type to Users.
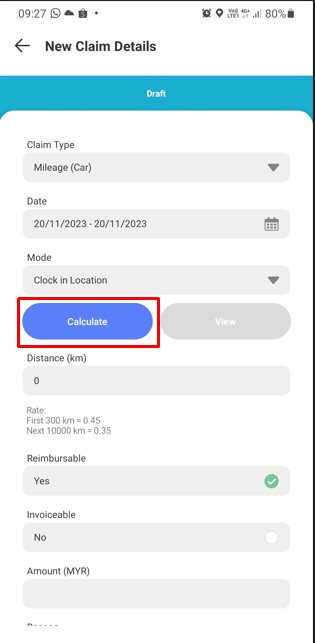
3. Now let’s run a simulation test for the mileage claim request. Select the date of travel.
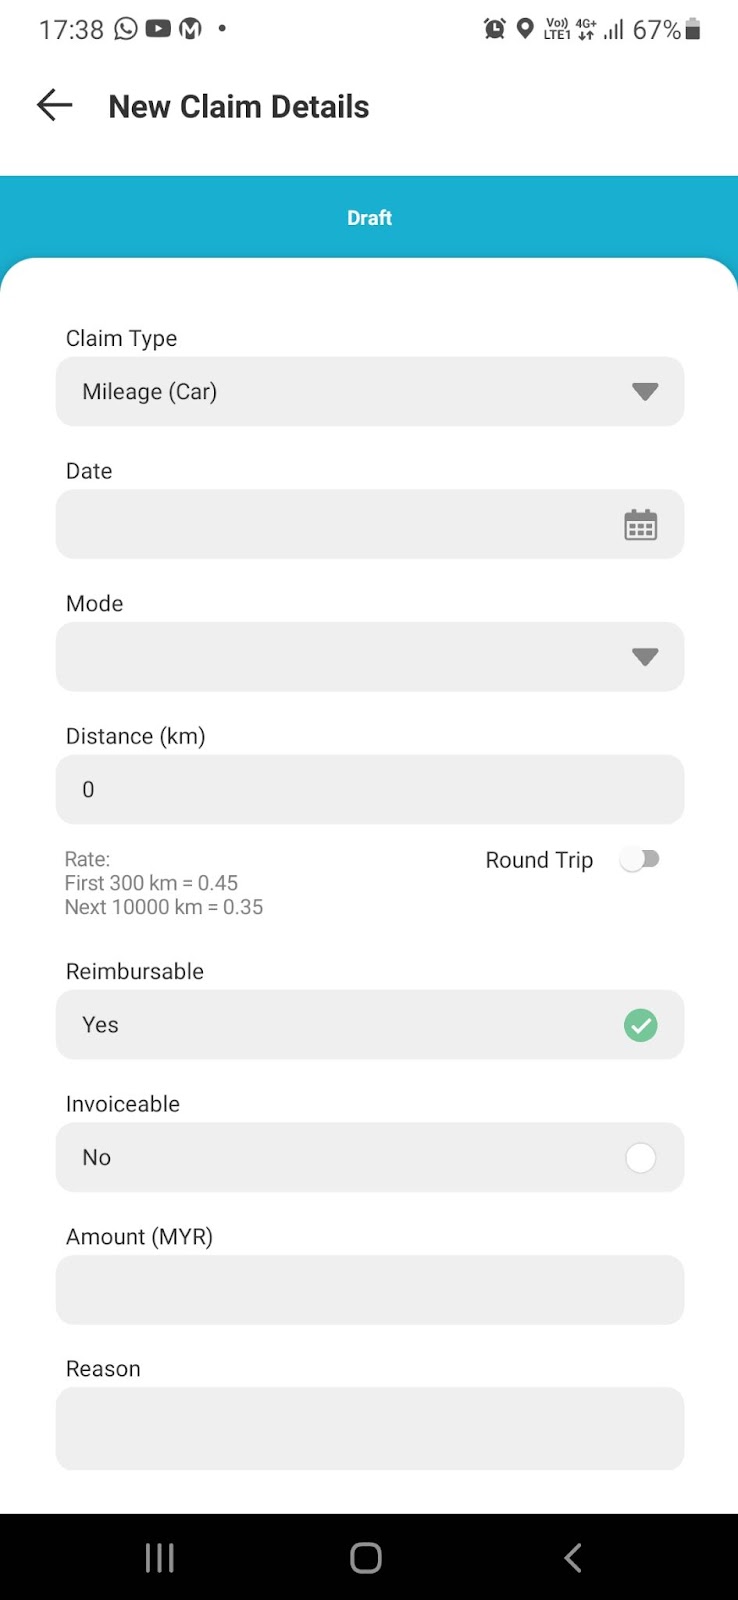
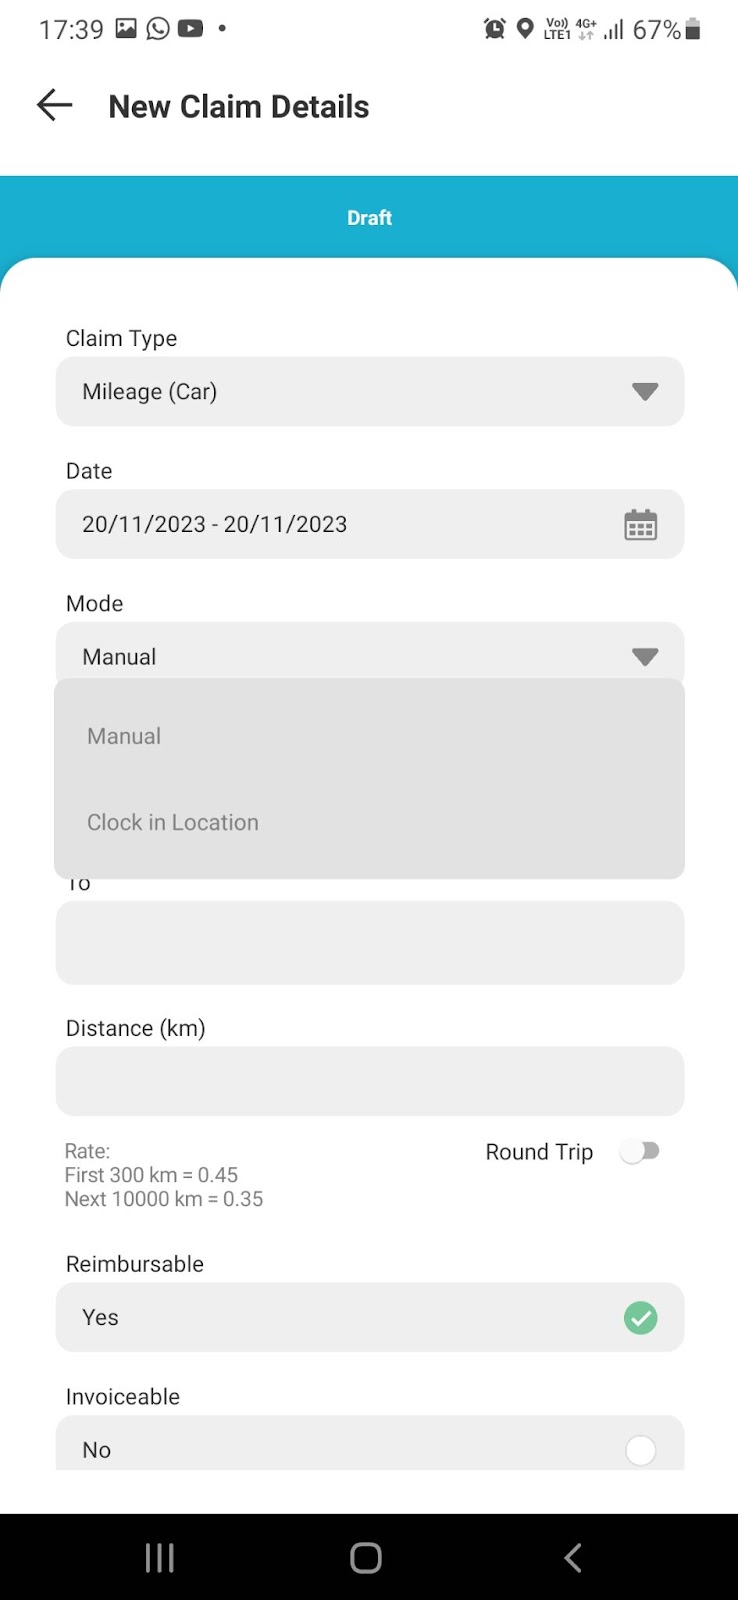
4. At the ‘Mode’ selection, choose ‘Clock In Location’.
5. Then click on the ‘Calculate’ button to view the GPS clocking list.
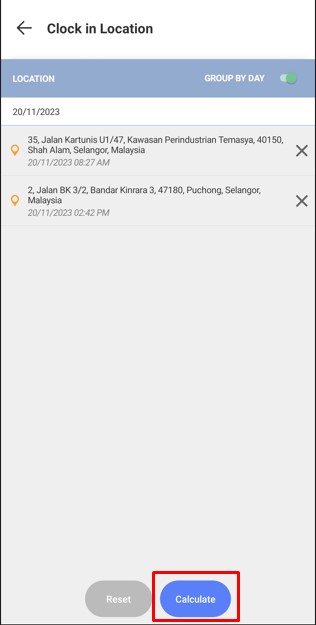
6. The GPS clocking listed will be based on the date that you selected. To calculate the distance between one point to another, you need two GPS clockings. You may click on the X button to remove the irrelevant locations. Once done, click on the ‘Calculate’ button to proceed.
7. The total distance of the two locations selected will be shown. Click ‘Confirm’ to proceed.

8. The app will automatically show the total distance with the claimable amount. Double-check the details before proceeding.
9. That’s it! You may proceed to submit the claim request.
Related Articles
How To Add New User to TimeTec TA (Geofence User)
Introduction Time attendance, scheduling management & work from home are effective solutions for the modern workforce. The TimeTec TA automates your time data collection process and seamlessly integrates it with biometrics identification devices. ...How To Enable/Disable GPS & Web Clocking In TimeTec TA
Introduction: TimeTec TA is a versatile smart solution that provides employees with various clocking methods to assist in enhancing the productivity within the workplace. Hence, in this article, we will be discussing on how to enable/disable GPS & ...Set your Clocking Boundary with TimeTec TA GPS Geofence Feature
Introducing our latest option for GPS clocking in TimeTec TA: Geofence. What is Geofence? Geofence is a virtual geographical perimeter or barrier made for a specific location, i.e your office. By setting a geofence in TimeTec TA, employees can clock ...Timetec HR App - Personal Clocking
Introduction To cater to employees who are always on the go and those with flexible working arrangements, TimeTec Attendance offers 4 different ways for users to clock their attendance from a smartphone. The options available for personal clocking in ...Unable to Clock In Using GPS Mobile Clocking? Troubleshooting Guide For GPS Clocking
Introduction: Timetec TA offers various mobile clocking features such as GPS, WIFI, NFC, and Beacon clocking. However, sometimes users may encounter errors while trying to use the GPS mobile clocking feature. This article will provide step-by-step ...