i-Account & i-Neighbour Integration Guide
Introduction
i-Neighbour and i-Account are two separate applications, but the integration between these two systems enables certain debtor information such as billing and payment to be synchronised.
Below is the summary table for the documents that have integration between i-Neighbour and i-Account.
Summary Table
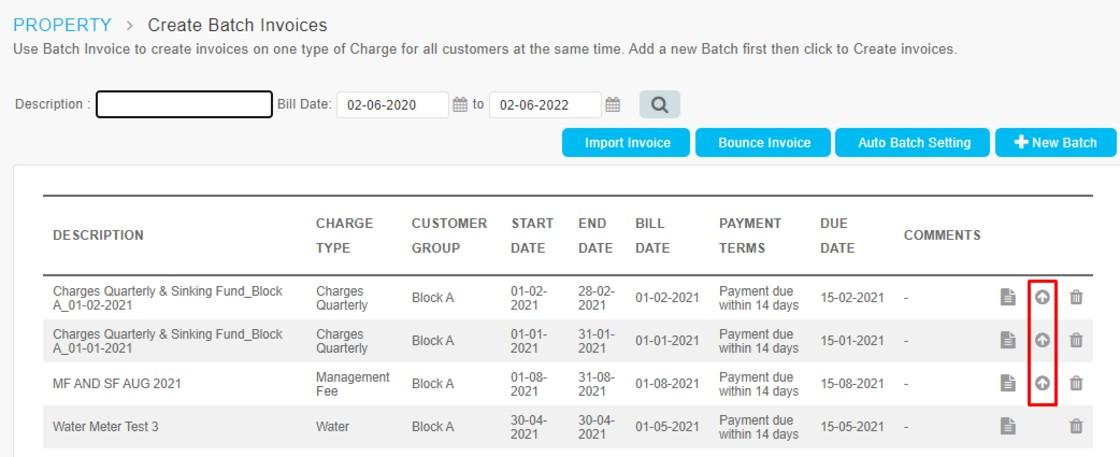
a. Batch Invoice / Late Payment Interest Invoice
1. Batch Invoice - Click Upload (↑) icon. Once invoices are uploaded to i-Neighbour, the (↑) icon will be hidden in the listing.
Additional note: The same upload function is also applicable in the Late Payment Interest page.
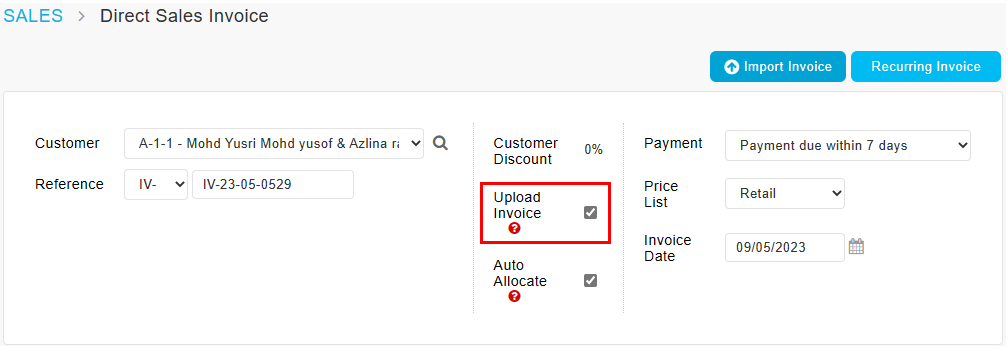
1. Direct Sales Invoice - At the invoice entry page, “Upload Invoice” checkbox is unticked by default. Tick the checkbox to upload the invoice to i-Neighbour once you click "Place Invoice".
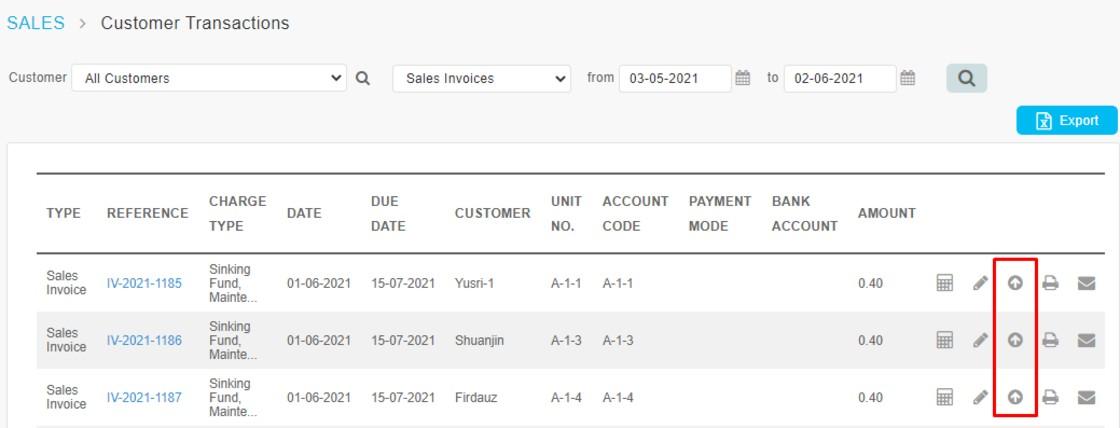
2. If you do not choose to upload immediately during invoice entry, you can still upload the previous invoices that have already been issued. Go to Accounting > Sales > Inquiries > Customer Transaction Inquiry and click on the Upload (↑) icon (The upload icon is only displayed for invoices that have not been uploaded to i-Neighbour yet; it will be hidden if successfully uploaded).
c. Admin & User Login View
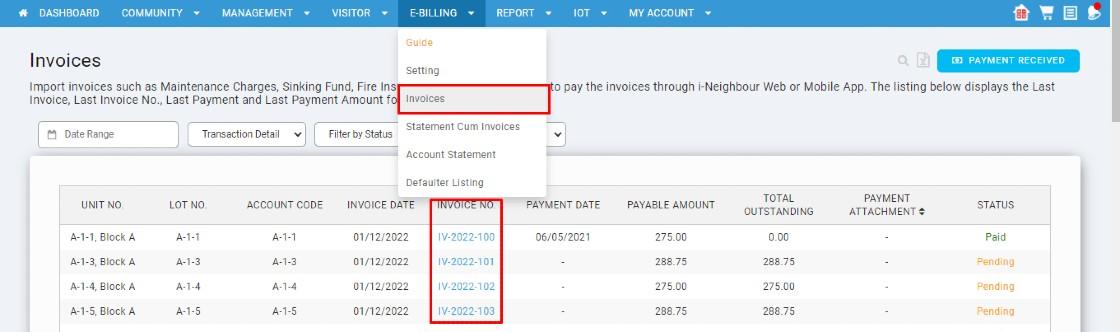
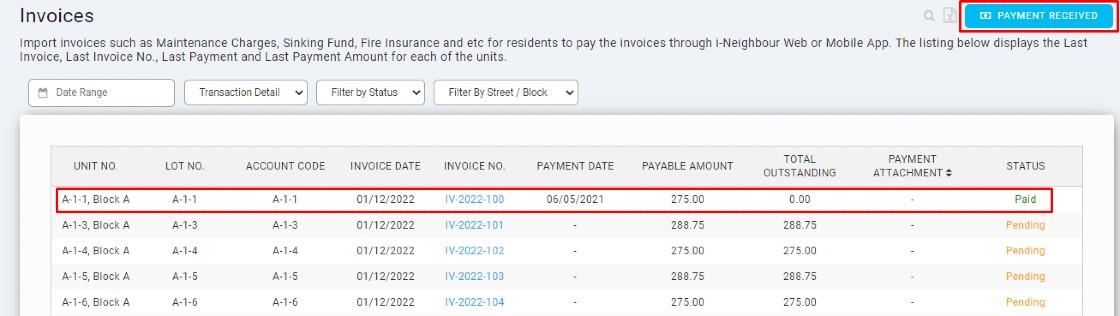
1. Admin web login - View at E-Billing > Invoices.
How to Upload Official Receipt
a. Upload During Customer Payment Entry
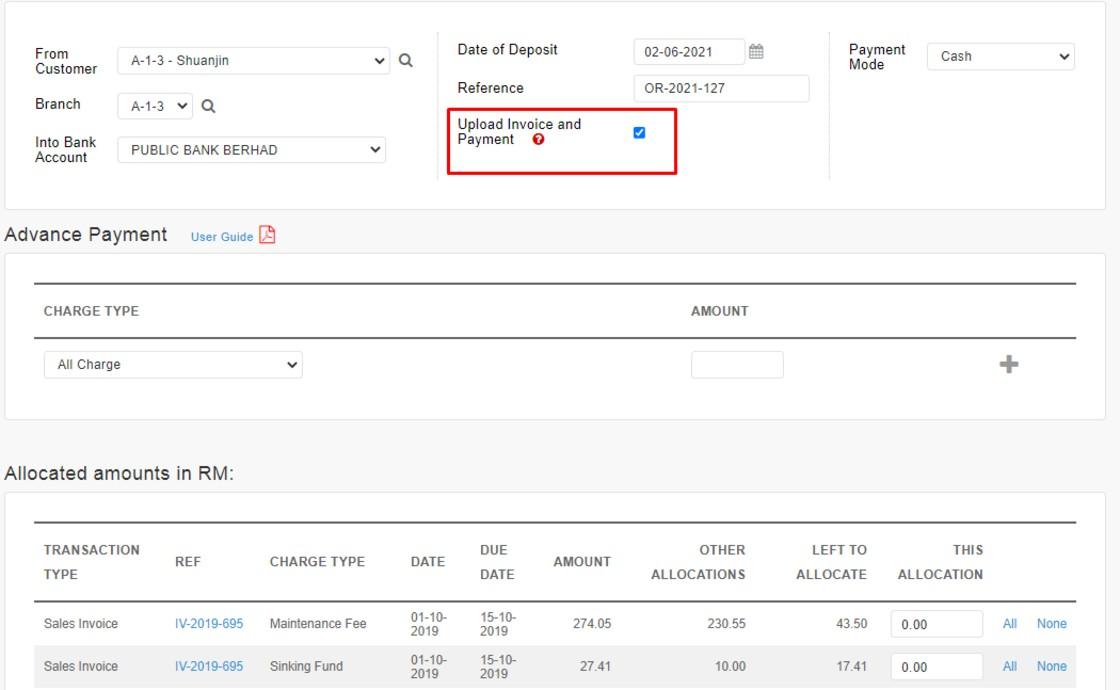
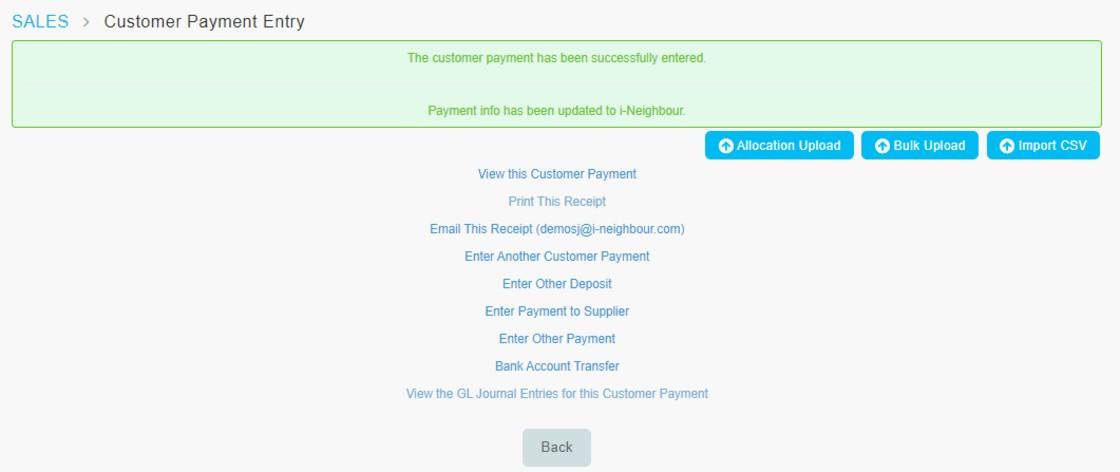
1. Customer Payments - When entering receipts, the checkbox for “Upload Invoice and Payment” is ticked by default (compulsory upload). Once user clicks the “Add Payment” button, the receipt will be uploaded to i-Neighbour.
2. Payment details are synced to i-Neighbour.
b. Admin & User Login View
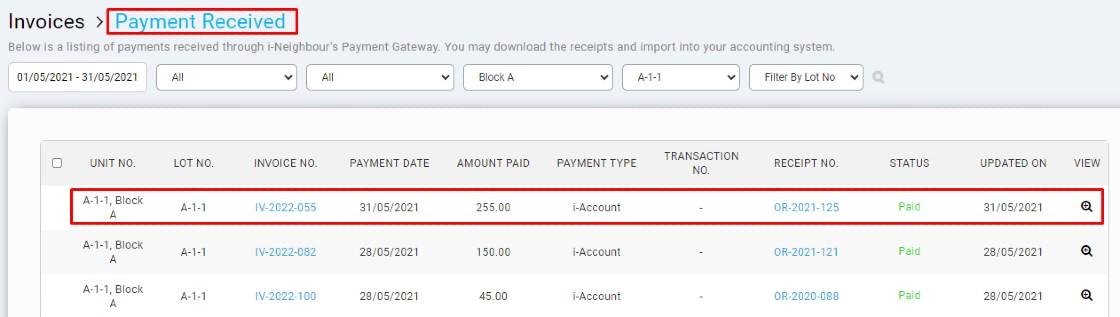
1. Admin web login- View at E-Billing > Invoices > Payment Received.

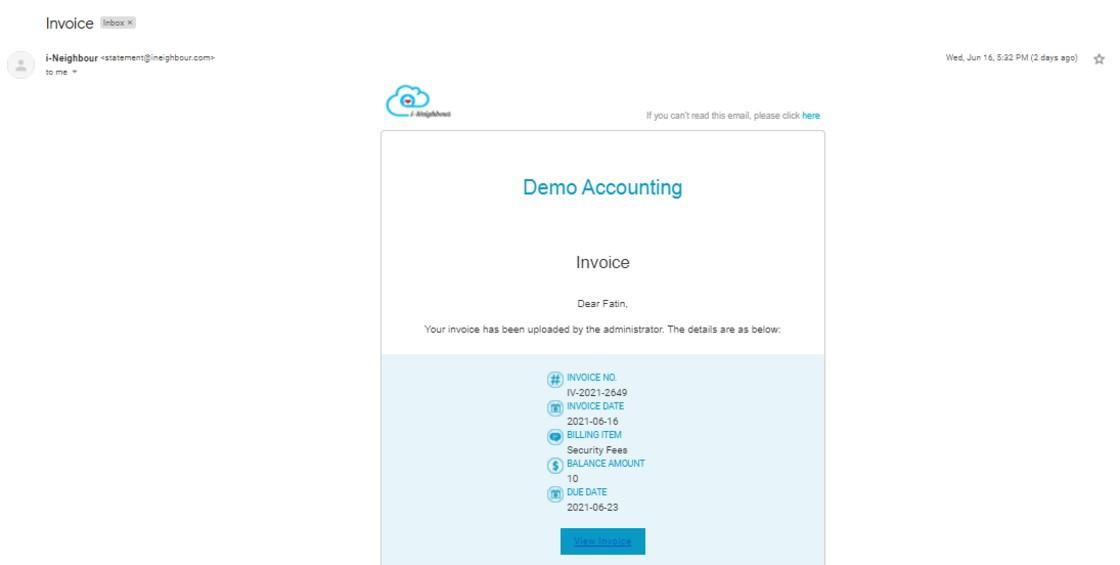
3. User app login- View at E-Billing. Status for the invoice will change to Paid once the payment is updated. Click on the receipt number to view/download the receipt (pdf).
4. Admin can check the invoice status and payment details inside i-Neighbour > E-Billing module.
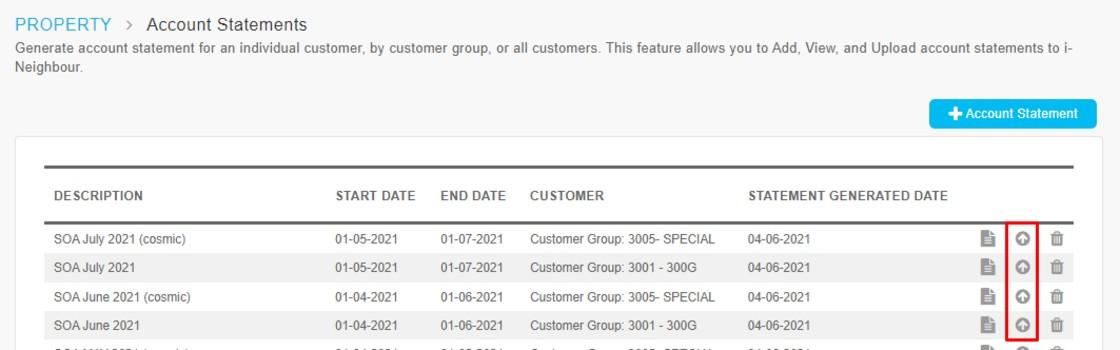
1. Login to i-Account and go to Property > Invoice > Account Statements. Click on the Upload (↑) icon to upload the generated Statement of Account into i-Neighbour.
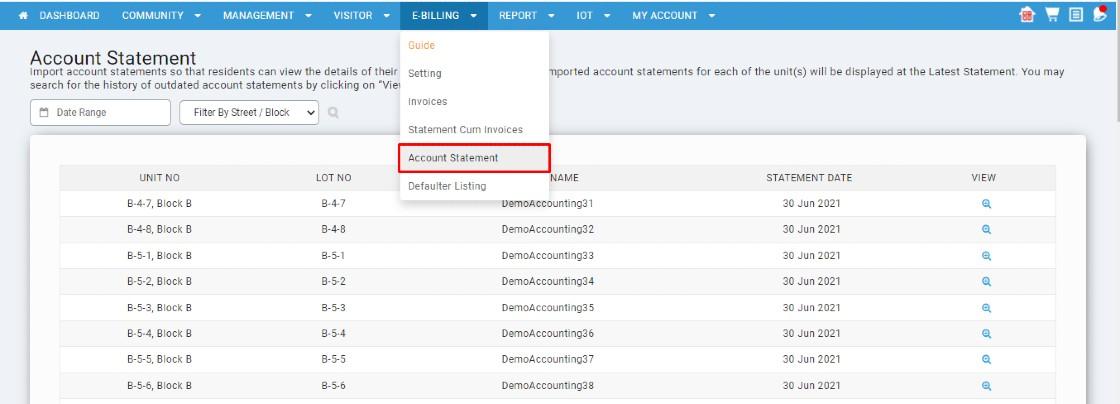
2. Admin web login- View at E-Billing > Account Statement.
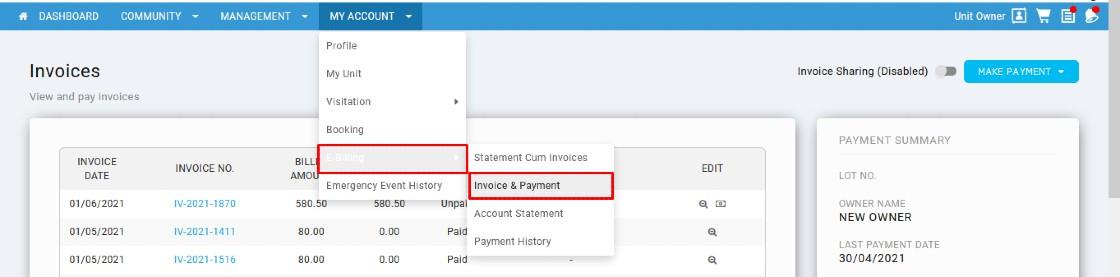
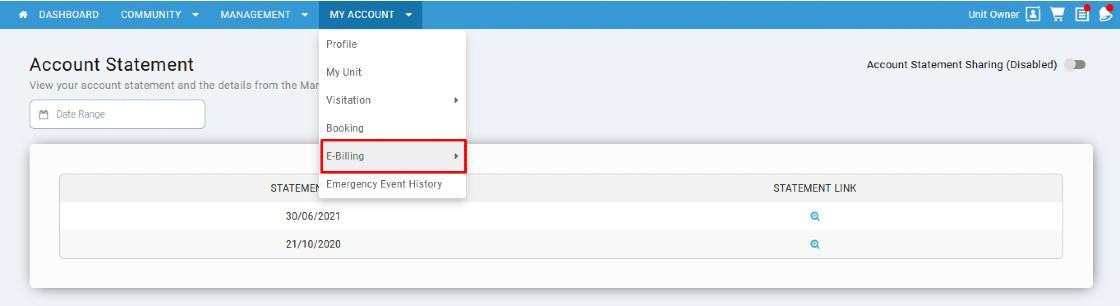
3. User web login- View at My Account > E-Billing > Account Statement.
4. User app login- View at More > Billing Info > Account Statements.

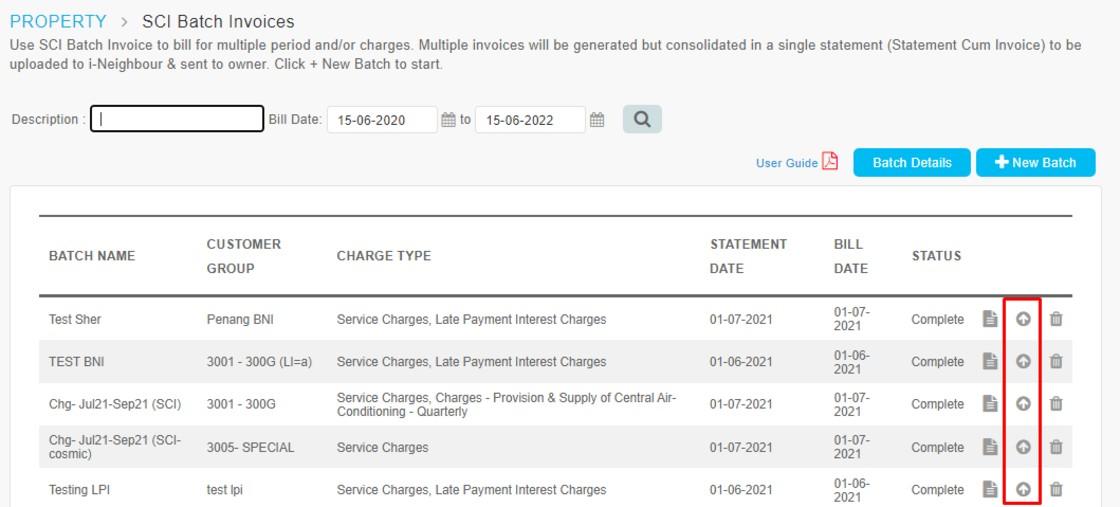
1. Login to i-Account and go to Property > Invoice > SCI Batch Invoice. Click on the upload icon (↑) to upload SCI into i-Neighbour. The upload icon will be hidden once you have uploaded the batch.
2. Admin web login- View at E-Billing > Statement Cum Invoices.

Related Articles
i-Account User Guide Pages
Billing, Account Statement & Notice Generate Quarterly Billing (SCI Statement) Automatically with Auto Recurring SCI Feature Link How to Charge Late Payment Interest (LPI) Link How to Issue Direct Invoice Link How to Upload Water (or Electricity) ...How to Add a New Bank Account
Introduction The steps below explain how to add a new bank account in the system. This process is also applicable during an account handover between a Developer, JMB, or MC, when a new bank account needs to be created and linked for proper financial ...i-Account - How to Add or Remove Admin
Introduction i-Neighbour and i-Account are two separate systems that have been integrated to enable the synchronization of billing and payment data. As a result of the integration, access management for i-Account is also controlled through ...Invoice Not Appearing in i-Neighbour App – Troubleshooting Guide
Que: Why is the Owner Unable to View Invoice in E-Billing? ✅ 1. Check Billing Sharing Settings ? Verify Login Role ● Ask the user whether they logged in using the Owner's account or a Family Member/Tenant account. ● If logged in as a Family ...i-Account User Guide – Customer Payment
Introduction In the Customer Payment entry page, you can record payments received from owners/debtors. Key in the Amount first before allocating the payment to invoices or setting it as an Advance Payment. After entering the payment, you can review ...