How to use the Panic Button
This article teaches users how to use Panic Button in the i-Neighbour mobile app.
1. Hold the panic button icon for at least 3 seconds. Any holding that lasts shorter than 3 seconds will not trigger the panic button because this is a children preventive measure preconfigured in the system.
2. Once the owner has triggered the panic button, a pop-up panic page will appear as shown below.
2.1 Time frame to trigger the guard house
2.2 Enable flash
2.3 Switch to front camera
2.4 Allow siren on phone
2.5 Purpose of emergency
a) General
b) Robbery
c) Ambulance
d) Fire
2.6 Cancel panic alarm
Note: Cancel before the time frame runs out.
3. After the time has run out, i-Neighbour system will automatically snap 4 pictures from your back camera (by default).
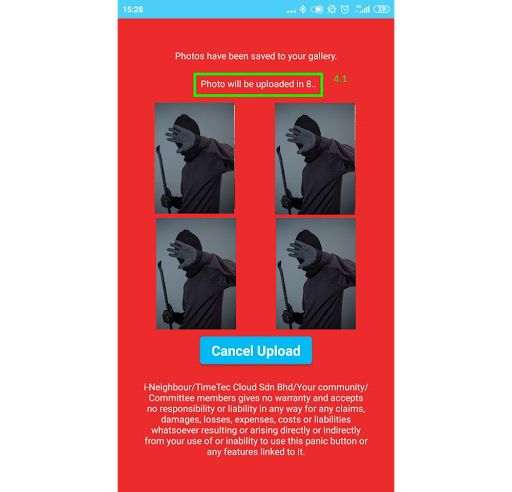
4. The owner can cancel the photo from being uploaded by clicking on “Cancel Upload” (Optional)
Note: The panic alert will still be synced to the guard house despite cancelling the uploaded photos.
4.1 The countdown in seconds before successfully uploading the photos.
5. The photos are being uploaded.
6. To turn off the panic button, click on the siren icon.
If you are still having problems after completing all of the steps stated above, please contact us via support@i-neighbour.com
Note: If some of the screenshots or steps viewed here are different from the ones in the current system, this is due to our continuous effort to improve our system from time to time. Please notify us at info@i-neighbour.com, we will update it as soon as possible.
Related Articles
The Function of Panic Button in i-Vizit
This article explains the function of the Panic Button in i-Vizit. PROCESS 1. A pop-up message will appear when the owner triggers the panic button. This popup message will include the owner’s information such as name, Jalan or block, unit number, ...Activate Offline Mode
This article teaches users how to turn on offline mode in an event that there are internet connection issues. Steps 1. When a resident launches an i-Neighbour mobile app, the system will check for an Internet connection status and it will alert the ...How To Enable GPS and Notification Features (For iOS and Android)
This article aims to teach users how to enable GPS and notification features for both iOS and Android. If you are intend to use the panic button in the future, these are the steps to enable the notification and GPS feature for i-Neighbour on your ...How To Use Visitor Pass During Check-In/Out (Guard House Tablet)
This guide will teach you how to use the visitor pass with i-Vizit mobile application (Guard House Tablet). 1) Check-In Visitor During visitor registration, the person in charge needs to select the visitor pass number, before proceeding to check-in ...How to use Emergency Roll Call
Management offices and admins can take advantage of the emergency roll call feature to start emergency evacuations in an event of an emergency such as a house fire or gas leak, this function can also be used to create fire drills to test residents ...