How to set Default Recipient in Timetec Attendance
Time Attendance, scheduling management & working from home are common practices nowadays for the modern workforce. The GPS Clocking automates your time data collection process and seamlessly integrates it with the TimeTec Attendance system. Most of the time, GPS Clocking can be helpful for those who are working outside of the office and at the same time need to do clocking for their Attendance.
Although it is easy and efficient, some people find it hard to keep track of their staff’s GPS Clocking as some of them don't have restrictions on where they can perform clocking in. This article will guide you on how to set the default recipient for any GPS Clocking made by users.
Process
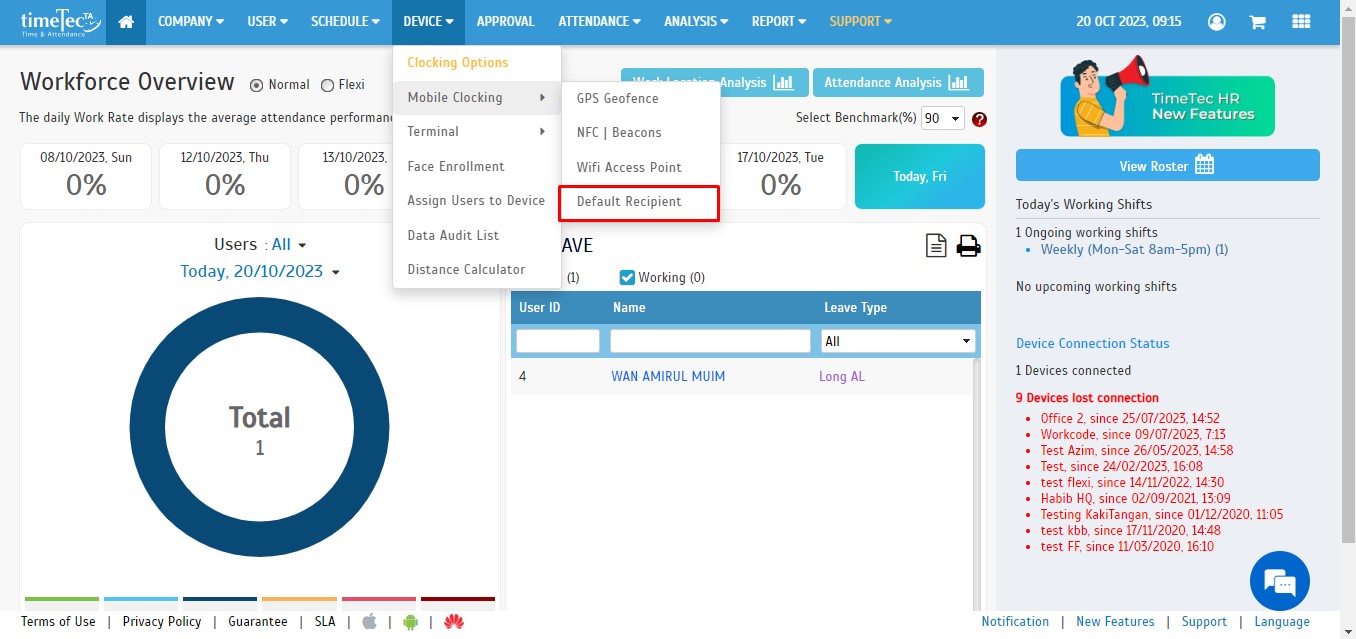
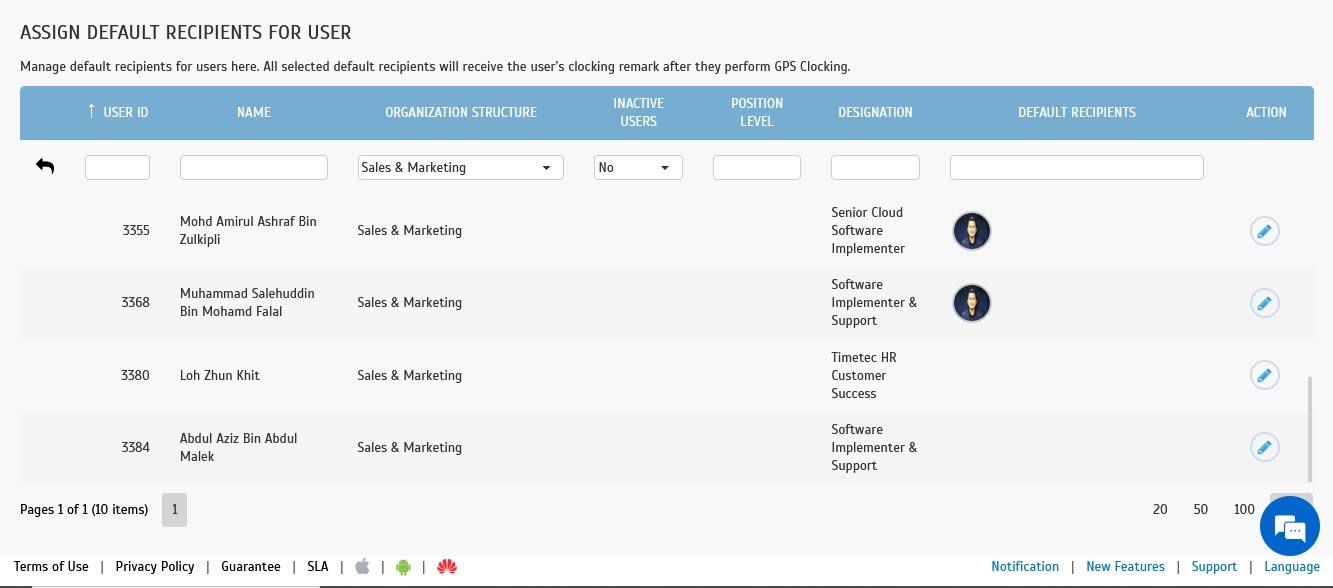
1. In TimeTec’s Attendance Module, go to Device > Mobile Clocking > Default Recipient.
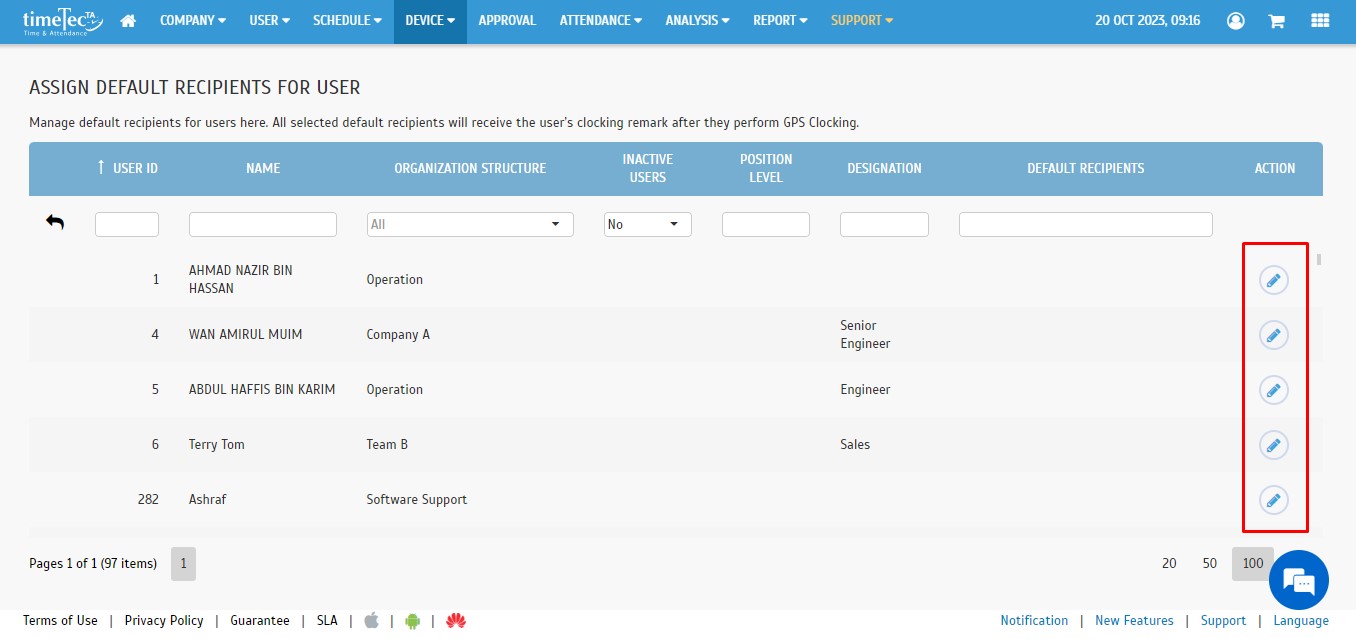
2. The page will list all users available. You will then need to select the user you wish to monitor in terms of GPS clocking and click on edit (pencil icon) to add recipients.
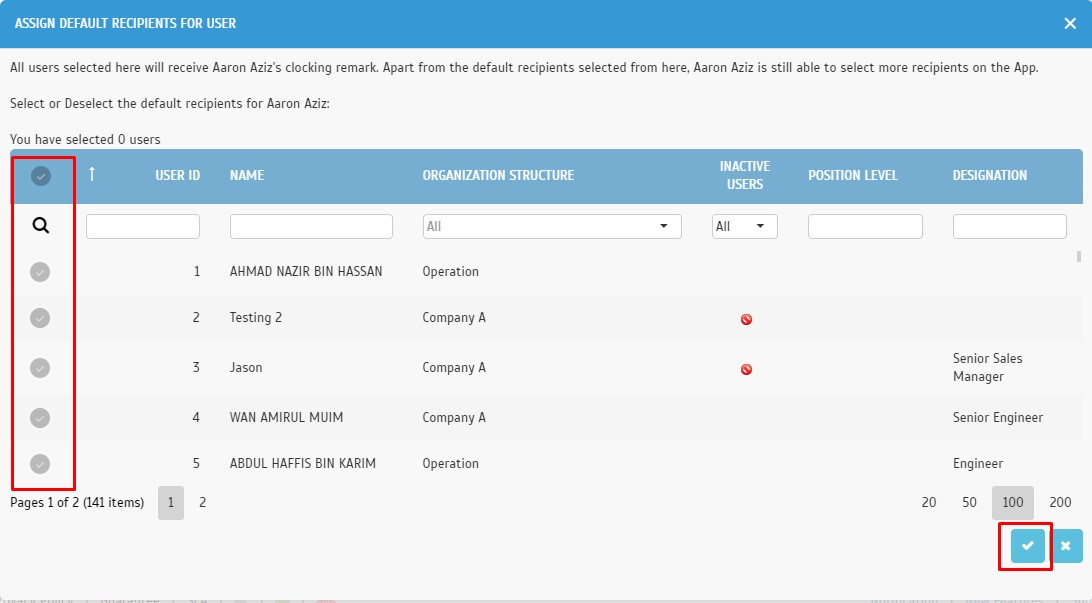
3. After you have clicked the edit button, it will again list all users, but this time you need to select the recipients. (Please note that the list will include inactive users as well, so it’s best to filter the inactive users column if you don’t want them to appear). Select the correct recipients and click submit.
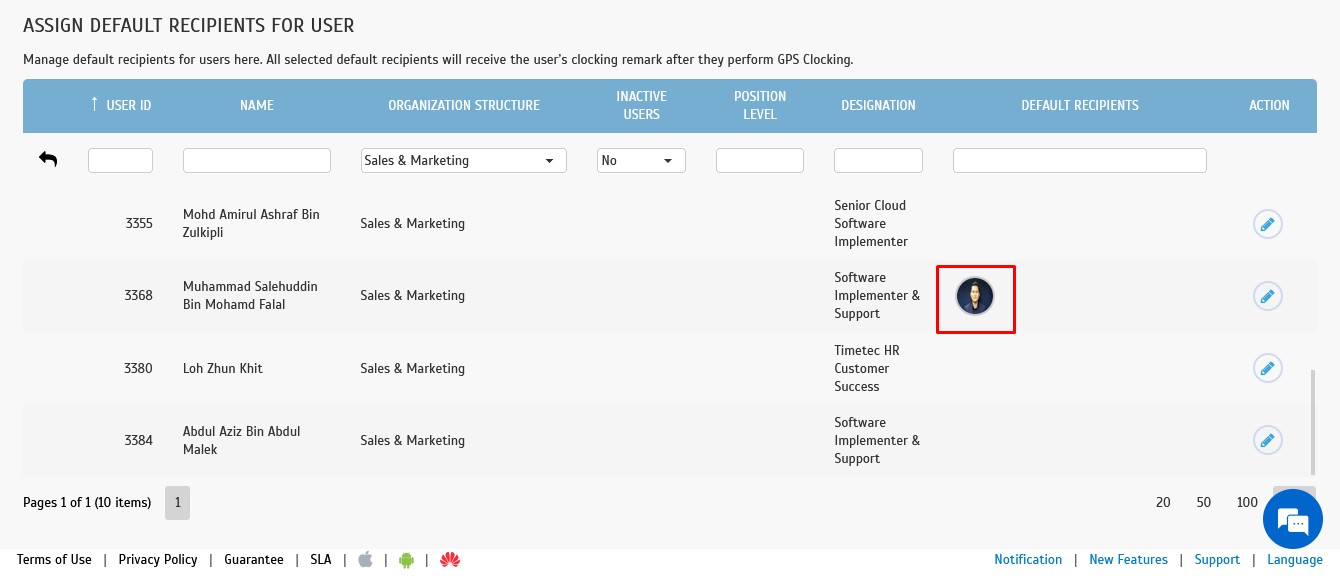
4. The recipients you have selected should appear under the ‘Default Recipients’ column.
5. If you wish to set it for multiple users, click edit (pencil icon) on the second person and select another name as the recipient.
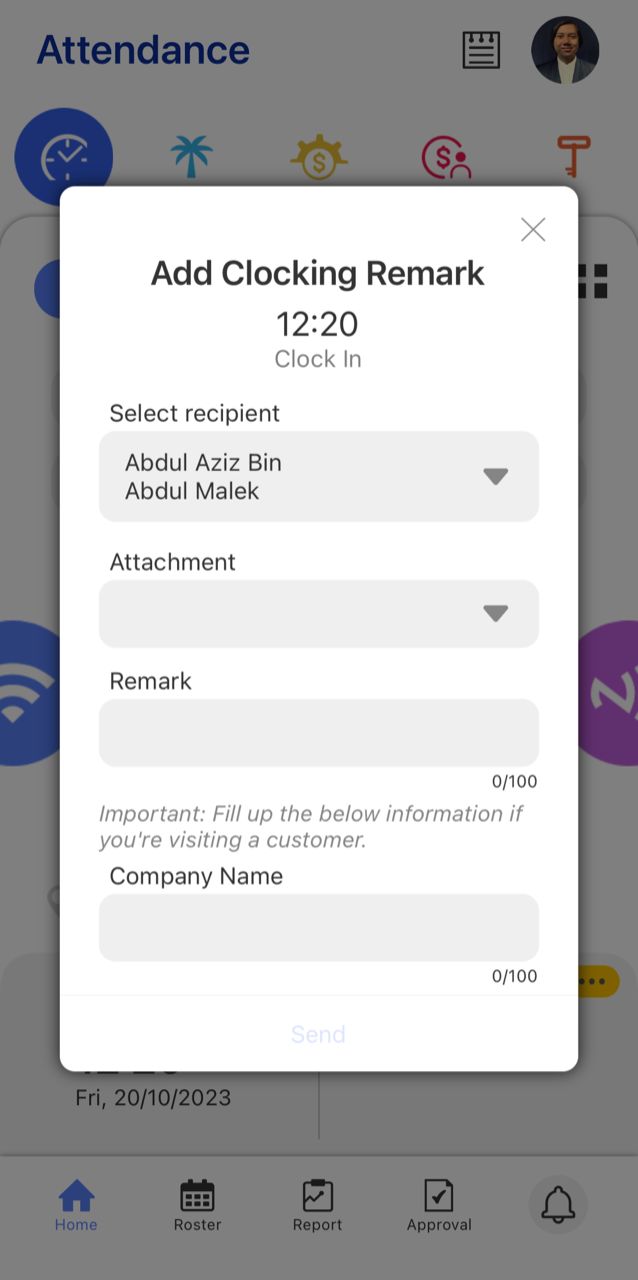
6. Next, to test this setting you may ask the user to perform GPS Clocking. After clocking in successfully, they will find the ‘Input Clocking Remark’ button below.
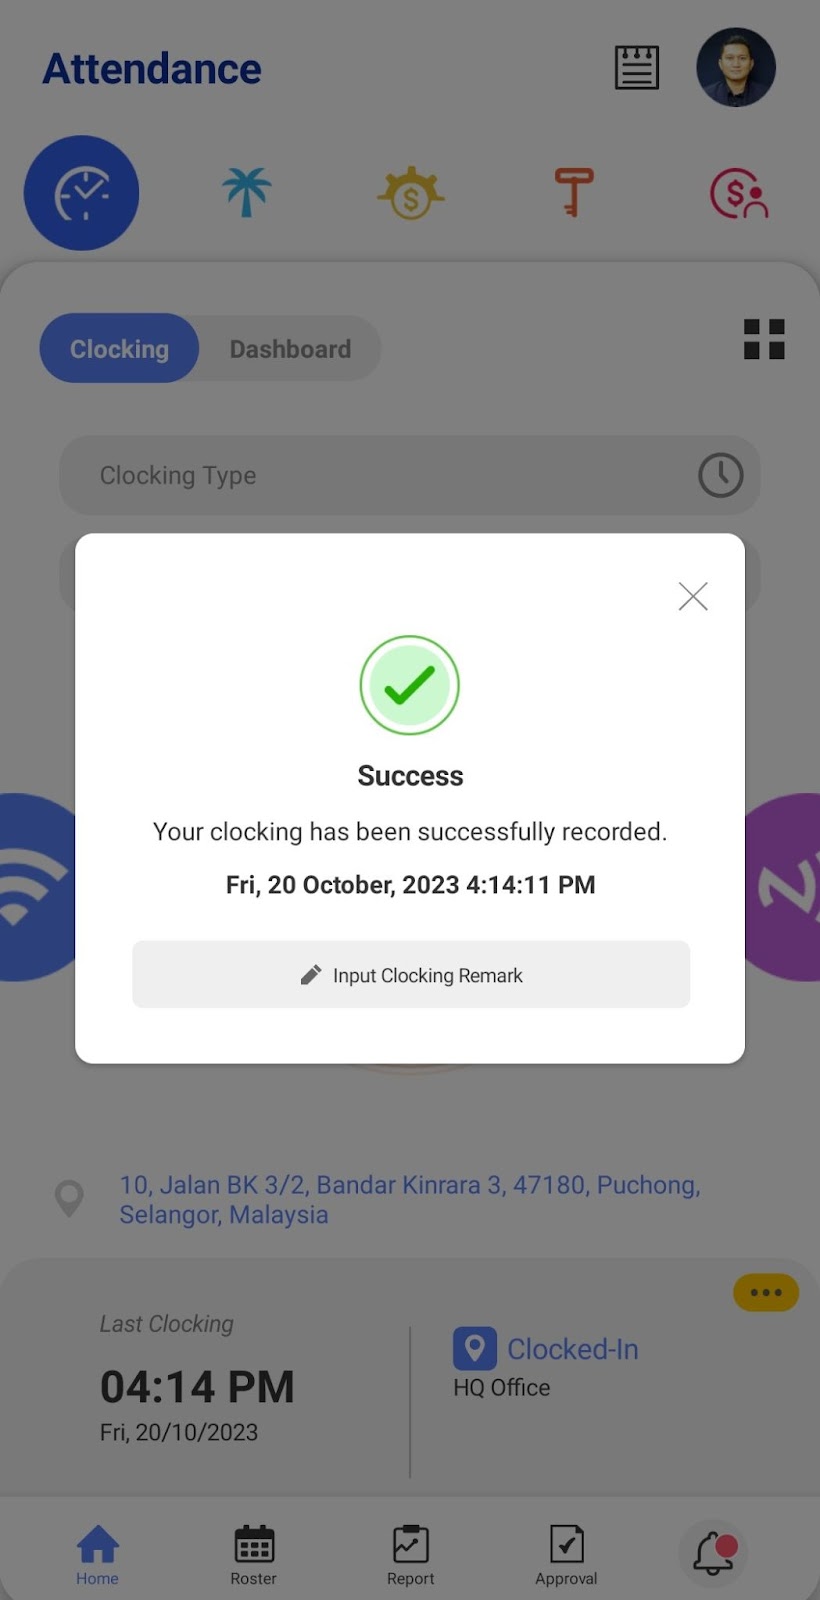
7. The ‘Select recipient’ field will automatically fill in the name of the person you have listed as the default recipient previously. So, users can directly send it to their default recipient without needing to reselect it every time.
Note: If some of the screenshots or steps viewed here are different from the current system, this is due to our continuous effort to improve our system from time to time. Please notify us at info@timeteccloud.com, we will update it as soon as possible.
Related Articles
How To Set User Card ID in TimeTec Attendance
Introduction: TimeTec Attendance conveniently allows the admin the option to add or change user card ID remotely from the system. This article will guide you on how to add or change your user card ID from TimeTec Attendance. Steps: A: Manage User ...How To Add New User to TimeTec TA (Geofence User)
Introduction Time attendance, scheduling management & work from home are effective solutions for the modern workforce. The TimeTec TA automates your time data collection process and seamlessly integrates it with biometrics identification devices. ...3 Ways to View Your Attendance Data in TimeTec HR
Introduction Timetec HR is the latest mobile application that Timetec just launched which we called the “Super App”. This newest application combines 4 modules (TA, Leave, Claim and Access) under one application which will reduce the hassle for the ...How to Set Memo from TimeTec Attendance (Web) and TimeTec HR App
Introduction Memo is usually sent to convey specific details on a project or to request specific information from other users. Memo also may serve as a reference for employees for the future as a way of maintaining memory clarity. There are few ways ...How to Import Attendance Clocking Data from 3rd Party Server into TimeTec Attendance
Introduction TimeTec is now able to import terminal data from other than FingerTec devices using a 3rd party server. Customers will need to prepare the server and create the database and table on the server to match the required data. Process 1. You ...