How to Lodge a Feedback Report for Common Area to the Building Management Team
This article teaches users how to submit feedback reports for issues encountered in the common area.
Step 1: Launch the i-Neighbour App > select “Feedback”
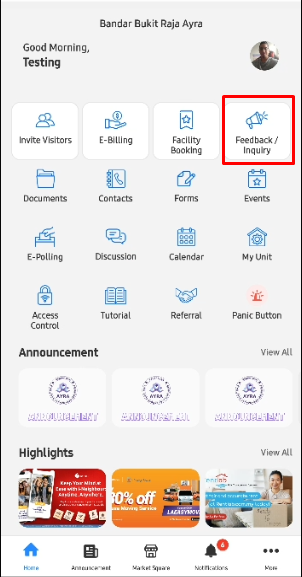
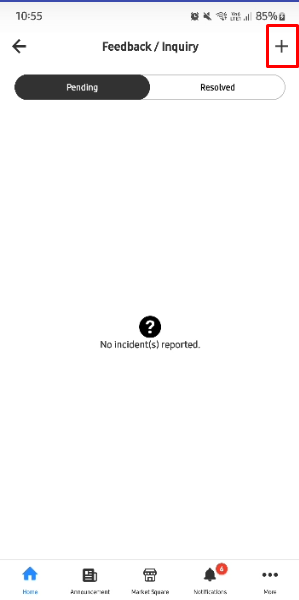
Step 2: To lodge a new Feedback/Inquiry, tap on the ‘+’ icon
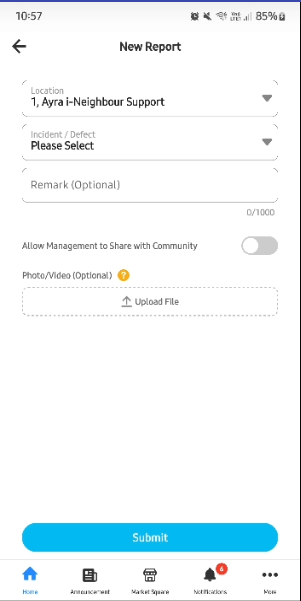
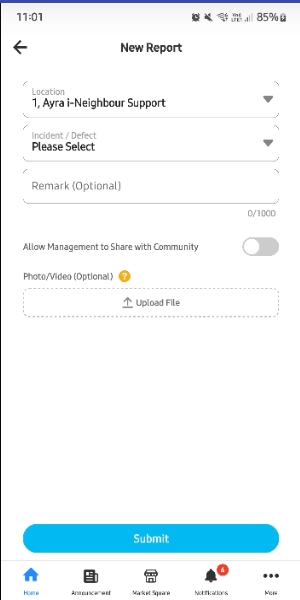
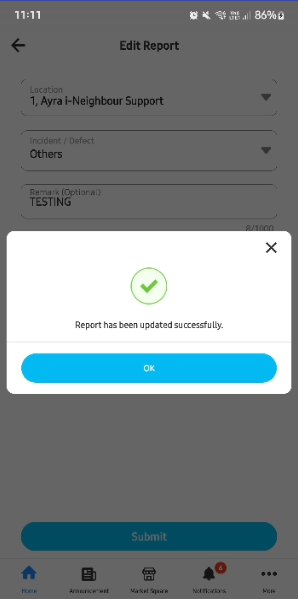
Step 3: Add feedback report
3.1 - Specify location (My unit or Public Area). For public area, please specify the exact location, for example, P1 Elevator
3.2 - Select incident / defect type
3.3 - Put some remark (optional)
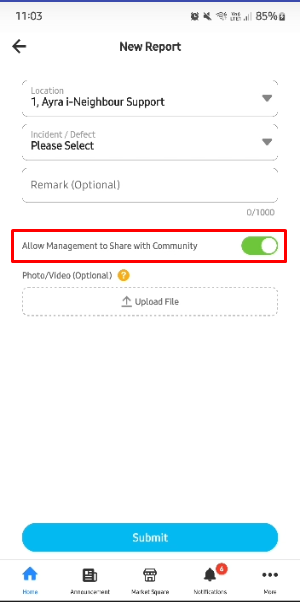
3.4 - User can toggle on/off button whether to allow management to share within the neighbourhood community
3.5 - User can also attach some photo/video (not larger than 25MB)
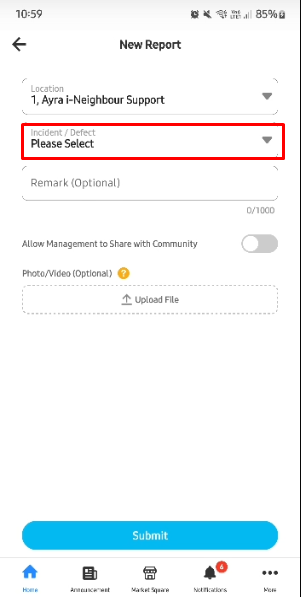
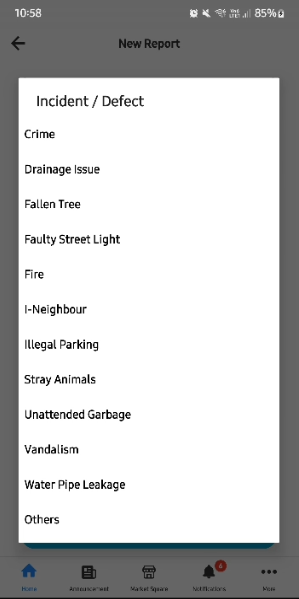
Step 4: Click Submit to proceed
4.1 - If you turn on ‘Allow management to share with neighbourhood’, the system will ask for a second confirmation check for your permission to share
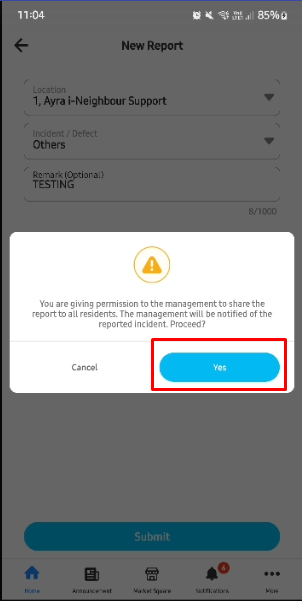
4.2 - Then system will upload the feedback/Inquiry
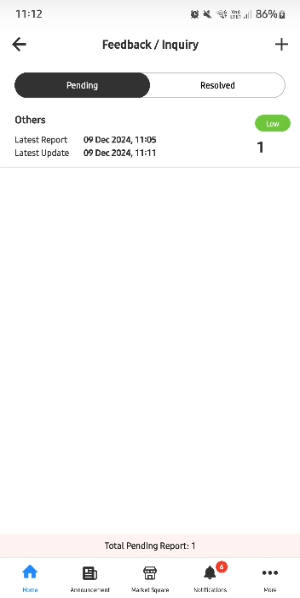
4:3 - All the reported items will show in the folder (Folder will be created automatically based on incident reported by unit owner)
Step 2: To lodge a new Feedback/Inquiry, tap on the ‘+’ icon
Step 3: Add feedback report
3.1 - Specify location (My unit or Public Area). For public area, please specify the exact location, for example, P1 Elevator
3.2 - Select incident / defect type
3.3 - Put some remark (optional)
3.4 - User can toggle on/off button whether to allow management to share within the neighbourhood community
3.5 - User can also attach some photo/video (not larger than 25MB)
Step 4: Click Submit to proceed
4.1 - If you turn on ‘Allow management to share with neighbourhood’, the system will ask for a second confirmation check for your permission to share
4.2 - Then system will upload the feedback/Inquiry
4:3 - All the reported items will show in the folder (Folder will be created automatically based on incident reported by unit owner)
Step 5: Management Team (Admin) will receive the report, and once they begin to rectify the reported issue(s), they will click on the button “Mark as in-Progress”. You will then receive a notification in your i-Neighbour app.
Step 6: After the issue has been fully rectified, the management team will select “Mark as resolved” and closed the case. Unit owners will receive notification in their i-Neighbour mobile app as their defect progress remark.
Note: If some of the screenshots or steps viewed here are different from the ones in the current system, this is due to our continuous effort to improve our system from time to time. Please notify us at info@i-neighbour.com, we will update it as soon as possible.
Related Articles
How To Lodge A Defect Report To The Developer using i-Neighbour App
This article aims to teach users how to submit defect reports through the i-Neighbour app. Following are the steps on how to submit a defect report via i-Neighbour. Step 1: Launch the i-Neighbour App > More > select Defect Report icon under Developer ...How To Configure the Defect Report Settings in the Web
This article is a guide for an Admin to configure the Defect Report module. The Defect Report module centralizes all the defect reports lodged by the Unit Owners, and it manages the report tickets efficiently for the management team. .Note: All ...How to Submit Defect Report on Behalf of Residents (Mobile App)
1. Tap on "More" then under Developer Management, tap on "Defect Report". 2. Click ‘+’ icon at top right to create new defect 3. Select Block/Street and unit number. Click ‘Next’ 4. Select defect type, item, location and fill in remark. Admin can ...How to View and Update A Defect Report on the Web
This article is a guide for an Admin to manage the Defect Report module. How to View and Update A Defect Report on the Web: Step 1: Go to Defect Report, and you can view all lodged defect tickets. The number of days the tickets submitted determines ...How To Generate A Defect Report for i-Neighbour
This article will help users learn how to generate defect reports through the i-Neighbour web app. Step 1: Go to the Defect Report and Click “Generate Report”. Step 2: Select the report type and select Start to End date. You can choose the report ...