How to Import Attendance Clocking Data from 3rd Party Server into TimeTec Attendance
Introduction
TimeTec is now able to import terminal data from other than FingerTec devices using a 3rd party server. Customers will need to prepare the server and create the database and table on the server to match the required data.
Process
1. You may provide the device information (device brand, model and device serial number) to TimeTec (support@timeteccloud.com) for us to add the serial number as a valid serial number in our database.
2. Customer will need to prepare the server to host the data from the third-party terminal and the attendance data centre for TimeTec to import the clocking data. On the server, customer need to create a database with the following table:
Table name: attendance_data_centre_checkinout
Columns:
user_id
check_type - Clock In, 1: Clock Out, 2: Break Out, 3: Resume In, 4: OT In, 5: OT Out
check_time - clocking time
serial_no
work_code
state - always insert as 'New' ('New', 'Completed', 'UnmatchedSerialNumber')
Please ensure to match the table as the required column to avoid data not being able to be imported correctly into TimeTec. You may refer to the sample table below.

Should you face any problems installing the above database and table, please contact your device vendor to troubleshoot the issue.
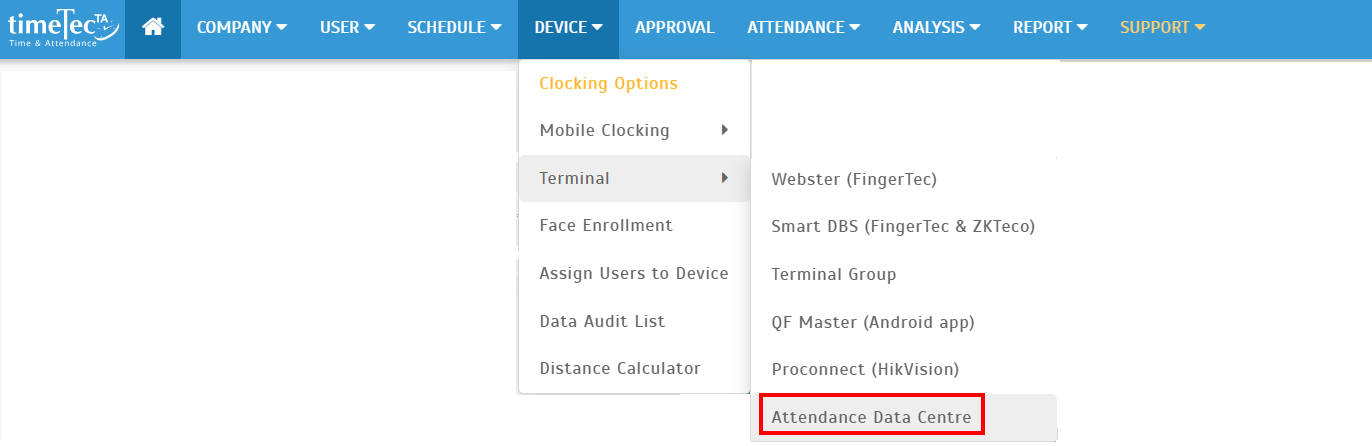
3. Login into TimeTec Attendance, go to Device > Terminal > Attendance Data Centre
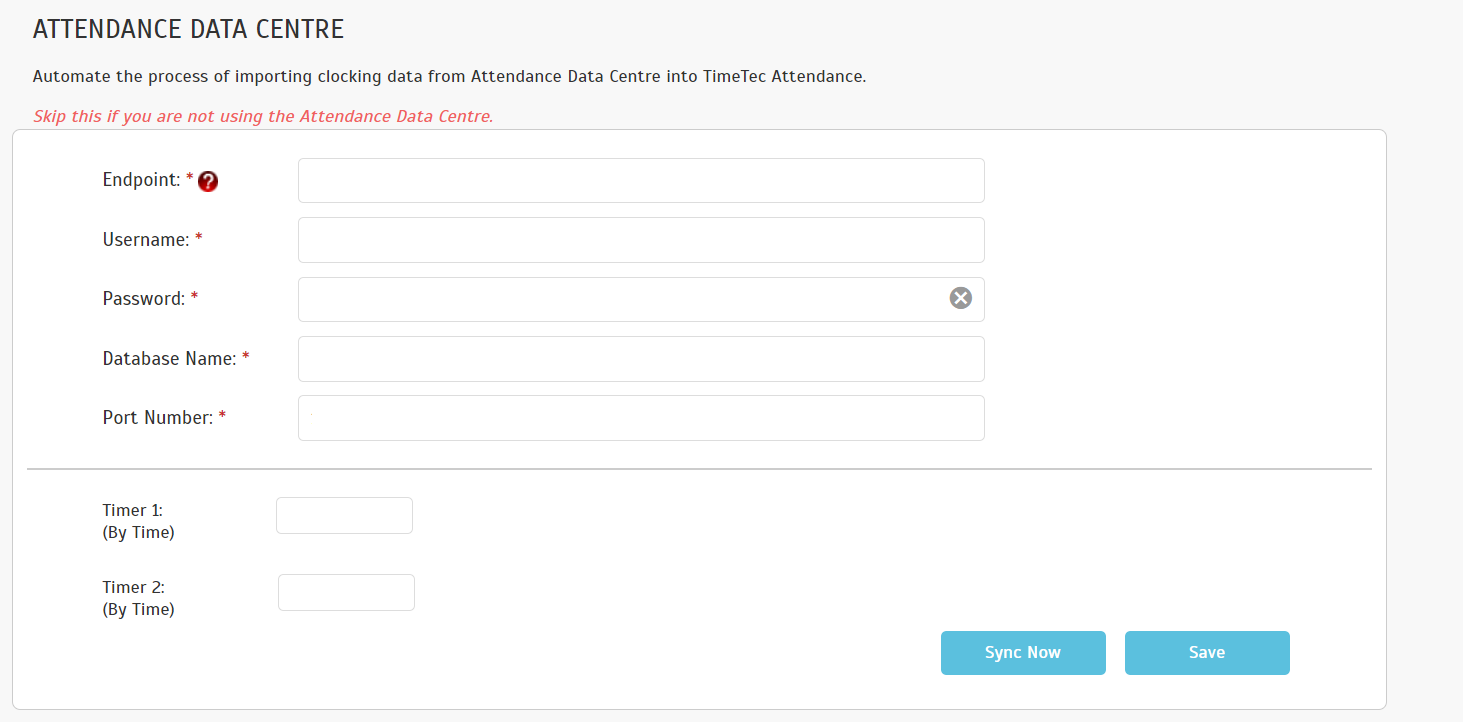
4. Furnish the Attendance Data Centre information to link TimeTec with the server.
Related Articles
How To Add New User to TimeTec TA (Geofence User)
Introduction Time attendance, scheduling management & work from home are effective solutions for the modern workforce. The TimeTec TA automates your time data collection process and seamlessly integrates it with biometrics identification devices. ...Exporting Data to 3rd Party: Configuring Export Templates in TimeTec TA
Introduction TimeTec TA is a highly flexible cloud-based attendance management system, allowing users to export the attendance data into a template and format of their preference. The attendance export formats are divided into 2 general forms schema ...Troubleshoot Missing Attendance Data in TimeTec TA
Introduction: Missing attendance data within the Electronic Time Card report is most often caused by a few issues such as wrong issuance, expired date, no group duty roster assigned and no clocking data in the device itself. Therefore, we’ve prepared ...3 Ways to View Your Attendance Data in TimeTec HR
Introduction Timetec HR is the latest mobile application that Timetec just launched which we called the “Super App”. This newest application combines 4 modules (TA, Leave, Claim and Access) under one application which will reduce the hassle for the ...How to Setup Rounding for Work Hour and Overtime in Clocking Schedule via Timetec Attendance
Introduction There are companies which want to view the user's total working hours and overtime in an even amount instead of appearing in an odd/decimal amount in the attendance module. Here, we will guide you on how to set up rounding in the ...