How to enroll WiFi Clocking by Admin via TimeTec HR App
Introduction
WIFI connection is widely used these days to connect users with the most recent technology and updates. It provides users with greater mobility where the user can connect to a network or the Internet while moving freely around the space. For organisations that select the best mobile connectivity options, the choice often comes down to a WIFI connection.
By using TimeTec TA, WiFi is one of the options available for clocking which makes it much easier to record attendance as most companies have their own WiFi connection.
But before ones can use Wifi Clocking, the Admins need to make some configurations in the system (i.e. Wifi Access Point & User assignment settings). You can choose to do the initial setup either through the Web application or TimeTec HR mobile app. In this article, we will cover the steps needed to set up WiFi Clocking via the TimeTec HR mobile app.
Admin Setup (TimeTec HR App)
To start using this feature, Admin must first enrol the Wifi as clocking checkpoints and assign the User to it.
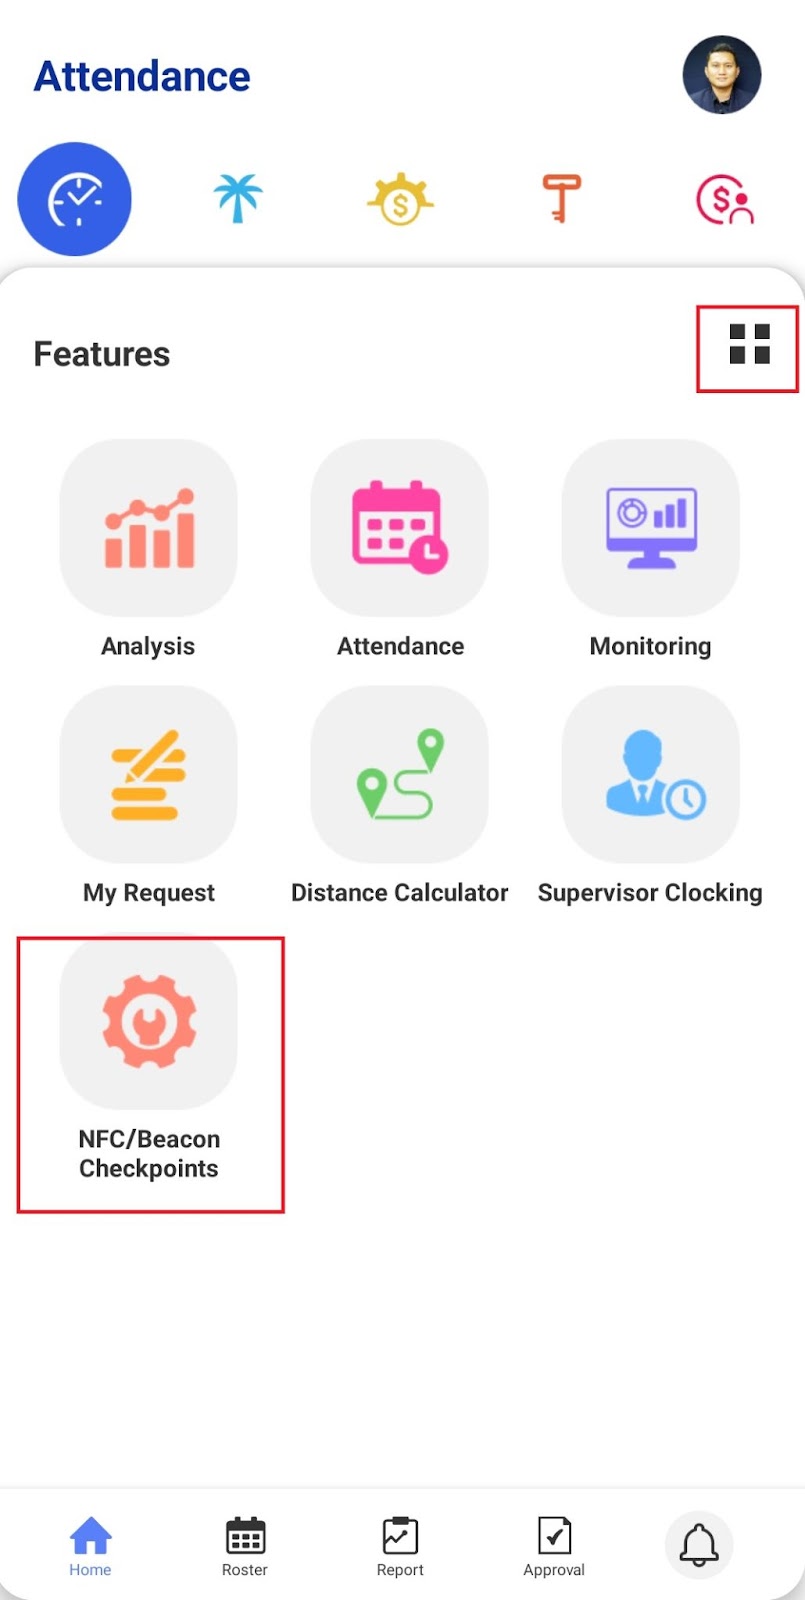
1. On Timetec TA > Navigate to Feature Settings (box icon) > Select NFC Checkpoints.
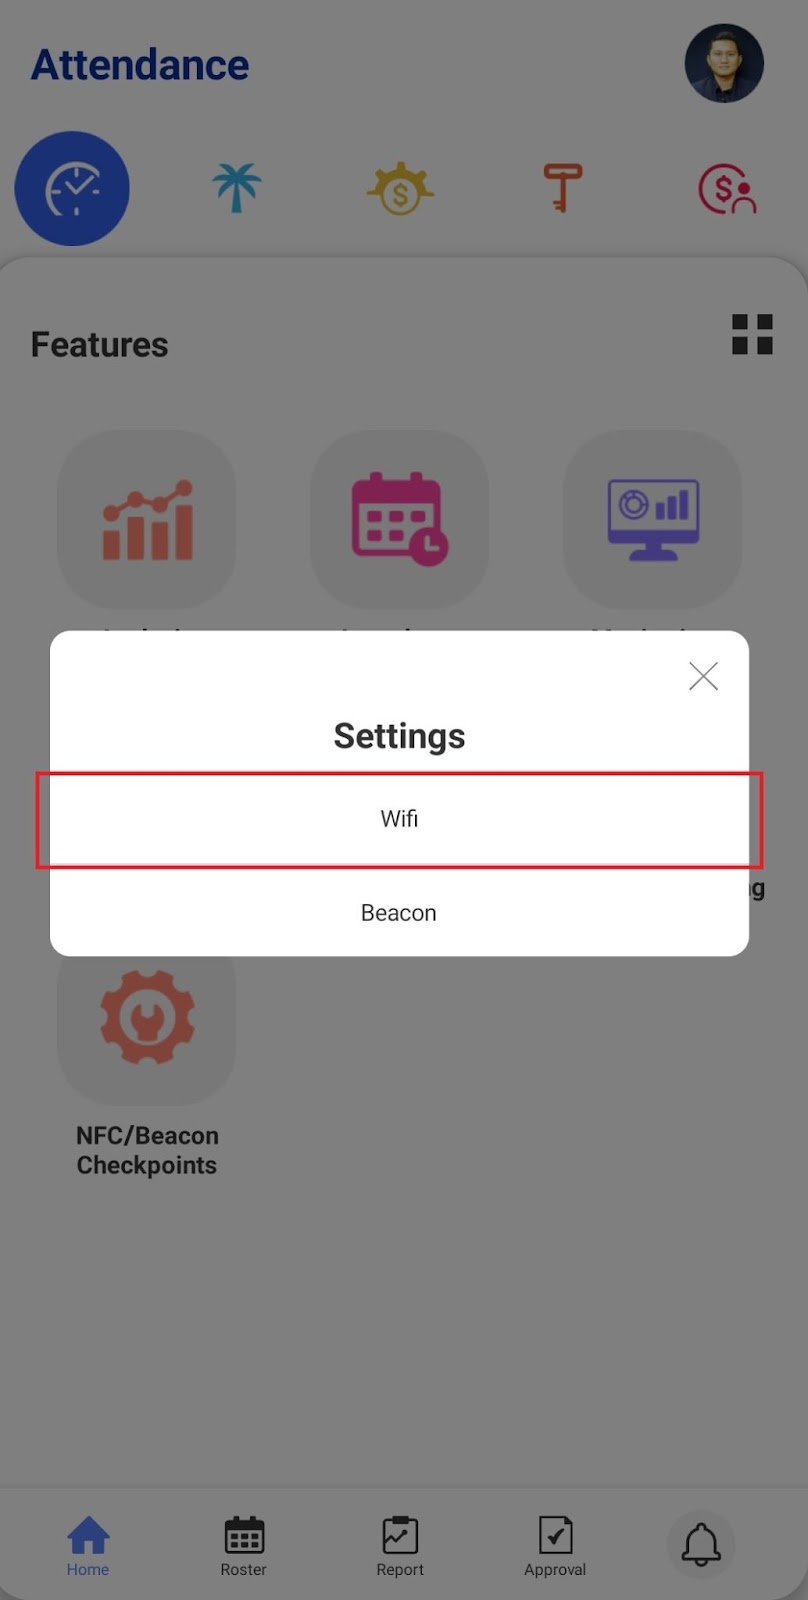
2. On the Settings tab, select Wifi.
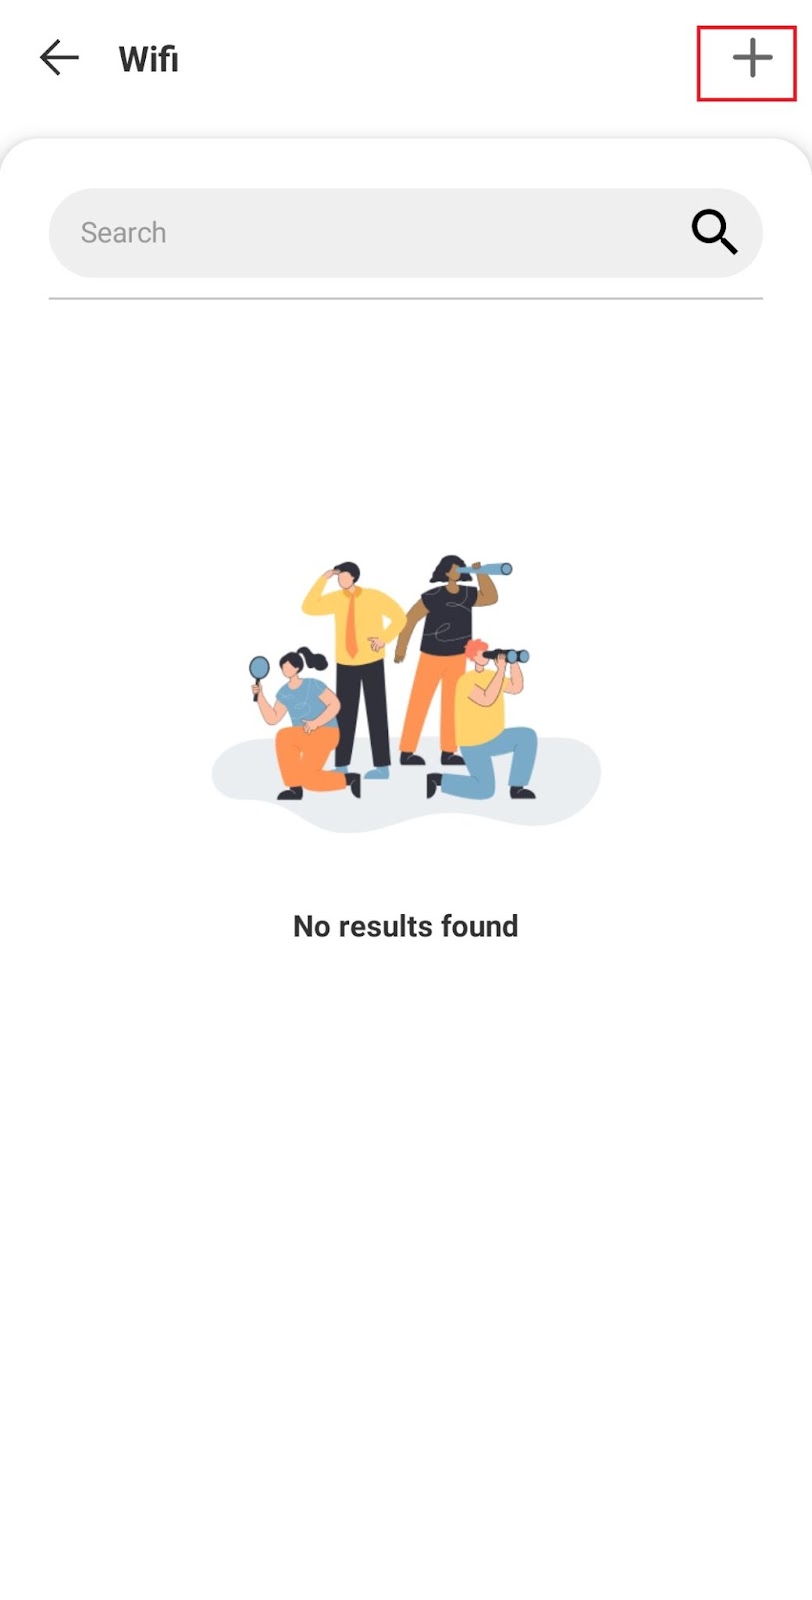
3. Please be reminded to connect to an active Wifi connection before proceeding. Then press the + button to add.
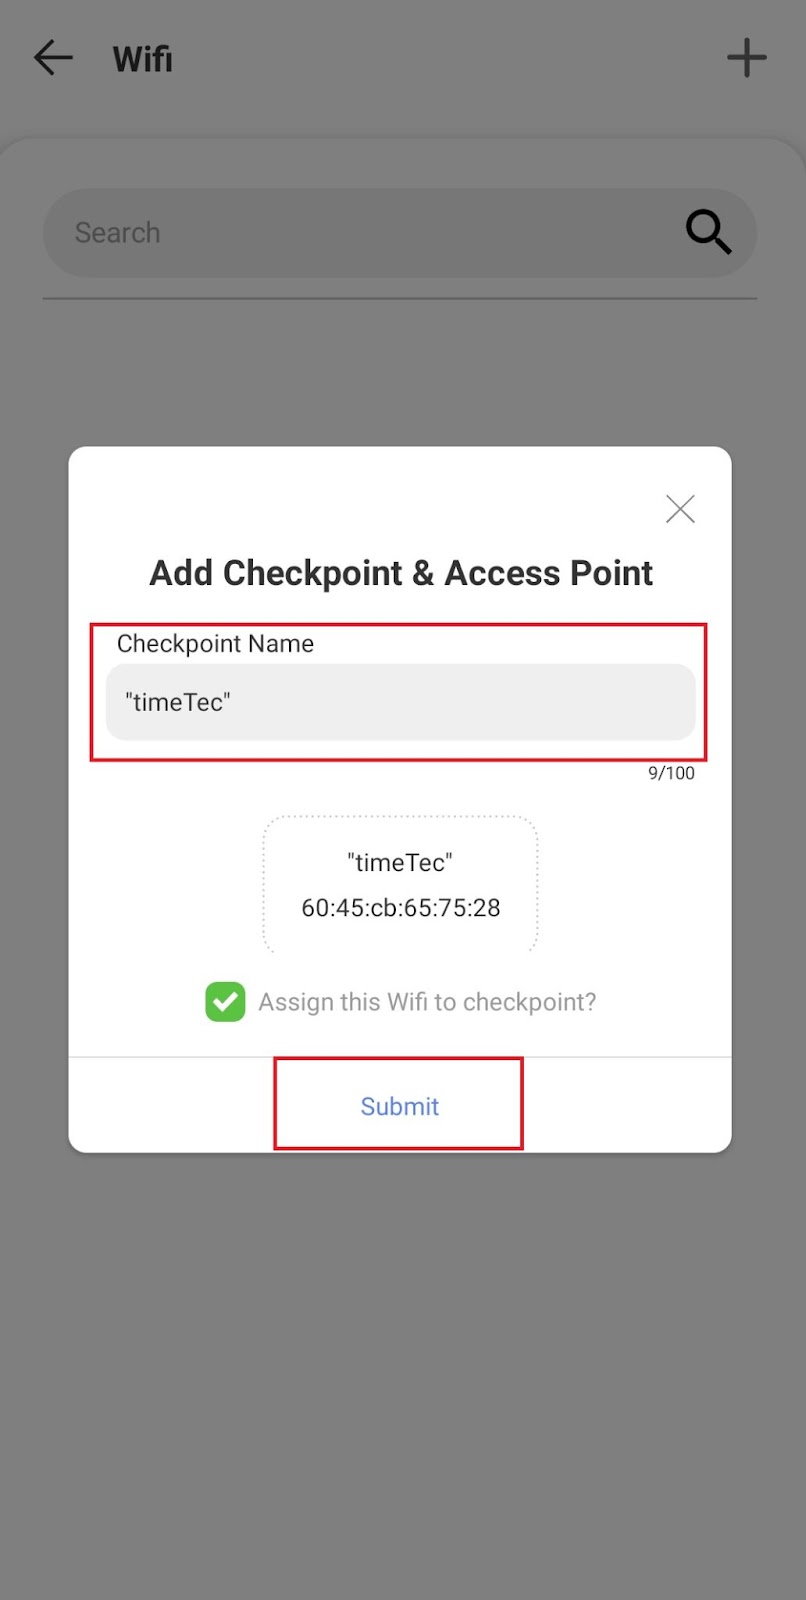
4. Fill up the Checkpoint name and click Submit.
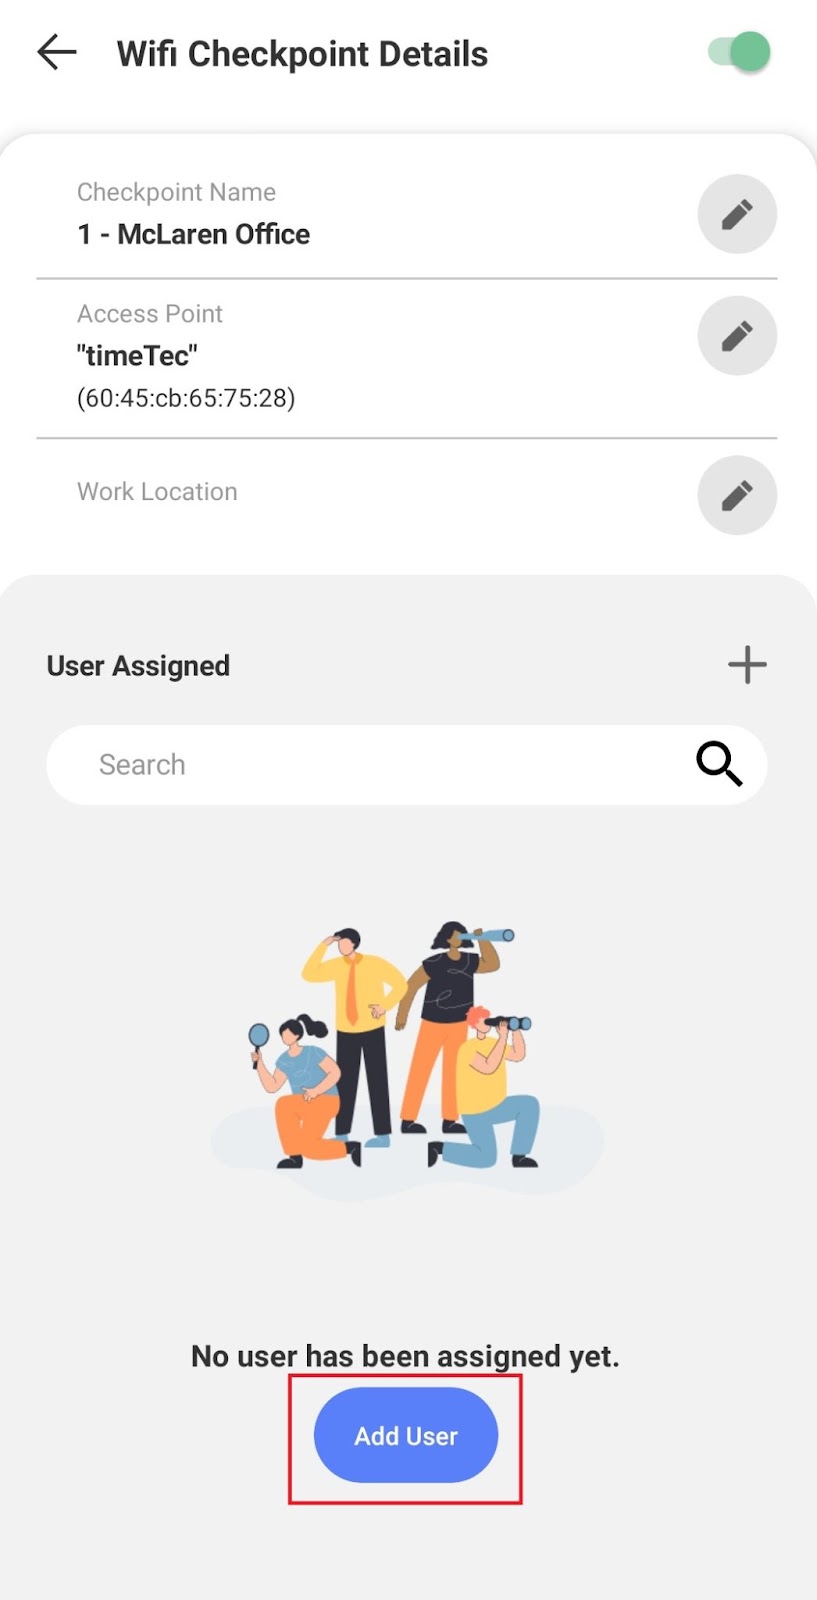
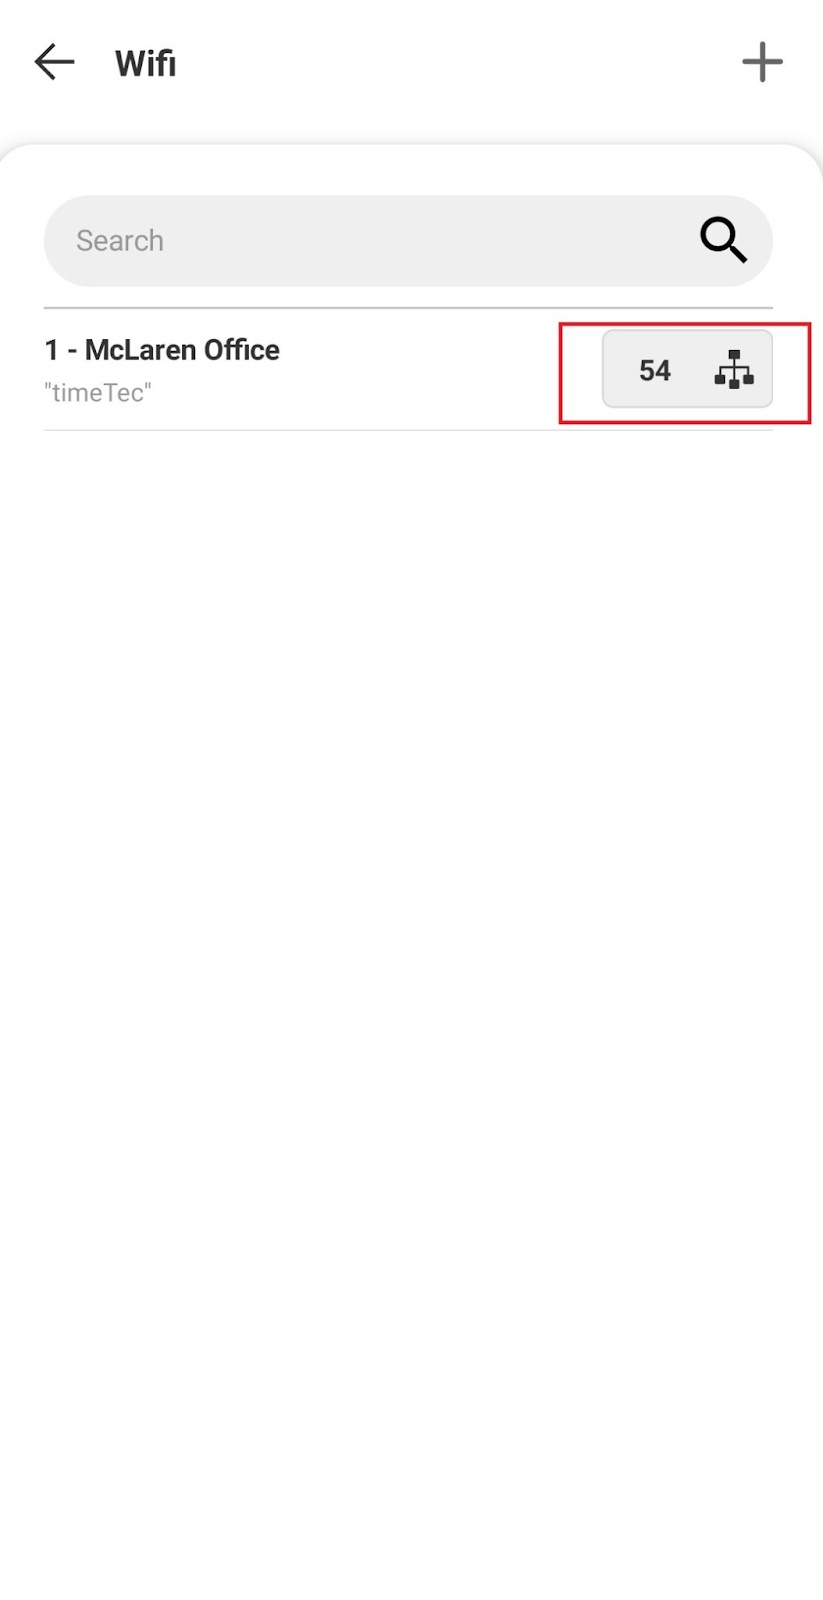
5. Newly added Wifi checkpoints will appear in the list. Next, we need to assign users/departments to the checkpoint.

6. To assign users, simply select the checkpoint and tap the button + or Add User button.
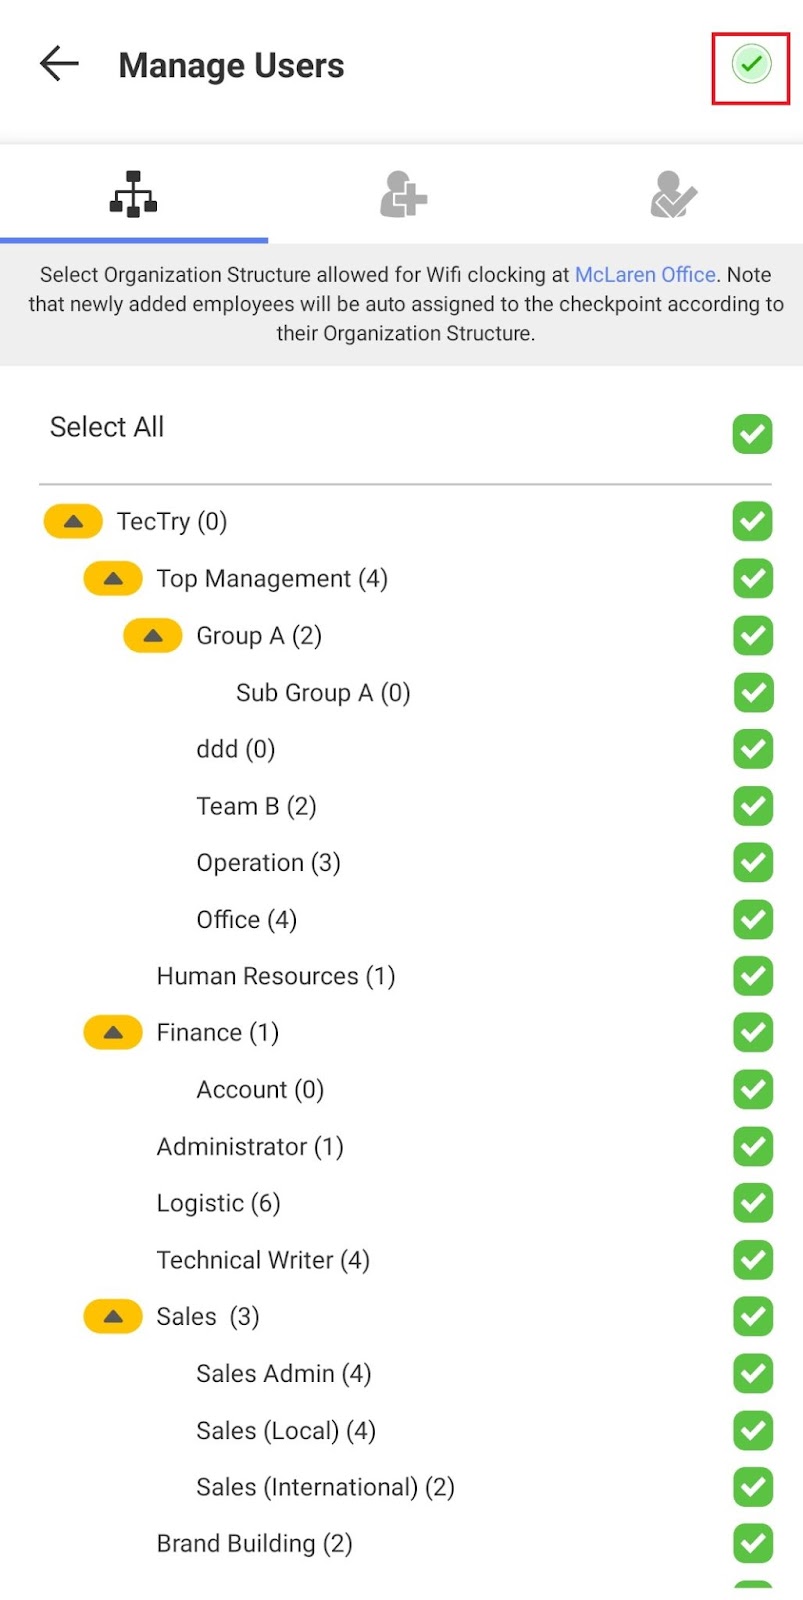
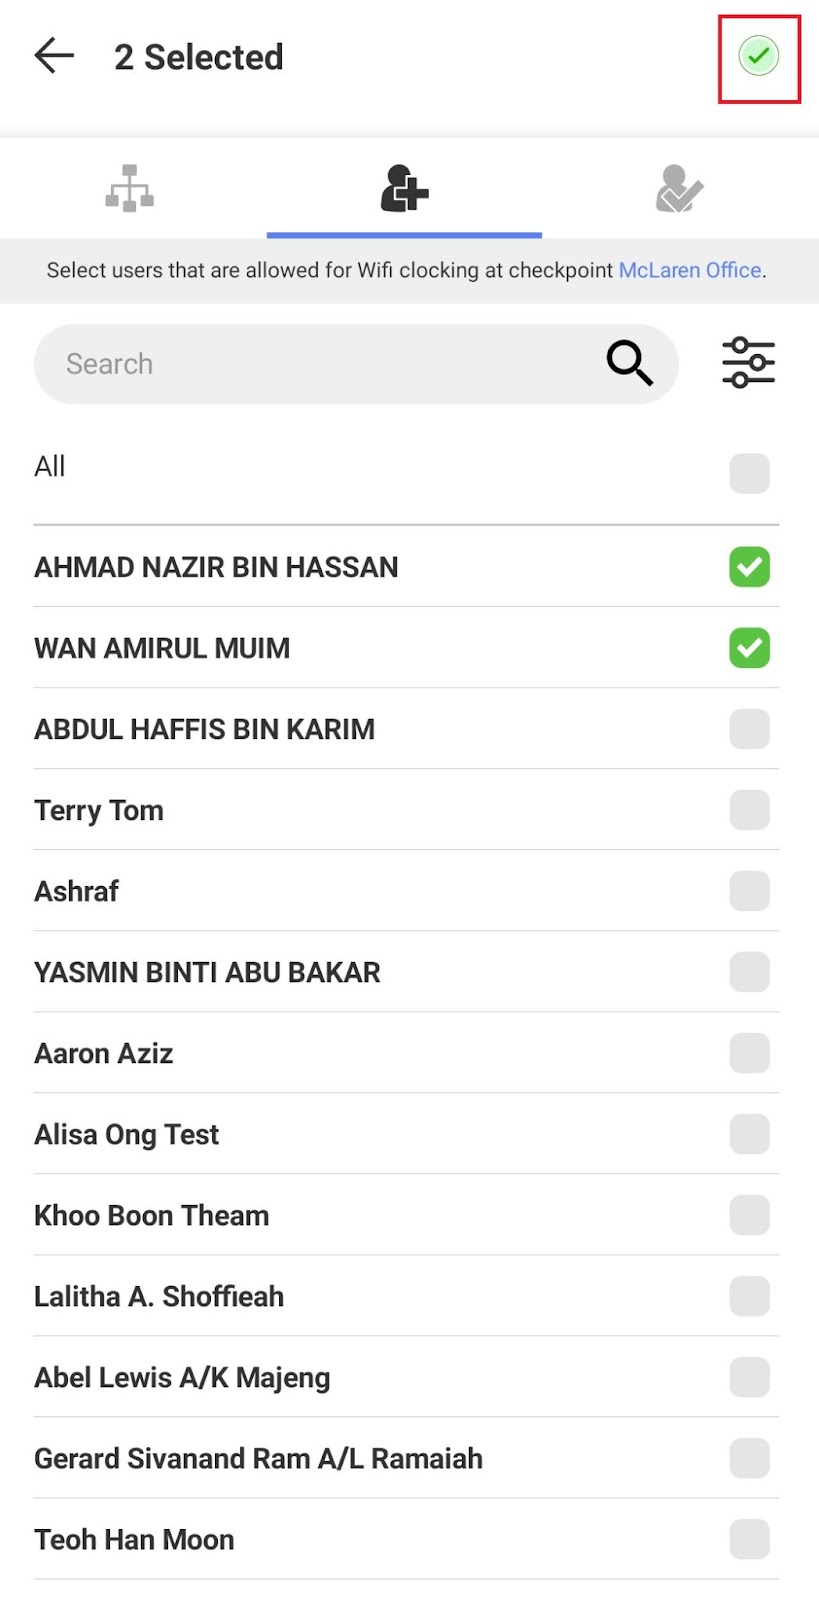
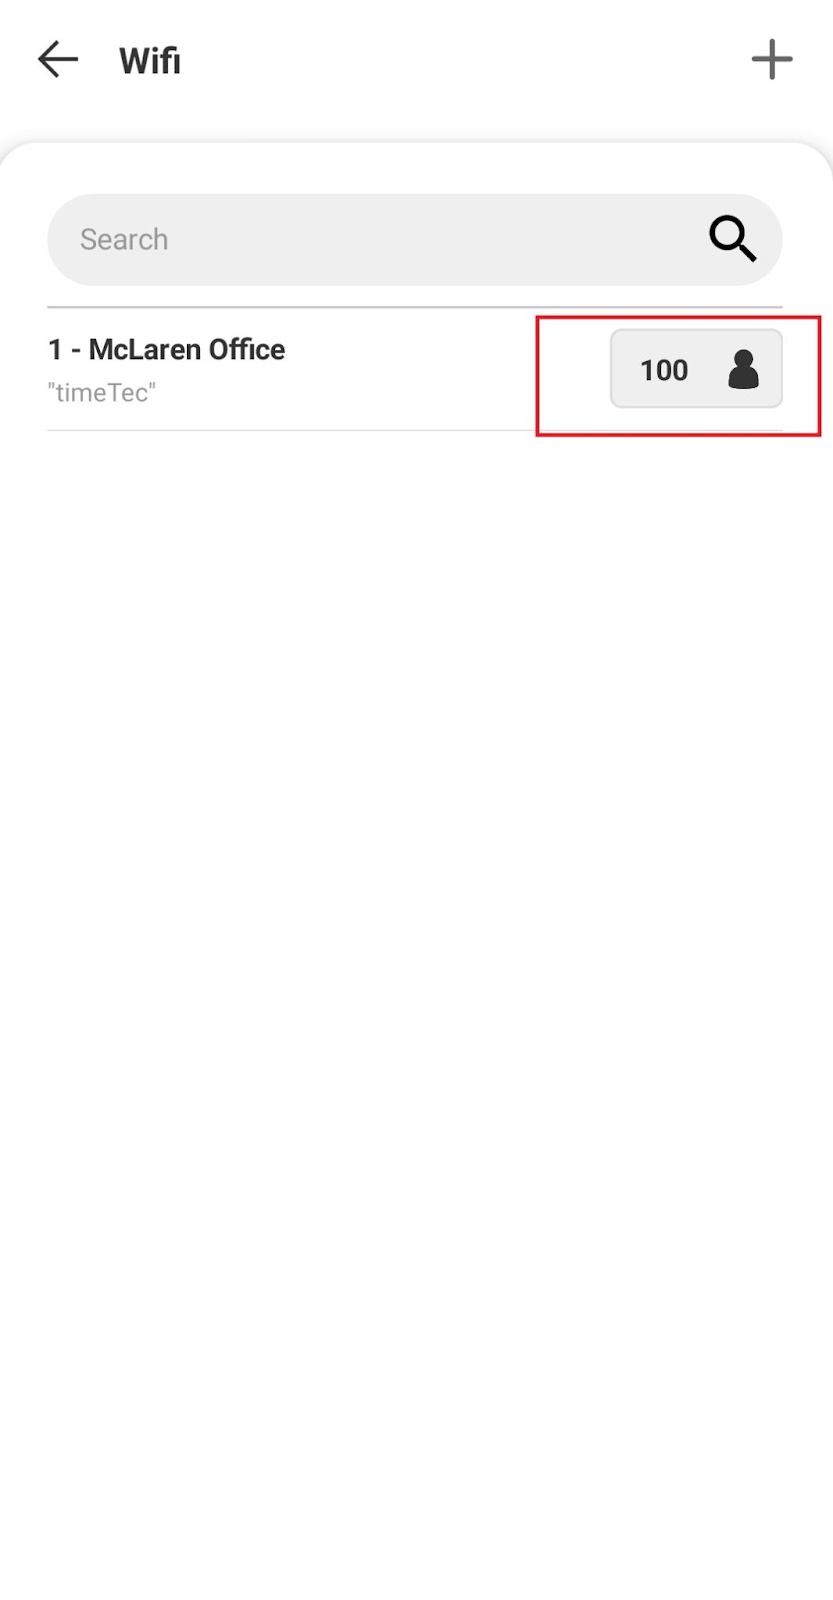
7. There will be 2 options available, assign Users by department or by the person. After selecting, click on the Save button on the top right of the page to save changes.
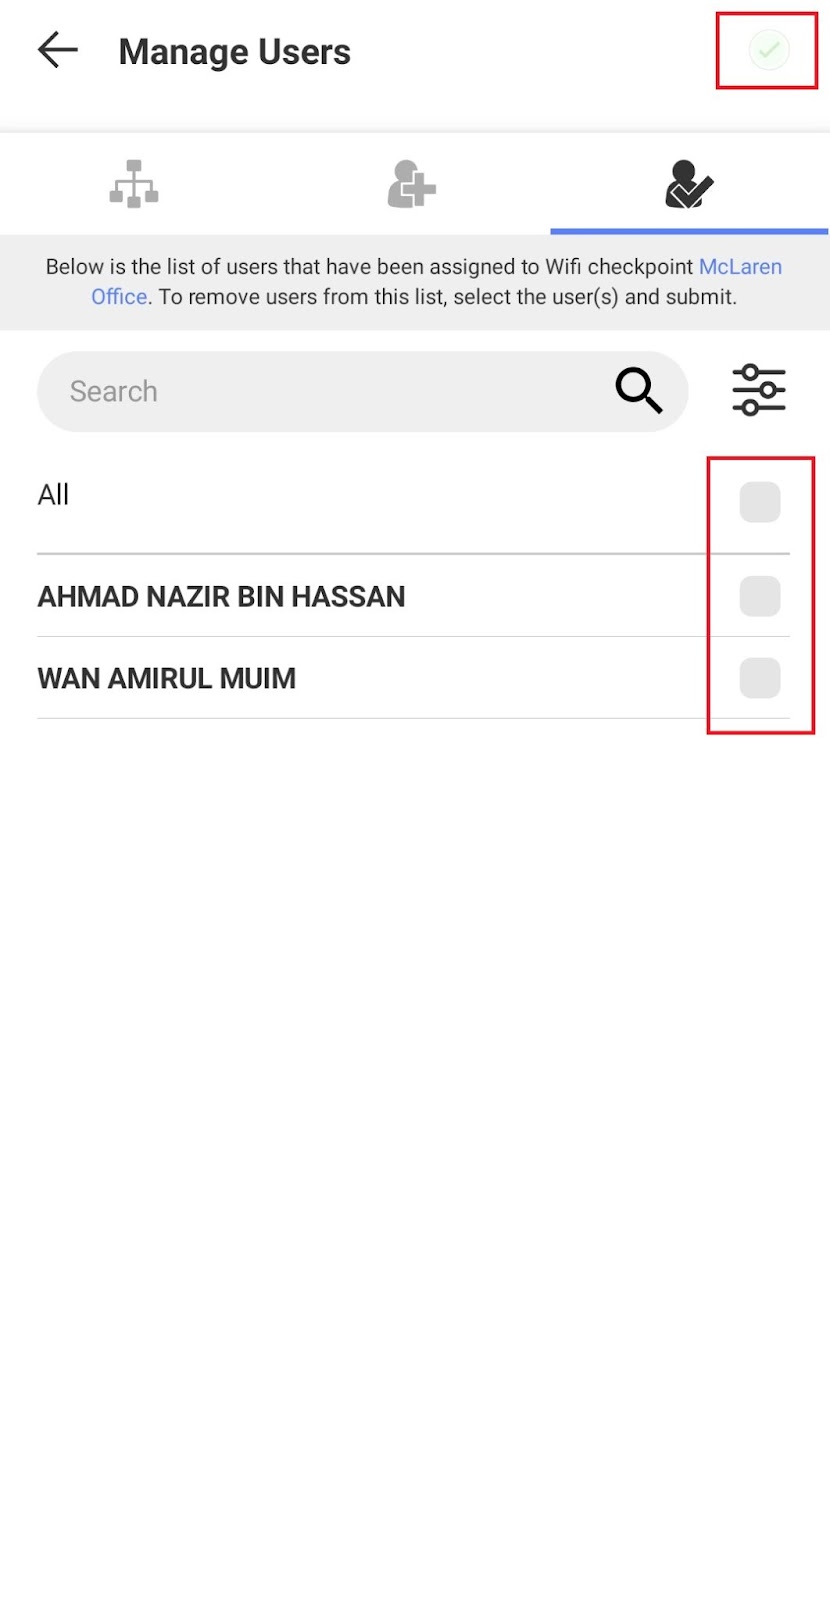
8. The list of Users/Departments assigned will be shown in the last tab. You can also delete assigned users in this tab.
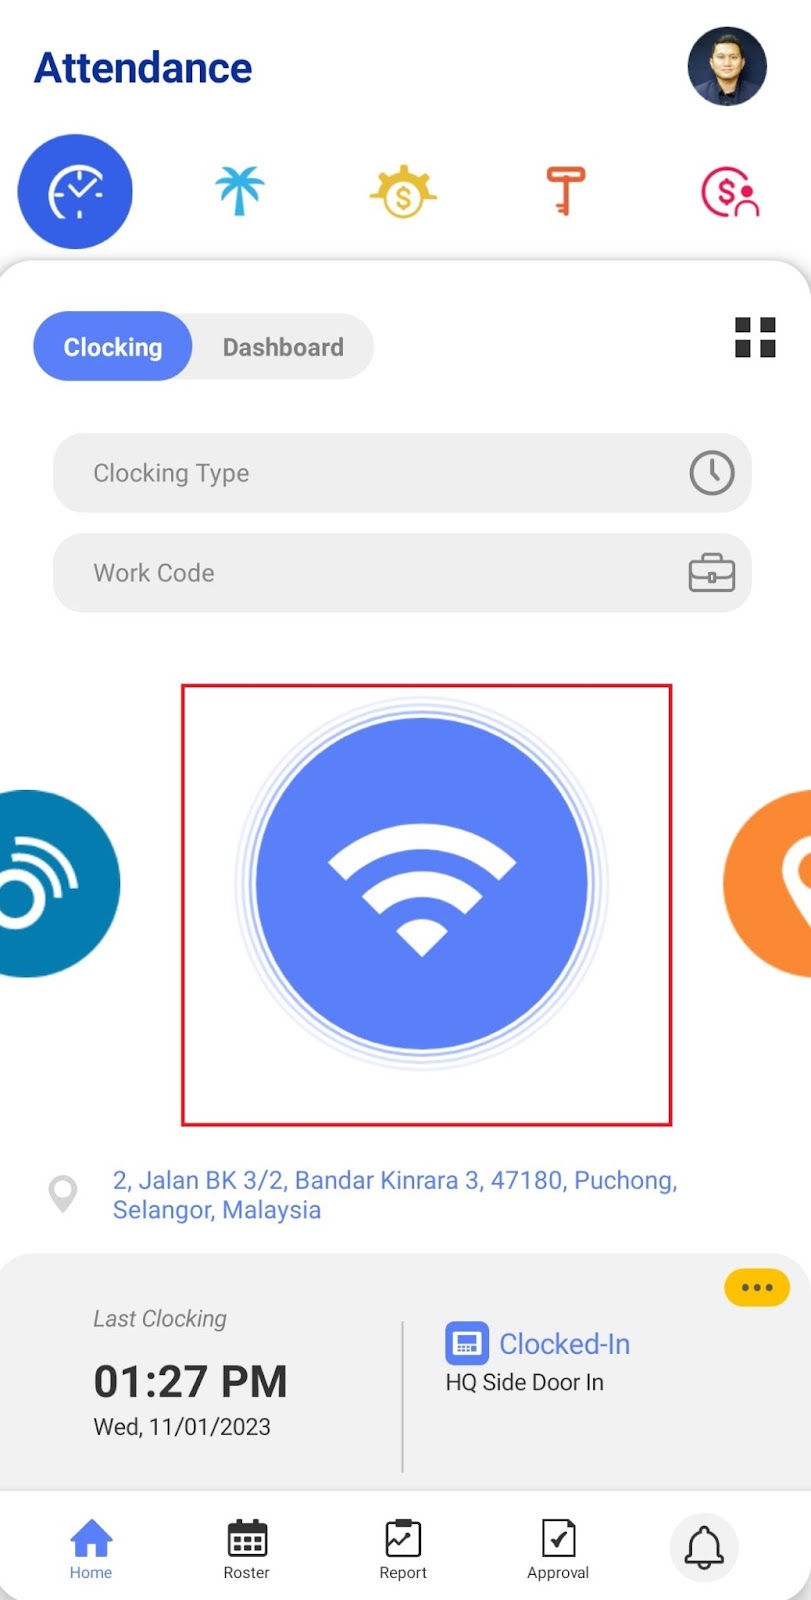
10. To test, go to the Clocking tab and Select the Wifi icon. Tap on the Wifi icon to proceed with clocking in. But please be reminded that only an active Wifi connection can successfully use the Wifi clocking features.

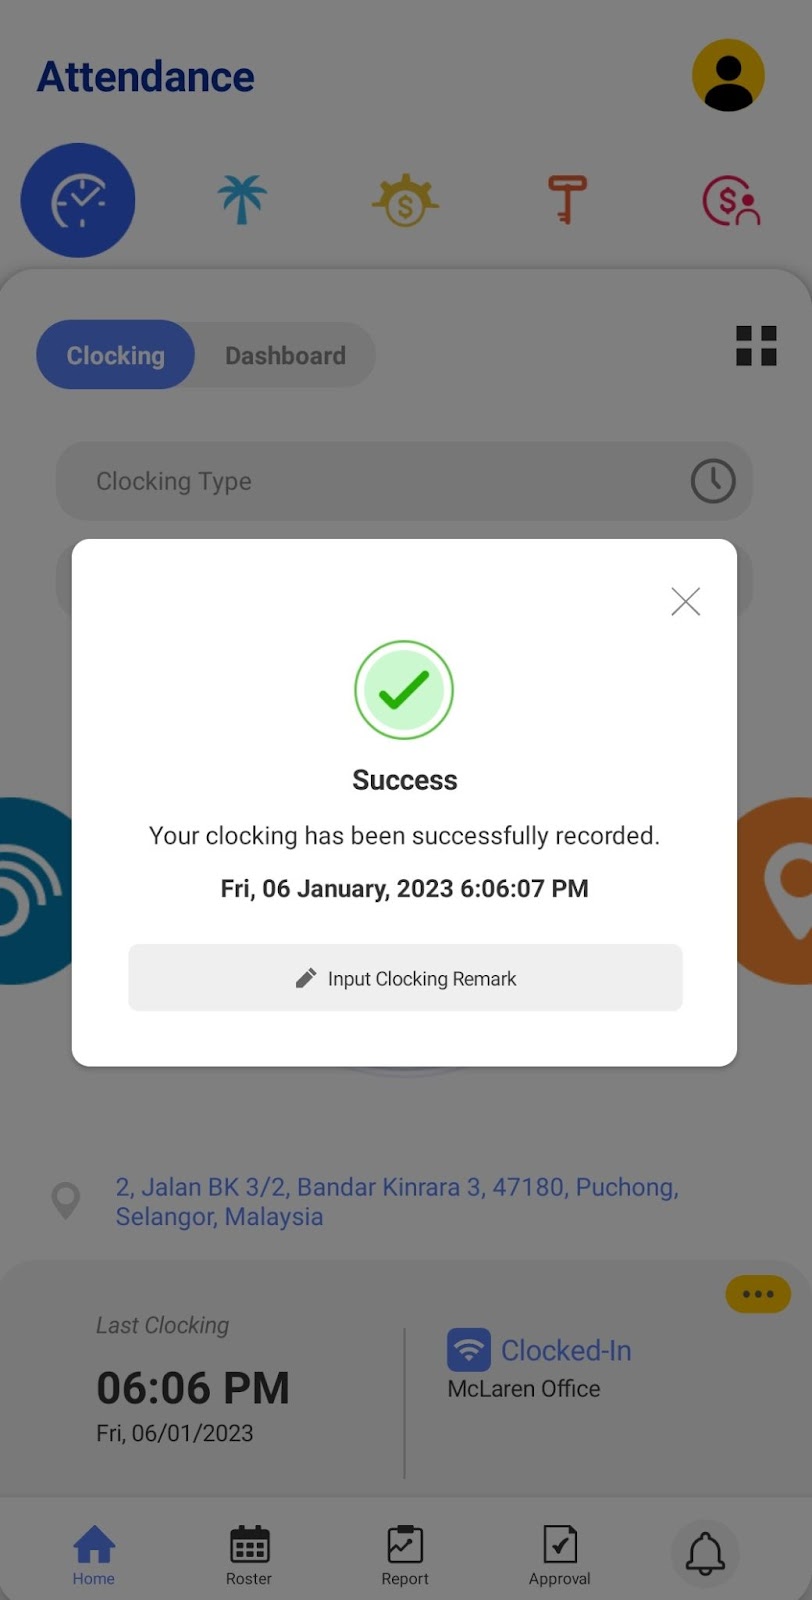
11. Please wait until the Apps Success popup, only then the system will capture the clock in time successfully.
Related Articles
Start WiFi Clocking With TimeTec TA App
Introduction Within TimeTec TA, users previously had 3 different ways to personally clock their attendance from a smartphone. Following our latest release we are notching that up to 4, by offering one more clocking method to users, known as Wifi ...Timetec HR App - Personal Clocking
Introduction To cater to employees who are always on the go and those with flexible working arrangements, TimeTec Attendance offers 4 different ways for users to clock their attendance from a smartphone. The options available for personal clocking in ...How to Enroll NFC and Beacon in Timetec HR App
Below is a guide using Beacon as an example to demonstrate the method for device enrollment. However, the enrollment steps are the same for both Beacon and NFC. Therefore, you can also refer to this guide if you are using NFC. Any additional points ...TimeTec TA Mobile App - Personal Clocking
Introduction To cater to employees who are always on the go and those with flexible working arrangements, TimeTec TA offers 4 different ways for users to clock their attendance from a smartphone. The options available for personal clocking in ...Using TimeTec HR (Leave) App for The First Time
Introduction TimeTec HR is a new app by TimeTec that consolidates several TimeTec solutions: Attendance, Leave, Claim, Access and Payroll, into one super app. This article will guide you on how to use the leave module in TimeTec HR. Benefit By ...