How to create E-Polling in i-Neighbour
This article will teach users how to use the E-Polling feature to generate a polling session to get an agreement and consensus from residents (if necessary).
1. Under Management, click on E-Polling
2. Click “Create Poll”.
3. Fill up the details to create a poll:
a. Poll Title
b. Description (optional)
c. Question 1
d. Option A, B = Answer
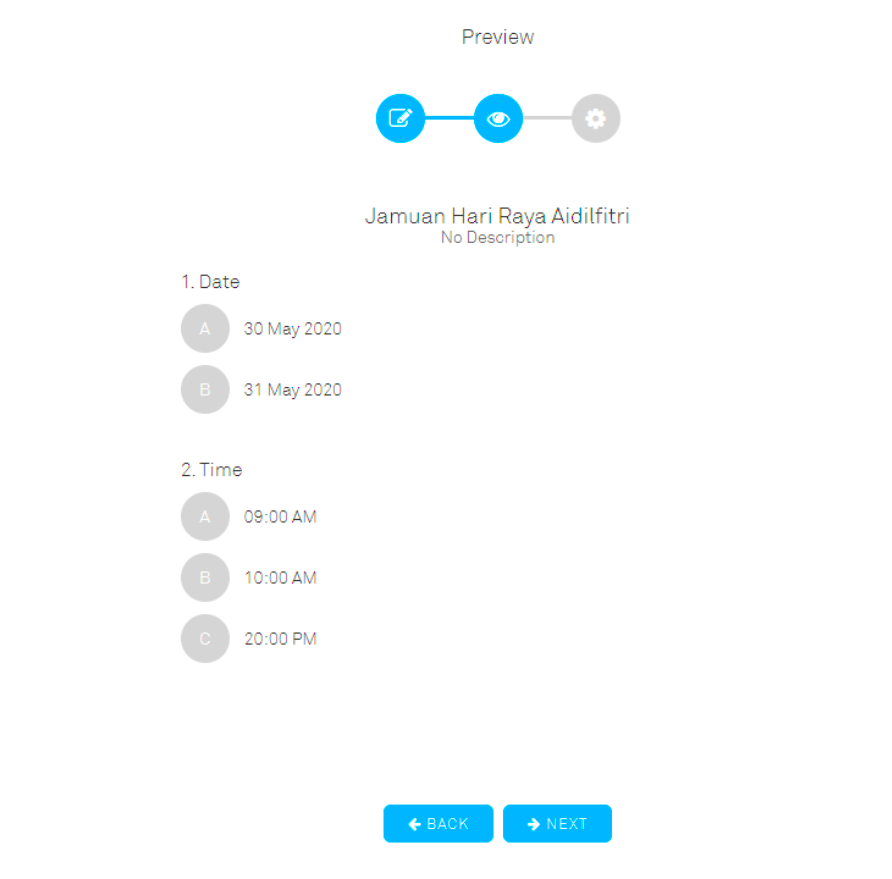
5. The second page is a sample of the poll preview page from the residents’ view. Once the selections are confirmed, click “Next”.
6. Select the Poll Expiry Date, the type of participants, minimum participants required and the minimum percentage to win the poll. The management can select who to join the polling. They can select Admin, Committee, Resident and Unit Owner.
Note:
The minimum period is 3 days and the maximum period is 3 months.
Click upload.
Resident: All resident including family members and tenant
Unit Owner: Only unit owner
7. The poll has been successfully created.
9. The management can see the voting result in percentage style.
If you are still having problems after completing all of the steps stated above, please contact us via support@i-neighbour.com.
Note: If some of the screenshots or steps viewed here are different from the ones in the current system, this is due to our continuous effort to improve our system from time to time. Please notify us at info@i-neighbour.com, we will update it as soon as possible.
Related Articles
How to Create E-Forms
Management can create forms for Residents to view and fill up on the mobile app and web portal. 1. Under Management, click on E-Forms. 2. Click on Created Forms then Create New. 3. Admins will be redirected to a Build Form page, whereby you can start ...E-Invoice – How to Issue & Submit Individual E-Invoice
Introduction i-Account’s e-Invoice module enables e-Invoice submission through direct LHDN API integration. Once enabled, you can assign TimeTec as an intermediary to handle the submission of e-Invoices to LHDN on behalf of the entity. Important ...E-Invoice - Enable Allow Owner to Submit E-Invoice Details via App
Introduction i-Neighbour has a feature that support user request for e-Invoice via the i-Neighbour app. There is an optional setting that needs to be enabled at E-Billing Settings. Setup in i-Neighbour E-Billing Setting - Enable 'Allow Owner to ...How to Create An Event in i-Neighbour
This articles aims to teach admins how to create an event through the web portal. 1. Login Admin and go to Management > Manage Event 2. At the top right click Add Event 3. Fill up the required information. You can enable registration/fee if any. ...How to Create Announcements
1. Under Community, click on E-info then Announcements. 2. Click on the + icon. 3. Select the recipients and upload an optional cover photo, click Create when done: i) Select Recipients ii) Select viewers: a) Unit Owner & Residents (Family ...