How to Clear Cache and Cookies on i-Neighbour and i-Account
Introduction
Sometimes there may be an error when you try to login to i-Neighbour or i-Account. If you encounter this, clearing the cache and cookies from your web browser is an important first step for troubleshooting. The 'cache' is a tool used by your internet browser to speed up the page loading process. However, it could cause a problem when websites are updated and developed as files saved in the cache may conflict with what's coded into the website.
Below are the steps on how to clear cookies and cache in different browsers. After following the steps below, try login into i-Neighbour and i-Account again.
Google Chrome
1. Open Chrome, and at the top right, click on the More icon (three dots) on the top right.

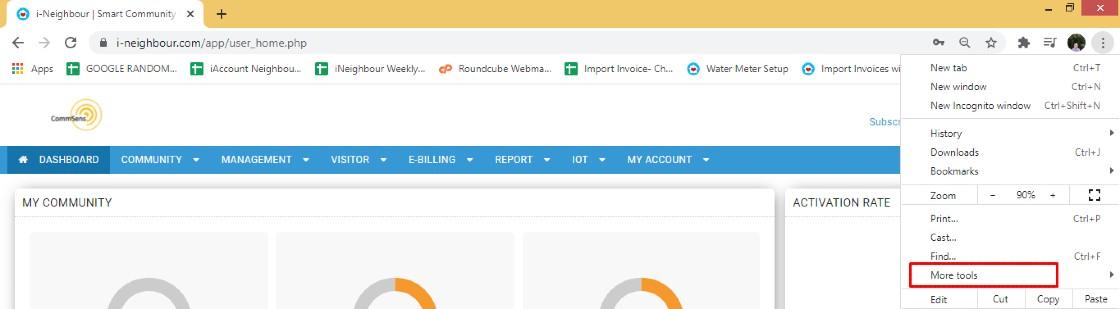
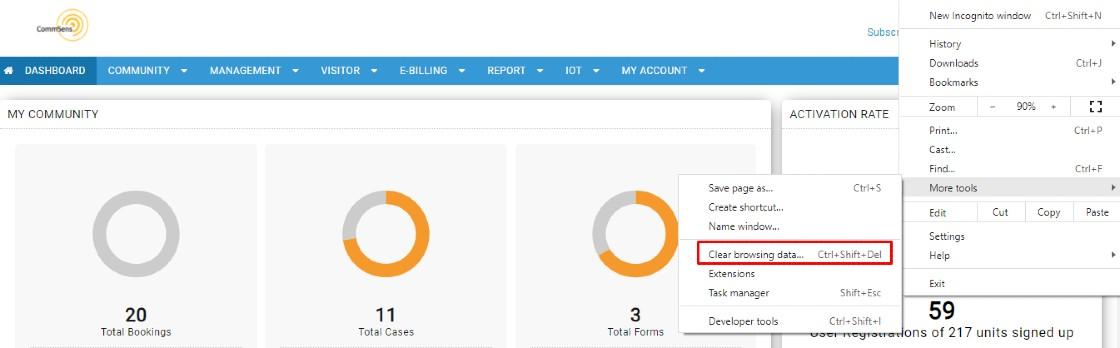
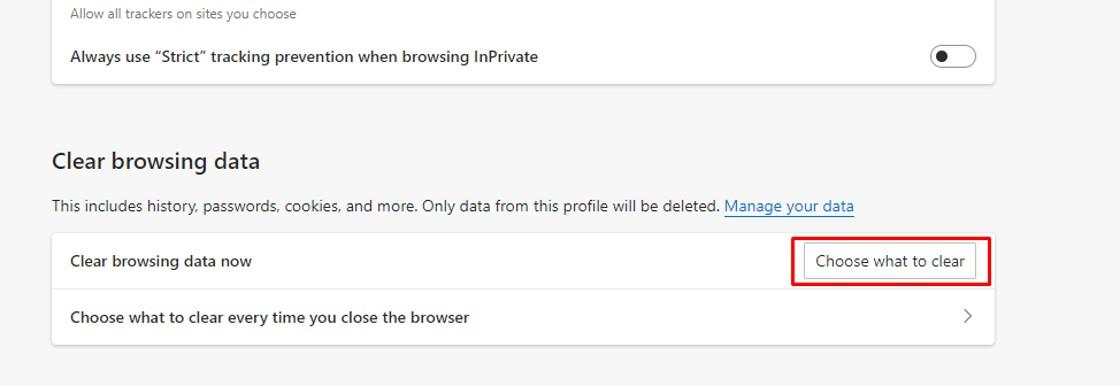
3. Then select the "Clear browsing data" option.
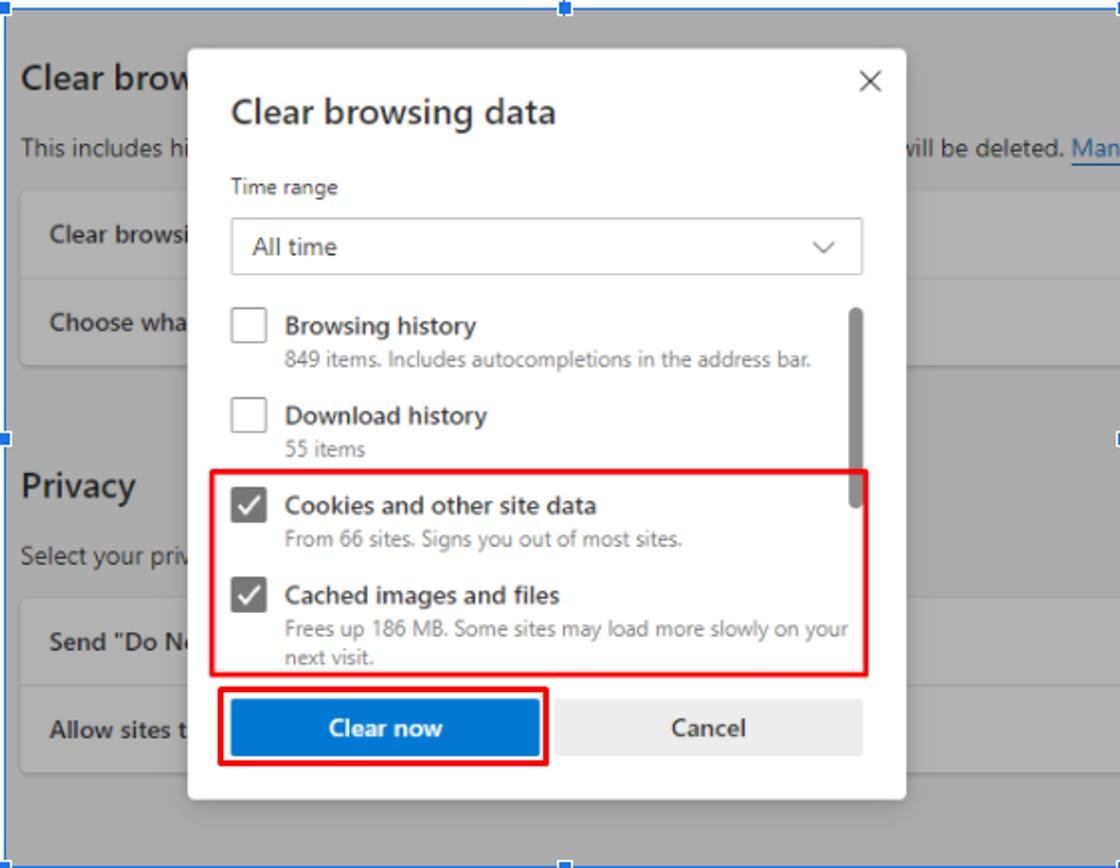
4. For the "Time range", select "All time".
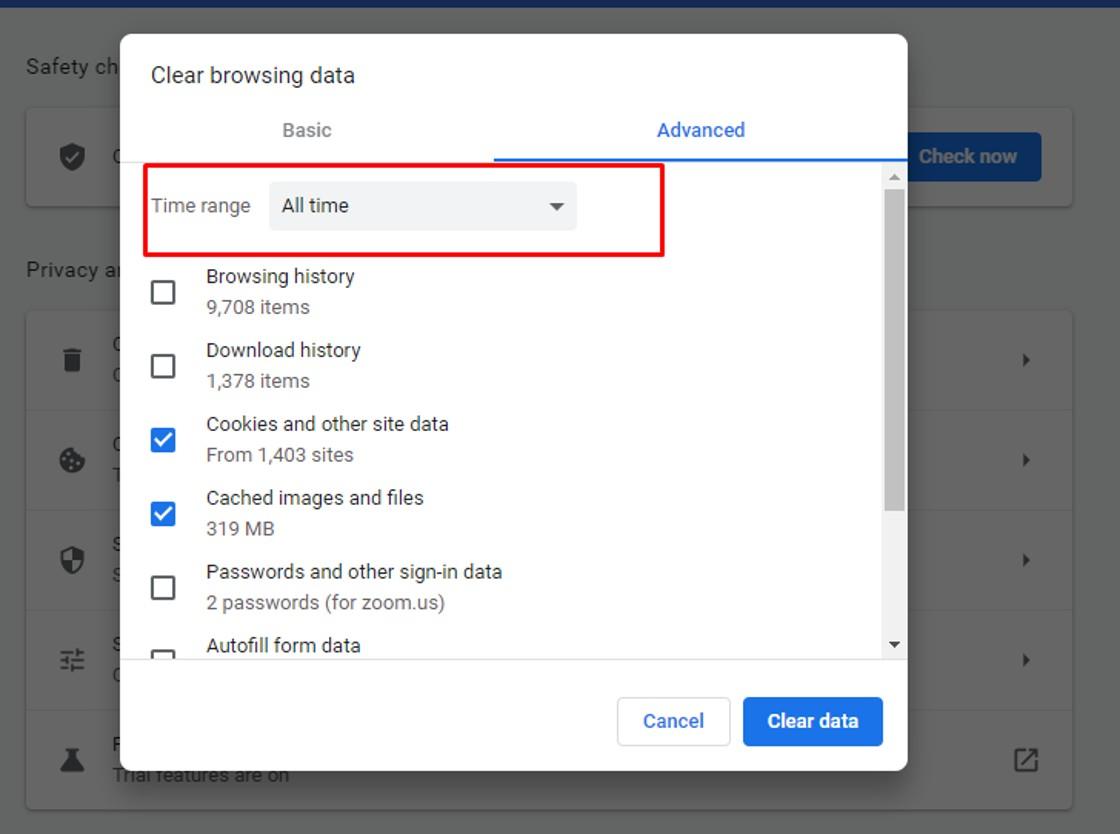
5. You need to tick the checkboxes for "Cookies and other site data" and "Cached images and files".

6. Then, click the “Clear Data” icon to clear all the cookies and cache.
Option 1
1. Click on the menu button (three horizontal lines) on the top right.

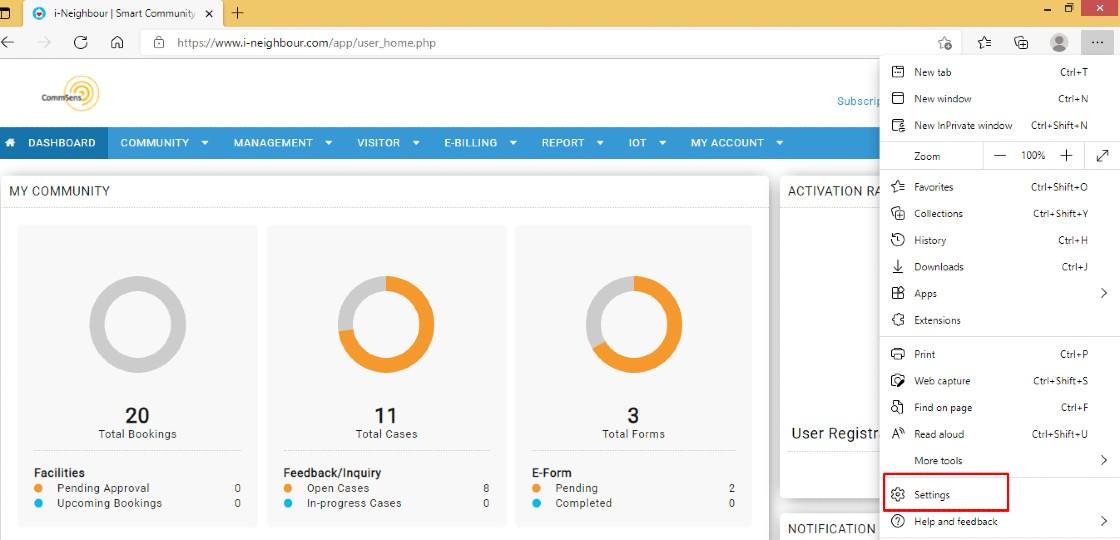
2. Select Settings.


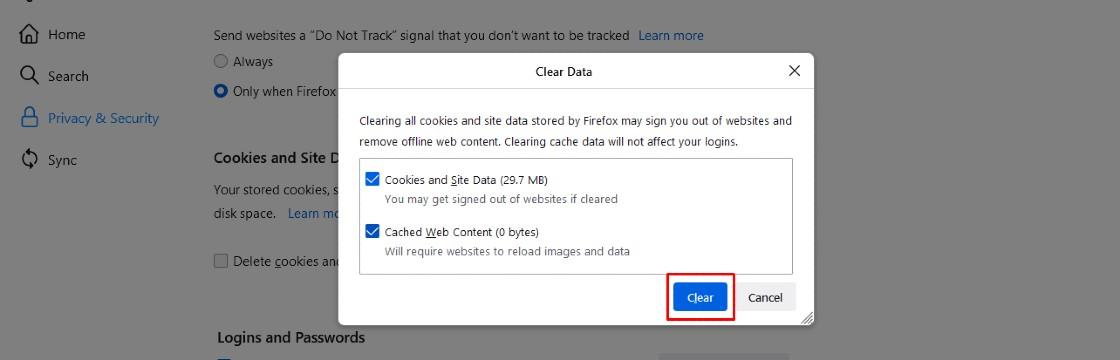
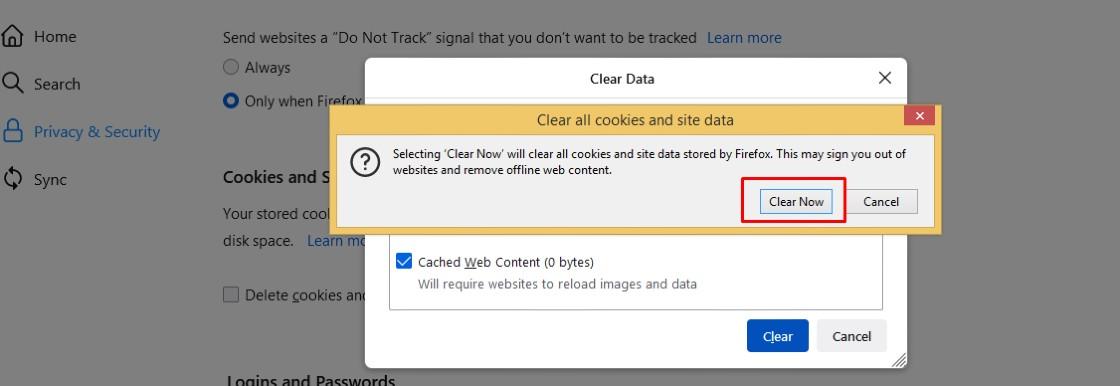
5. Tick the check mark in front of the below option box then click the Clear icon.
Option 2
Alternatively, you can clear the cookies or cache by this option too:
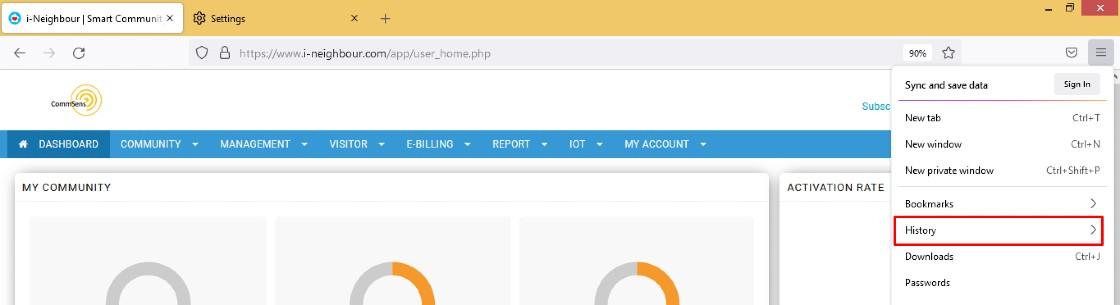
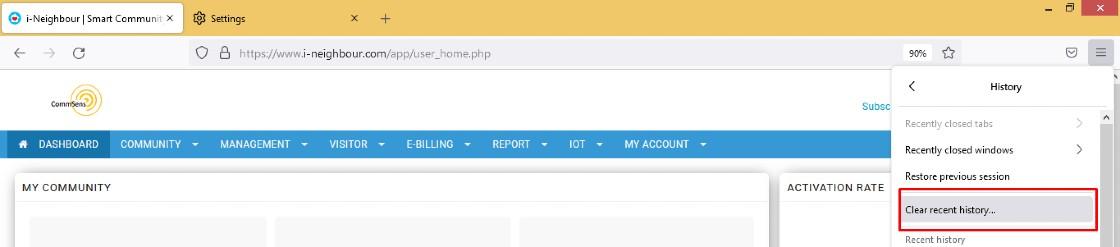
1. Click the menu button (three horizontal lines) on the top right and select History.

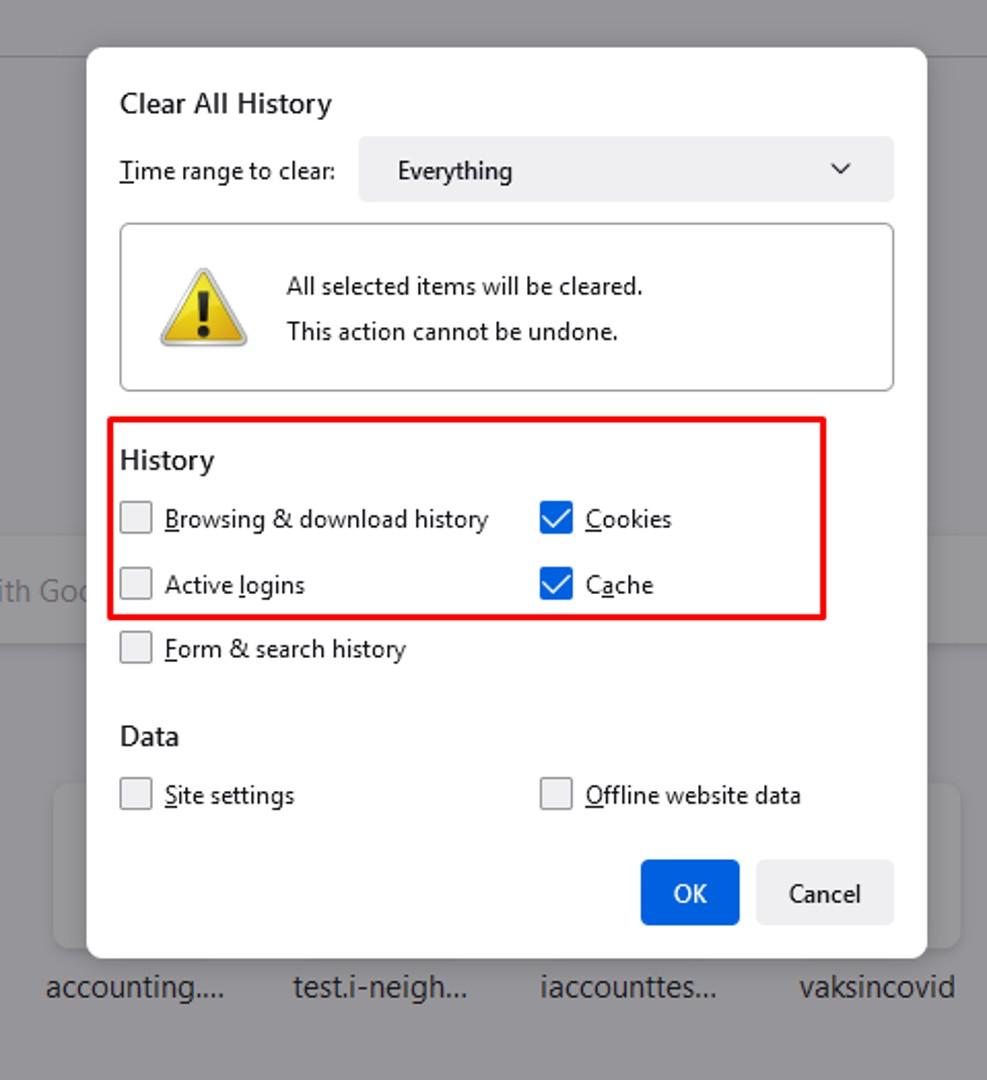
4. Click on the drop-down menu next to "Time range to clear" and choose “Everything”.
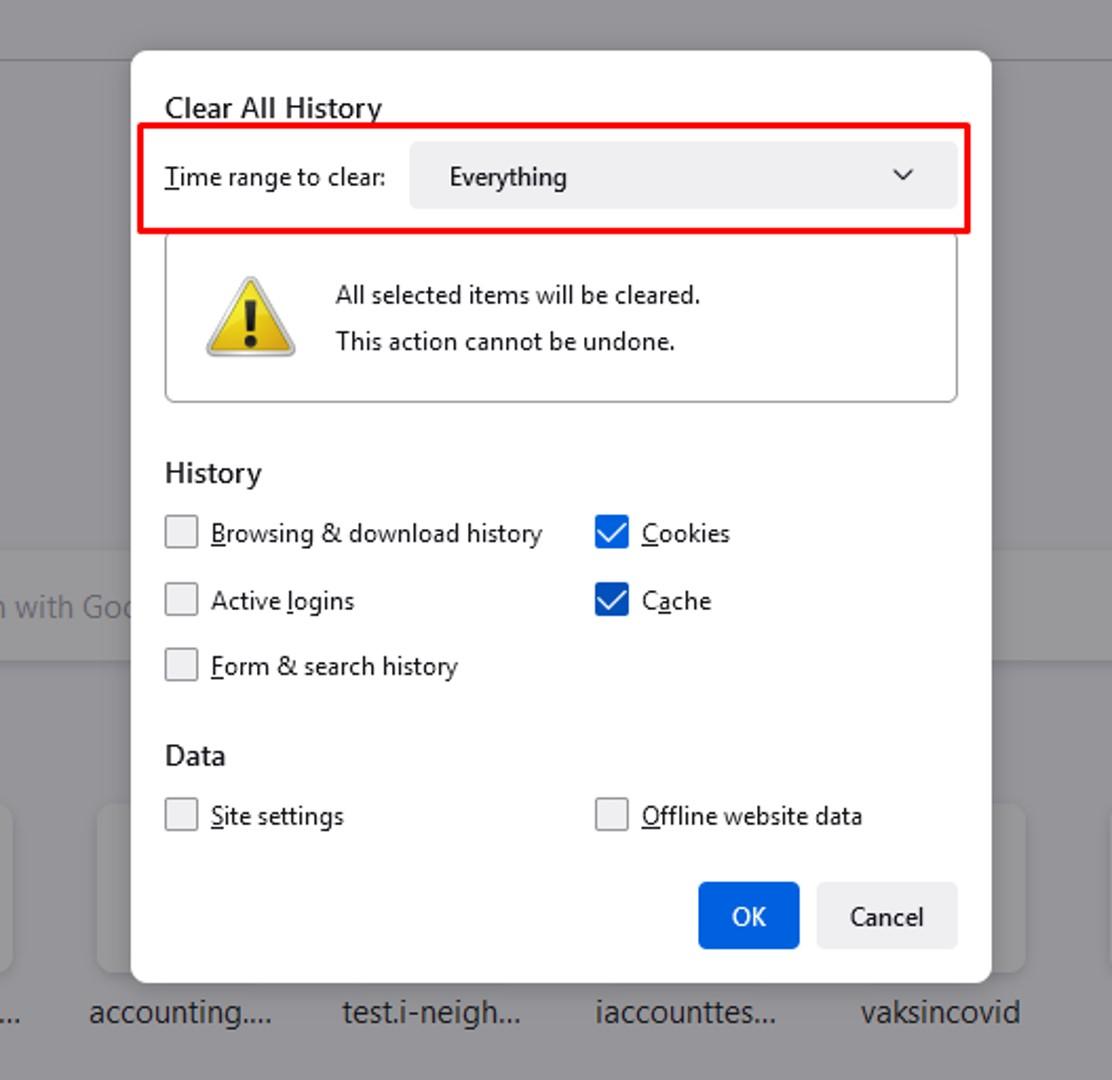
5. Tick the checkboxes for “Cookies” and “Cache”. Click OK to proceed.
Edge
1. Open Microsoft Edge, select Menu (three dots) on the top right.


The other more straightforward way to clear cache/cookies is to use keyboard shortcuts applied to most browsers.
Using Internet Explorer, Edge, Google Chrome, or Mozilla Firefox, you can quickly clear cache with a keyboard shortcut. While in your browser, press Ctrl + Shift + Delete simultaneously on the keyboard to open the appropriate window.
Note: If some of the screenshots or steps viewed here are different from the ones in the current system, this is due to our continuous effort to improve our system from time to time. Please notify us at info@timeteccloud.com, we will update it as soon as possible.
Related Articles
i-Account User Guide Pages
Billing, Account Statement & Notice Generate Quarterly Billing (SCI Statement) Automatically with Auto Recurring SCI Feature Link How to Charge Late Payment Interest (LPI) Link How to Issue Direct Invoice Link How to Upload Water (or Electricity) ...i-Account & i-Neighbour Integration Guide
Introduction i-Neighbour and i-Account are two separate applications, but the integration between these two systems enables certain debtor information such as billing and payment to be synchronised. After you generate residents' invoices, receipts ...How to Reset I-Neighbour Account Password
This article shows users how to change their account password. Process Below are the steps to reset password in Mobile Apps and Web: MOBILE APP 1. Open your i-Neighbour App, press “Forgot” 2. Insert your email address and verification code, then ...How to download and activate i-Neighbour account (Mobile application)
This article aims to teach users how to activate their i-Neighbiour account with their mobile application. Process 1. Download i-Neighbour mobile application from Google Playstore or Apple App Store. 2. Check your mailbox for the i-Neighbour account ...How to Generate Account Statement in i-Account and Upload it to i-Neighbour
Introduction A Statement of Account (SOA) is a great way to provide owners with a recap of the charges billed to them and the payments already made. Furthermore, SOA can also be used as a tool for payment reminder as it informs the owners of their ...