How to Cancel Wrongly Issued Receipt in i-Account
Introduction
i-Account users may occasionally issue receipts wrongly in the system, which could be due to incorrect unit owner, payment amount, bank account or other details. Additionally, it is possible that management policy does not allow editing or voiding of a receipt for control purposes.
Hence, to rectify the error, one alternative is to issue another transaction document (bank payment/ journal voucher) to cancel or effectively reverse/offset the wrongly issued receipt.
Refer to the steps below:
Option 1 - Issue Bank Payment
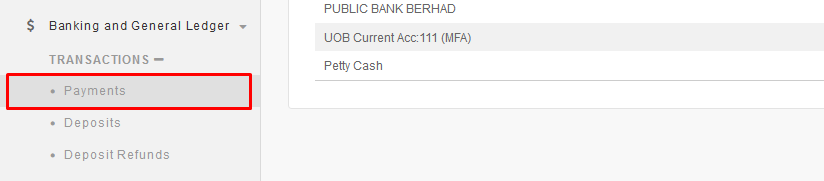
1. Go to Banking and General Ledger > Transactions > Payments to issue a Bank Payment to cancel the receipt.
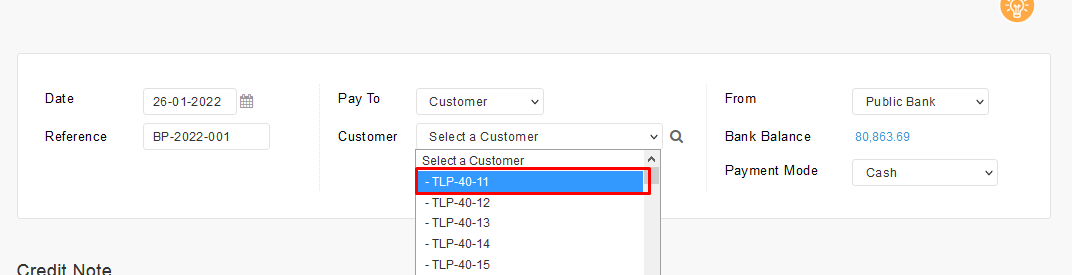
2. Select the Date (same as the original incorrect receipt date) and select “Customer” from the Pay To drop-down listing.
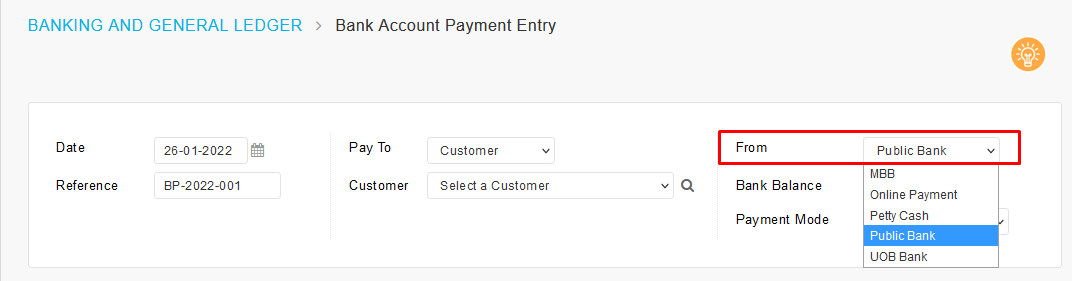
4. Select the applicable bank for this Bank Payment document (same bank as the original incorrect receipt's bank).
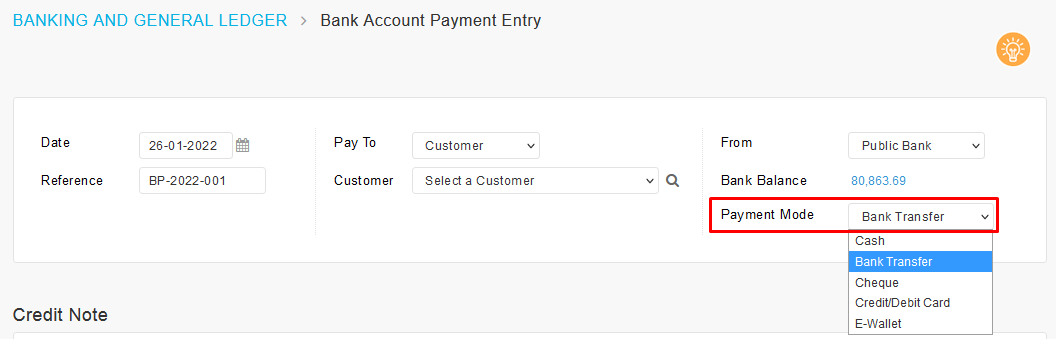
5. Select the Payment Mode.
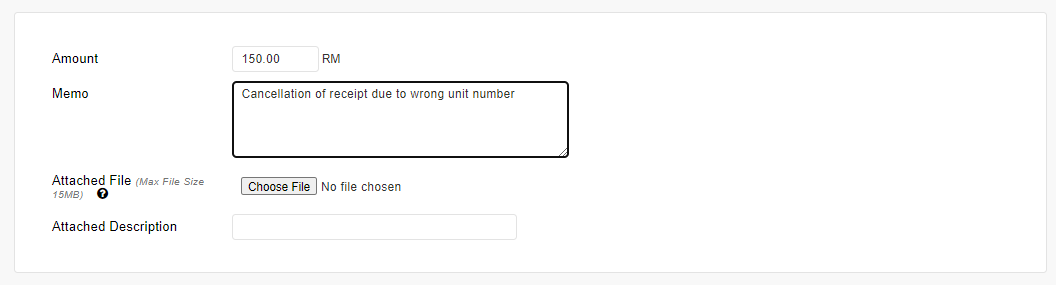
7. Click on Process Payment to proceed.

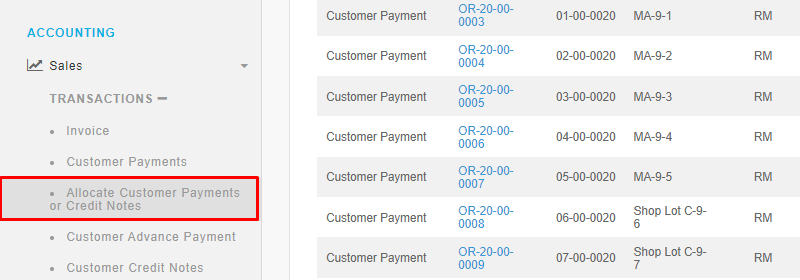
8. Next, you can allocate the incorrect receipt against the Bank Payment. To do allocation, go to Sales > Transactions > Allocate Customer Payments or Credit Notes.
9. Select the owner from the drop-down listing.

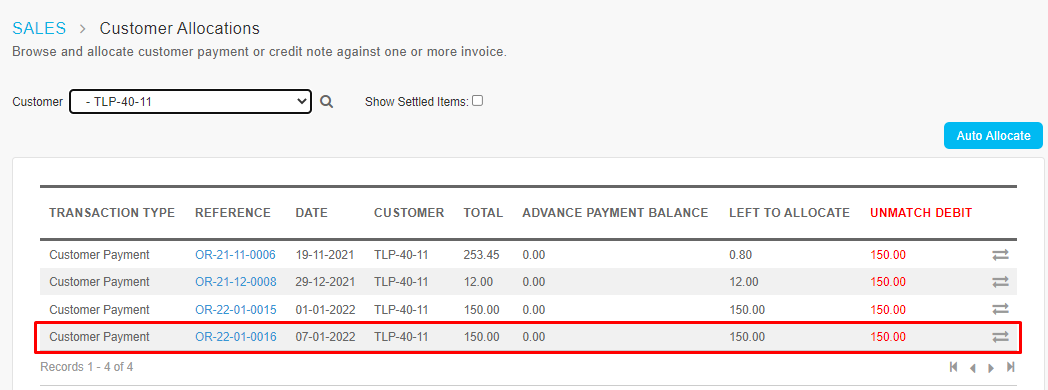
11. Allocate the OR against the Bank Payment that was entered earlier.
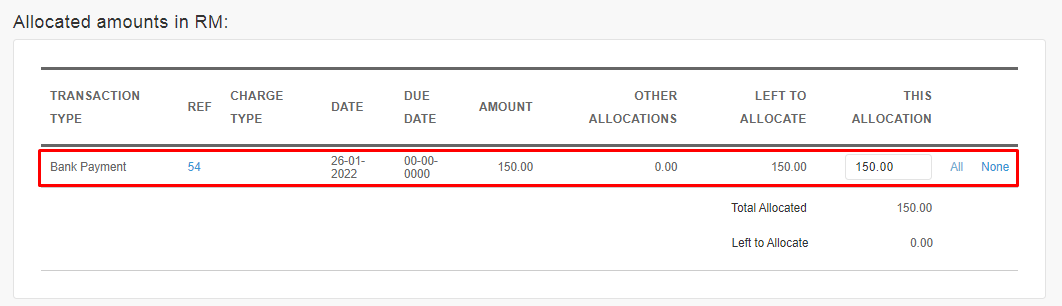
12. Click “Process” to complete the receipt cancellation.


Option 2 - Issue Journal Voucher (JV)
Alternative way to cancel the receipt is for Admin to enter a Journal Voucher. Admin can allocate the receipt against Journal Voucher. The steps are as below:
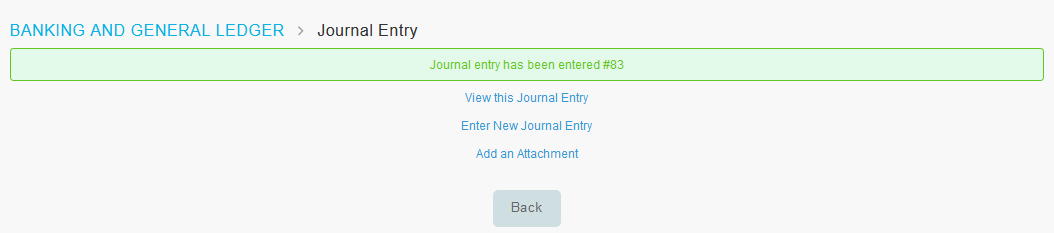
1. Go to Banking and General Ledger > Transactions > Journal Entry to issue a journal for receipt cancellation.

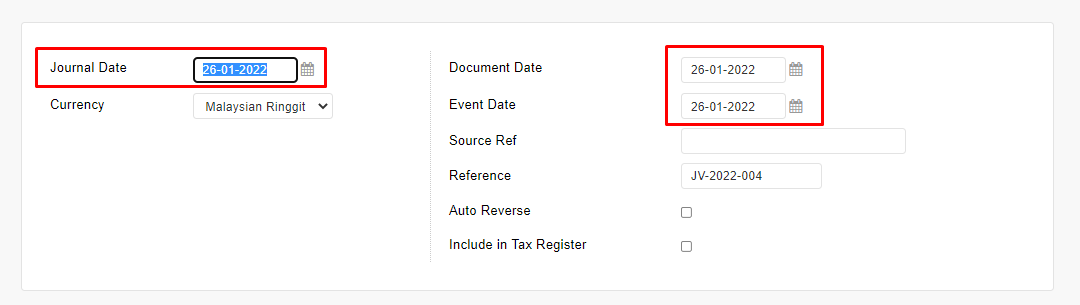
Debit: Accounts Receivable/Debtor GL
Credit: Bank GL
Note: For the Accounts Receivable/Debtor GL, users also need to select the applicable owner’s account code at the “Counterparty” dropdown.

5. Next, you can allocate the wrong receipt against the journal. Refer to the step 8 - 12 in Option 1 above to allocate the receipt.
Note: If some of the screenshots or steps viewed here are different from the ones in the current system, this is due to our continuous effort to improve our system from time to time. Please notify us at info@timeteccloud.com, we will update it as soon as possible.
Related Articles
i-Account User Guide Pages
Billing, Account Statement & Notice Generate Quarterly Billing (SCI Statement) Automatically with Auto Recurring SCI Feature Link How to Charge Late Payment Interest (LPI) Link How to Issue Direct Invoice Link How to Upload Water (or Electricity) ...i-Account User Guide – Customer Payment
Introduction In the Customer Payment entry page, you can record payments received from owners/debtors. Key in the Amount first before allocating the payment to invoices or setting it as an Advance Payment. After entering the payment, you can review ...How to Fix Wrongly Billed Water & Electricity Charges in i-Account
Introduction In i-Account, invoices for Water and Electricity are issued based on meter reading values that the user adds or imports into the system. At times, a wrong meter reading value could have been added for certain units, leading to an ...How to Cancel Payment Voucher for Expired Cheque in i-Account
How to Cancel Payment Voucher for Expired Cheque in i-Account Introduction Most property management regularly issues cheques for payments to their creditors/vendors, and occasionally, some of these cheques may expire without clearing payment in the ...i-Account - How to Record an Unidentified Receipt
Introduction An Unidentified Receipt GL account usually is a temporary holding (suspense) account in which funds are received but not yet identified as to which debtor the amount should be appropriately assigned to. Usually, you (the Admin) realize ...