How To Add Intercom Number In i-Neighbour App
This article aims to guide users how to add intercom contact numbers for the guardhouse to contact to confirm visitors.
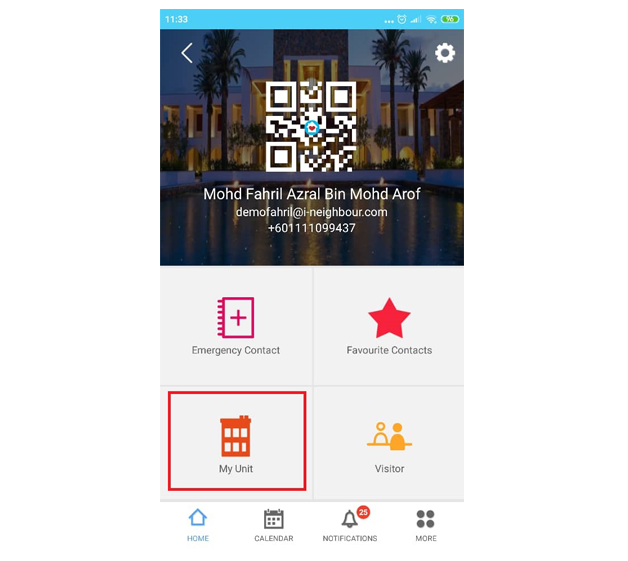
1. Click ‘My Unit’.
2. Click on the pencil icon next to ‘CONTACT NO’.
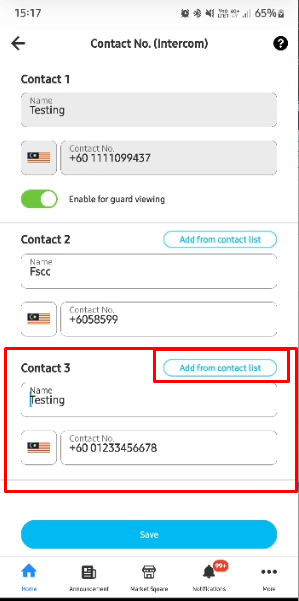
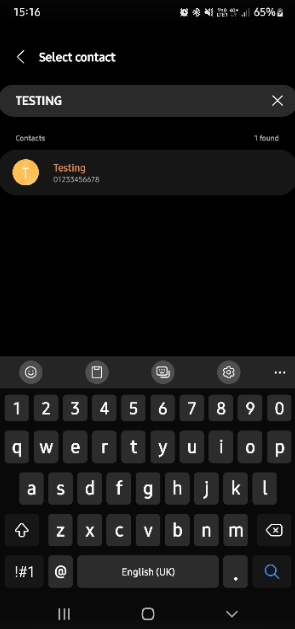
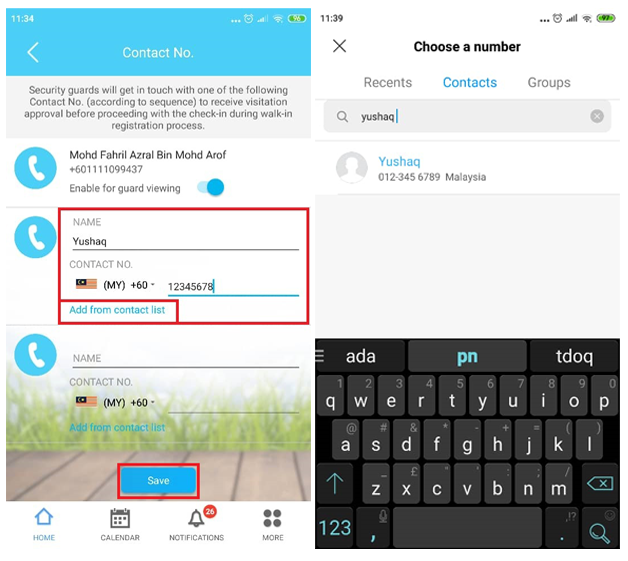
3. Enter a contact number for an intercom. You can enter it directly or you can choose from your contact list by clicking on the ‘Add from contact list’. Once done, click Save.
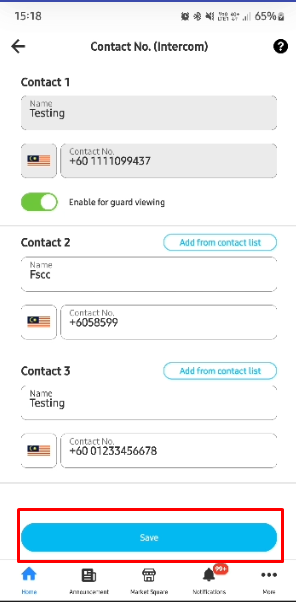
4. In the i-Neighbour App contact number, the name and the number you entered will be added into the system. Note: This number provided will only be used for i-Vizit and the number will not be displayed by security guards, only the house owner name will appear.
Now the security guards can intercom the resident to verify the check-in process via i-Vizit.
If you are still having problems after completing all of the steps stated above, please contact us via support@i-neighbour.com
Note: If some of the screenshots or steps viewed here are different from the ones in the current system, this is due to our continuous effort to improve our system from time to time. Please notify us at info@i-neighbour.com, we will update it as soon as possible.
Related Articles
i-Neighbour: Group Registration for Visitors (Contractor) [for Admin & Security Guard]
This article will guide users to register visiting contractors as a group. A) How to activate group registration [By Admin and Security Guard] Step 1 - [Admin Only] - Activate the group registration in the i-Neighbour Web Neighbourhood > Setting > ...How to change Contact/Intercom Number (Admin)
1. Under Community, click on Manage Unit. 2. Select block to View, then click on a unit you wish to edit. 3. a. Click on Edit Resident to change unit owner contact. b. Edit Unit Information to change Home Tel. No. c. Click on Intercom to add/edit ...How to Add Unit Owner Individually in i-Neighbour
An admin can carry out the steps easily when they need to add in only 1 or 2 units. However, when it involves more than 10 units, we do recommend importing by using the Excel file. This will speed up the process rather than to add in individually. ...How to View Invoices and Receipts in i-Neighbour App
Introduction The E-Billing module in the i-Neighbour app allows residents to view their invoices and payment records in one place. Through the Invoices and Payment screens, residents can check billing details, due dates, outstanding amounts, and ...How to Make Payment via i-Neighbour App
This article aims to teach users how to make payments using the i-Neighbour mobile app. 1. Click on E-Billing 2. Click on the selected invoice. 3. Owner can now view the invoice details. To get the original invoice, click on the blue invoice number. ...