Error “Email Already Exist” Explained for i-Neighbour
This article shows the user what to do when they try to change an email address, name, phone number, account code for a particular unit but when they click the “Save” button, the error “Email already exists” appears.
This happens because the email has already been registered in the other unit number, whether in the same neighbourhood or in other neighbourhoods subscribed with the iNeighbour system.
The change of data is usually done for these reasons:
i) To ensure all multiple units under the same owner use the same email.
ii) Owner requests to use a new email address
iii) Wrong email address was entered
iv) Change a new account code for accounting purposes
This article provides three situations to guide the admin on how to handle this situation.
Situation 1 - iNeighbour is still on “Pending activation” and have an account code
Steps
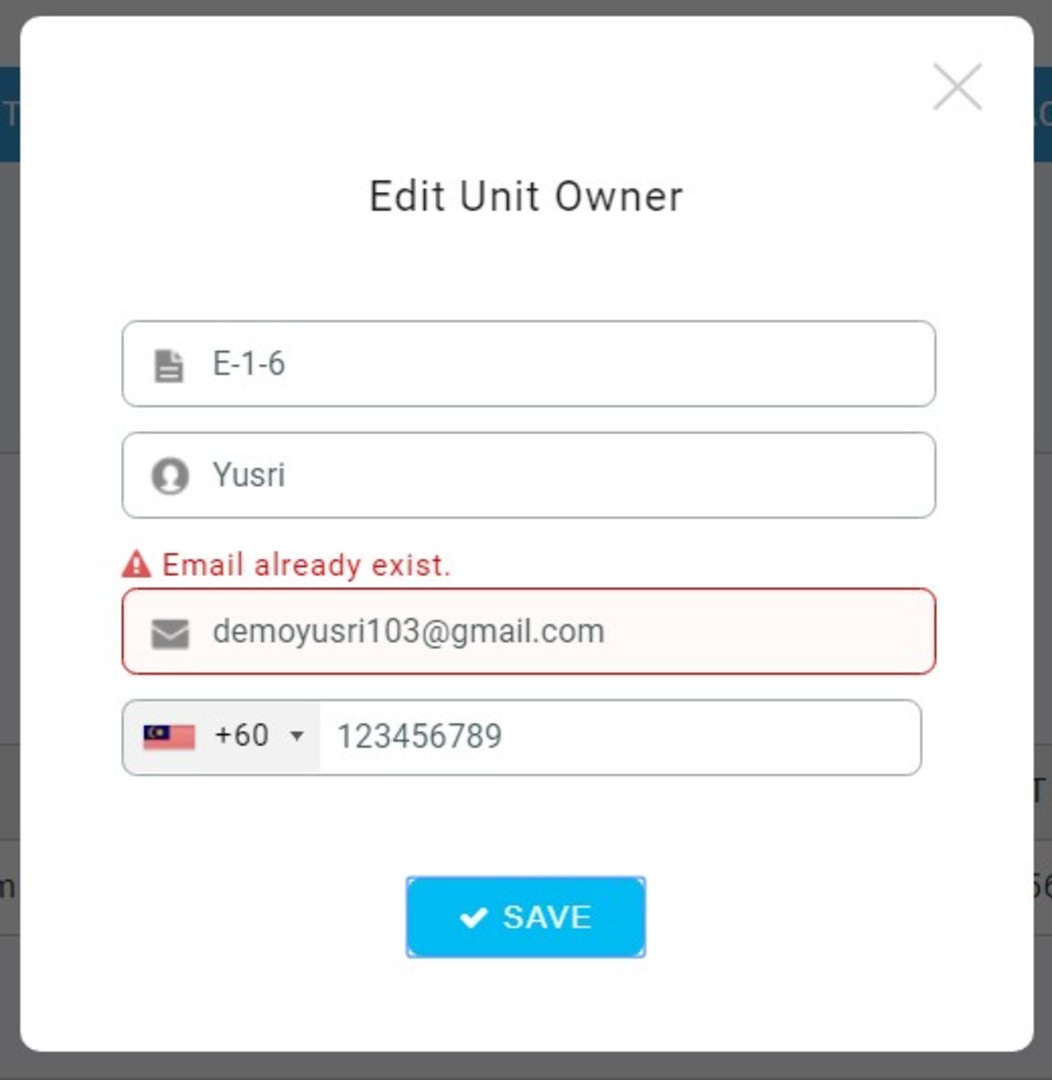
1. Click “Action” (Pencil Icon) > remove the account code > edit email address > Click Save
1. Click “Action” (Pencil Icon) > remove the account code > edit email address > Click Save
Note: For the editing of the email address. An example, the email is "jefferson@gmail.com", temporarily change it to "jefferson@gmail.comX"
Note: For sending of the login credential selection, if you don't want the system to directly send an invitation email after clicking save, please select it as "Later".
Situation 2 - iNeighbour is still on “Pending activation” and doesn't have an account code
Steps
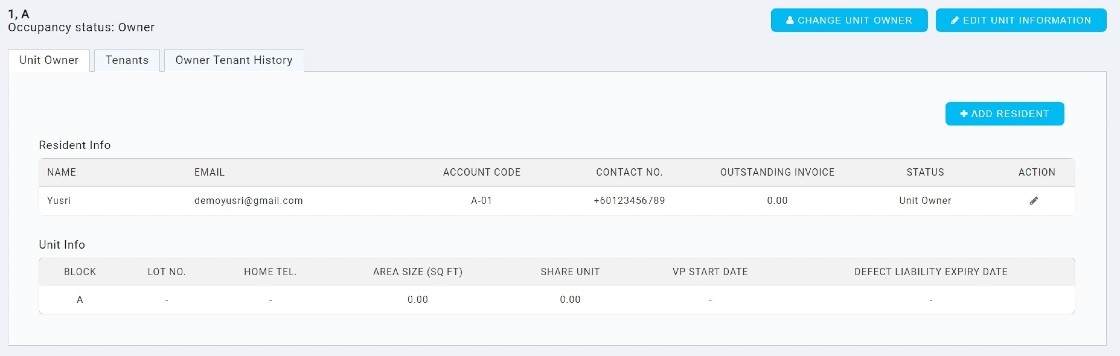
1. Directly click “Change Unit Owner”
2. Insert all the correct information (Account code/Name/Email address/ Phone number)
3. Click Save
Note: By default, an account code is optional. However, if you are using E-billing / i-Account, it is compulsory to add an account code.
Situation 3 - iNeighbour already been activated
For this, you need to contact iNeighbour support at support@i-neighbour.com. All you need to do is to provide all the correct information for the programmer to change it.
Note: You also can do the same steps provided in situation 1, but after clicking "Change unit owner", the owner needs to reactivate their account again. Please ensure that the owner didn't reactivate their account. Instead, the support team will forward all the information to the programmer to change it.
Note: If some of the screenshots or steps viewed here are different from the ones in the current system, this is due to our continuous effort to improve our system from time to time. Please notify us at info@timeteccloud.com, we will update it as soon as possible.
Related Articles
i-Neighbour E-Billing Invoice Payment: Error Message: “Payment Session Interrupted”
Payment Gateway Error "Payment Session Interrupted” Users of the i-Neighbour app (E-Billing) may encounter the error below when proceeding through the payment gateway (Fiuu or iPay88) screen. Sample Error Message Cause This error occurs when the ...i-Account & i-Neighbour Integration Guide
Introduction i-Neighbour and i-Account are two separate applications, but the integration between these two systems enables certain debtor information such as billing and payment to be synchronised. After you generate residents' invoices, receipts ...iPay88 Payment Gateway - Error Message "The transaction is rejected”
iPay88 Payment Gateway - Error Message "The transaction is rejected” Users making payments through the i-Neighbour app (E-Billing) may encounter an issue when making payment on the iPay88 payment page. Sample Error Message Cause The error message ...i-Neighbour Invoice Payment Error: Inability to Select Due to Greyed Out Checkbox and "Pending" Status
i-Neighbour Invoice Payment: Inability to Select Due to Greyed Out Checkbox and "Pending" Status (Pay Now Disabled) i-Neighbour users attempting to initiate an E-Billing payment may encounter an issue where the invoice checkbox is greyed out and the ...Manage multiple units in a community or a different community, in ONE i-Neighbour account
For owners that have multiple units in the same or different neighbourhood, use i-Neighbour to manage your units in the same account. This article explains the steps to manage multiple units in the same i-Neighbour App. First, register all available ...