Doorbell Wiring for FingerTec Devices
A doorbell is a small essential device that has become an integral part of our homes and business premises. It serves as a convenient and effective means of alerting occupants to the presence of visitors or deliveries at the front door.
Gone are the days of knocking on doors or relying on someone to hear a faint tap. With the advent of doorbells, we have transformed the way we identify our guests' arrival and ensure that they are attended to promptly.
This doorbell function is supported by a few of our FingerTec models, including Kadex, R2, R3, FaceID 3, and FaceID 6.
In this chapter We'll look at some advice, the types of doorbells that work with FingerTec models and wiring details.
Step 1, Types of Doorbells.
The FingerTec model only works and is suitable with 12V DC doorbells. This is because the majority of FingerTec devices operate on a 12V DC power supply.
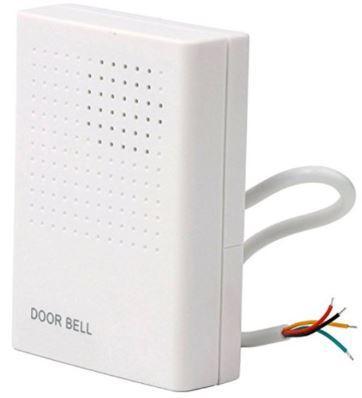

The image above depicts an example of a doorbell that operates on 12V DC electricity.
Step 2, Wiring Diagram.
The wiring diagram below applies to all FingerTec models that support doorbells.
2.1 Please check the device's backside;
2.2 Please find the Marking as Bell + and Bell - in the wiring section.

The illustration above depicts the rear of a FingerTec Model R3 device and the placement of the Bell + and Bell - cable connectors.
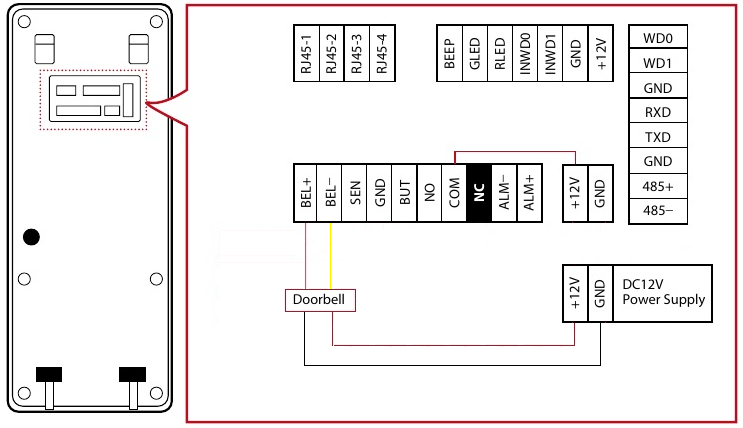
The wire connection between a FingerTec R3 and a 12V DC Doorbell is shown in the diagram above.
A +12V DC power supply is connected to the red cable from the doorbell.
A Ground power supply is connected to the black cable from the doorbell.
FingerTec R3 Bell + is connected to the Green Cable from the doorbell.
FingerTec R3 Bell - is connected to the Yellow Cable from the doorbell.
Related Articles
Connecting FingerTec Devices to Shutter Doors
Introduction Some offices or factories use shutters for the front door or loading bay access. By incorporating FingerTec devices, only registered people will have access to the shutters using face verification, fingerprint, card access or password. ...Wiring Guide To Setup TimeTec BLE-2 With FingerTec Controller
Introduction Introducing TimeTec latest product: TimeTec BLE-2 Smart Door Controller which is a new technology for access door controller that brings convenience in unlocking doors as well as enhancing security. TimeTec BLE-2 uses Bluetooth Low ...How to Change Wallpaper for FingerTec Devices via USB
Introduction Color multimedia FingerTec devices can display different wallpapers. By default, we have provided some wallpapers that you can choose from, however, users can also customize the wallpapers to suit their organization’s preferences. Below ...Fire Alarm System Integration with FingerTec Terminal Wiring Diagram
Introduction Exit routes for emergencies are important for every building when there are fires or other incidents. Regarding fire safety, most buildings have a fire alarm system as part of a full security system. With a Fire Alarm System, doors with ...Verification Fail Alarm in FingerTec Access Control Devices
FingerTec’s access control devices are equipped with a Verification Fail alarm feature. The Verification Fail alarm will trigger the device’s alarm (internal or external alarm) if a user failed to verify for a pre-determined number of times. This ...