Configuring the Five Lunch Time Scenarios in Ingress & TCMS V3
Introduction
FingerTec Ingress & TCMS V3 allow users to manage their attendance records even better. One such method is being able to set the remaining time of their lunch break to either work time or overtime. This allows employees to resume their job earlier after lunch break and claim whatever remaining time they have.
Benefit
By having this options, it provides flexibility to the organization to manage the employee's attendance as every organization has different lunch configuration. This is because some companies offer a paid-lunch system where the company will pay for the remaining lunch time of each worker. There are five lunch time scenarios in Ingress & TCMS V3 that can be configured to suit the user’s preference. This guide will take you through the scenarios and steps that are required to configure them.
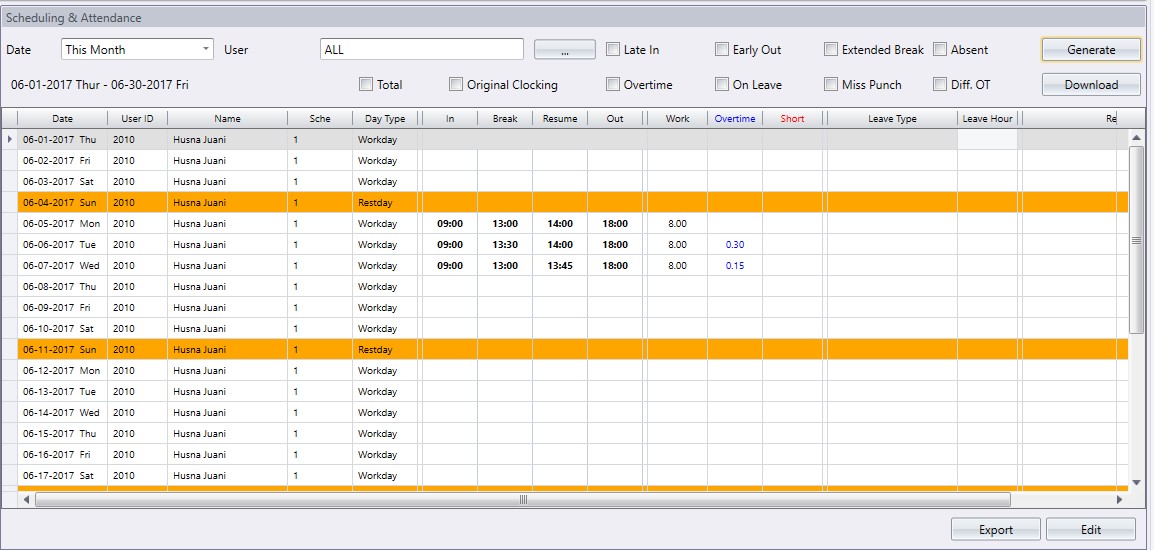
Scenario 1 – Fixed Lunch Time
Step 1
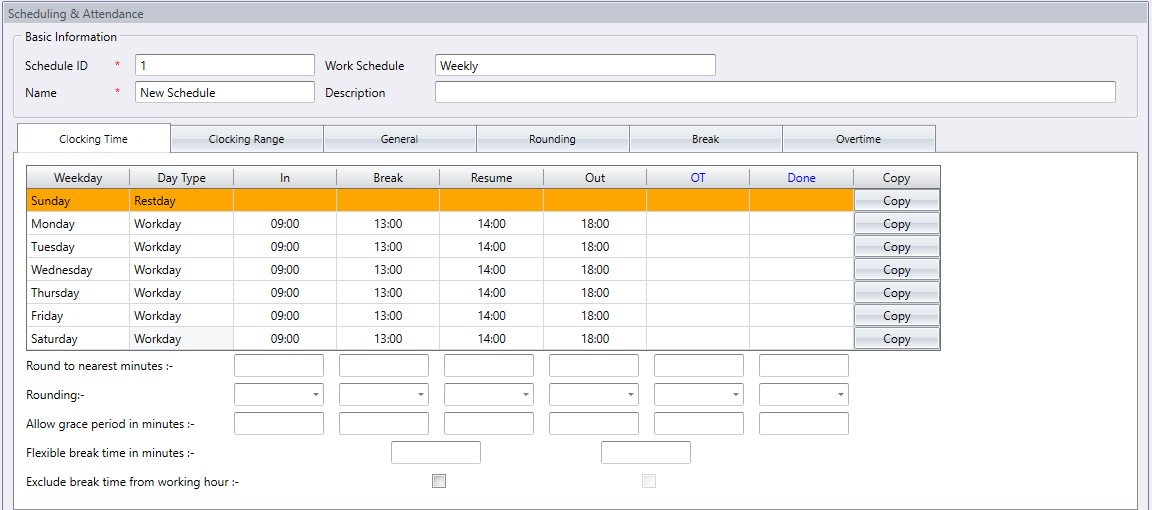
Create the clocking schedule.
Example: IN – 0900 / BREAK – 1300 / RESUME – 1400 / OUT – 1800
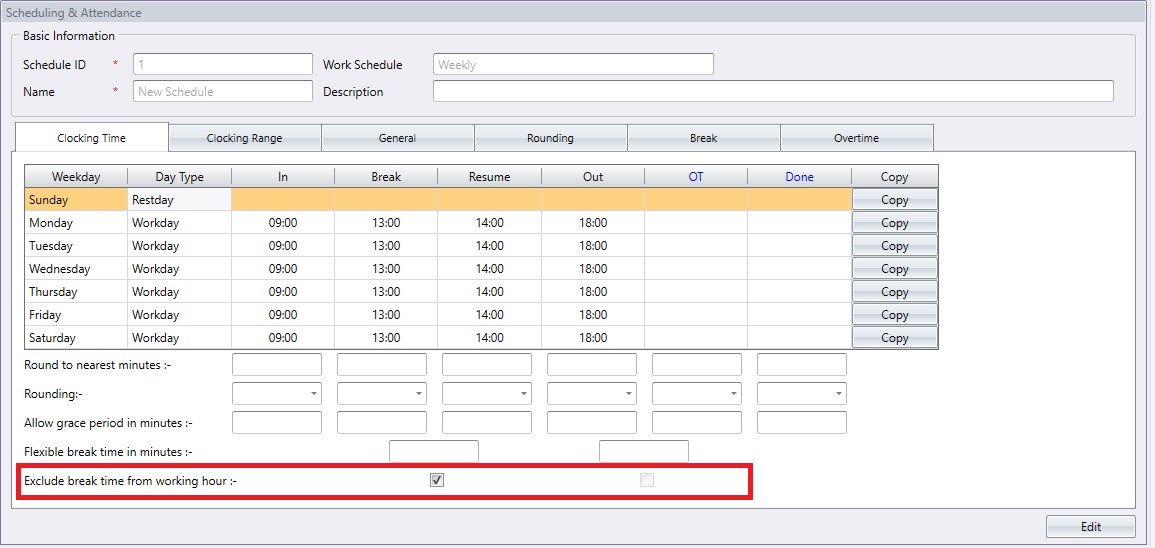
Step 2
Go to the Clocking Time tab and tick on the option Exclude break time from working hour

Step 3
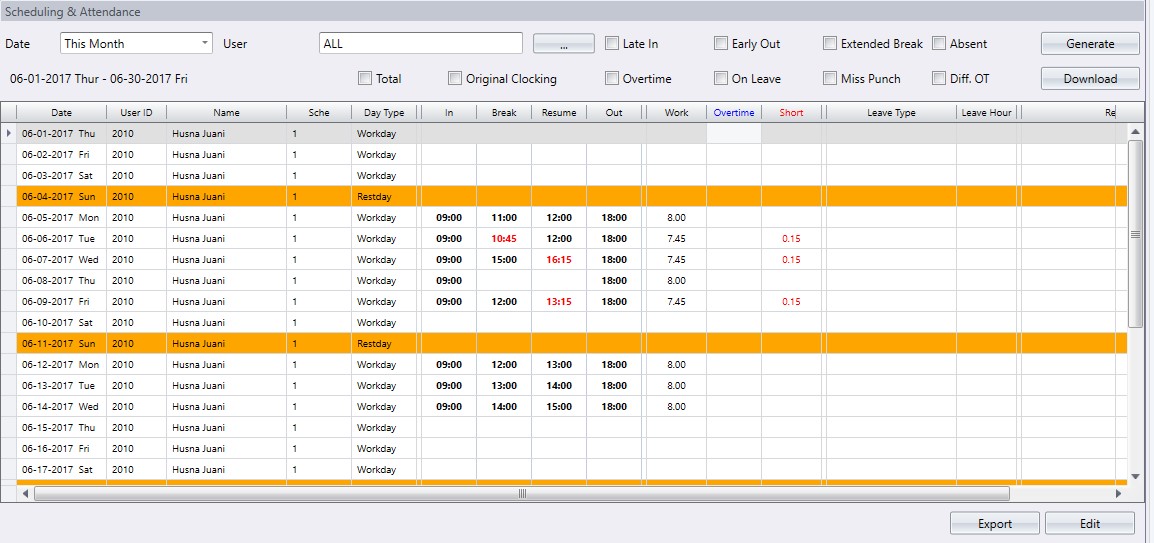
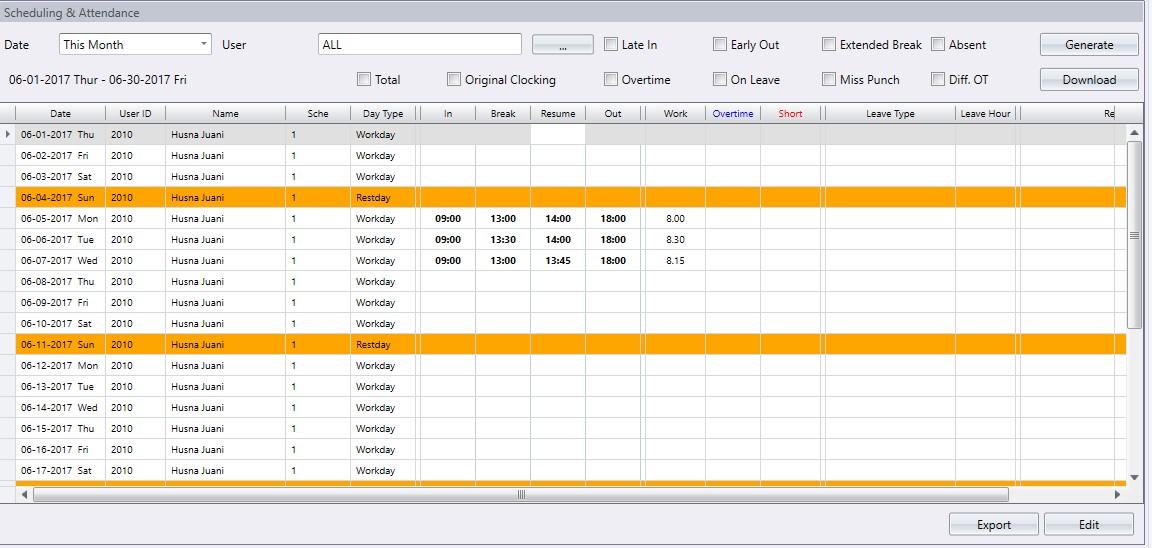
Generate the attendance sheet to apply the new setting.

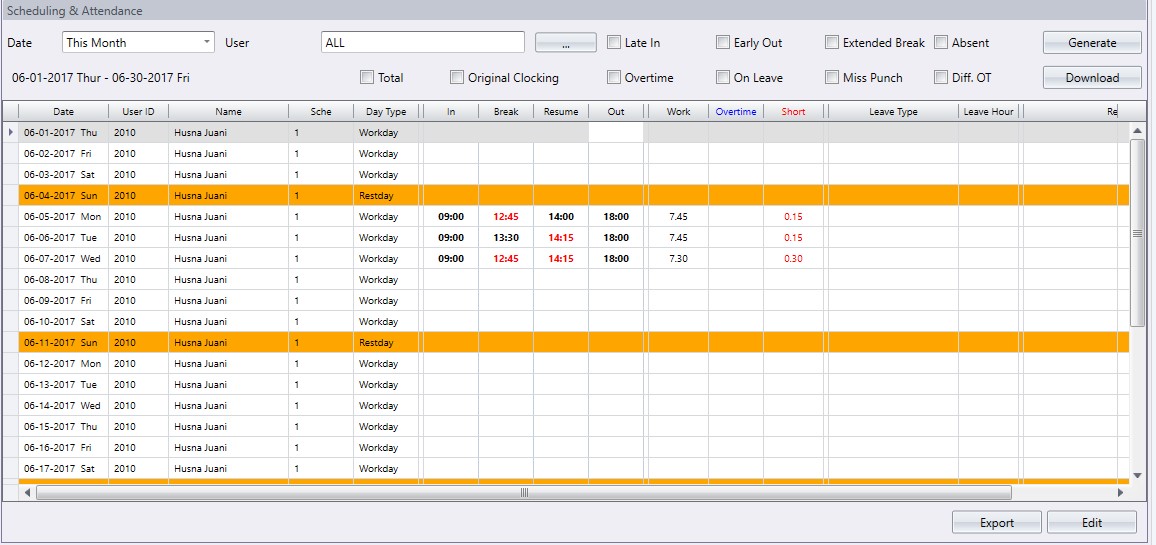
Scenario 2 – Flexible Lunch Time
Step 1
Create the clocking schedule.
Example: IN – 0900 / BREAK – 1100 / RESUME – 1600 / OUT – 1800

Step 2
Go to the Clocking Time tab and configure on the following options:
1. Tick on the option Exclude break time from working hour.
2. Flexible break time in minutes - 60.

Step 3
Generate the attendance sheet to apply the new setting.
Scenario 3 – Remaining Lunch Time to become Work Time
Step 1
Create the clocking schedule.
Example: IN – 0900 / BREAK – 1300 / RESUME – 1400 / OUT – 1800

Step 2
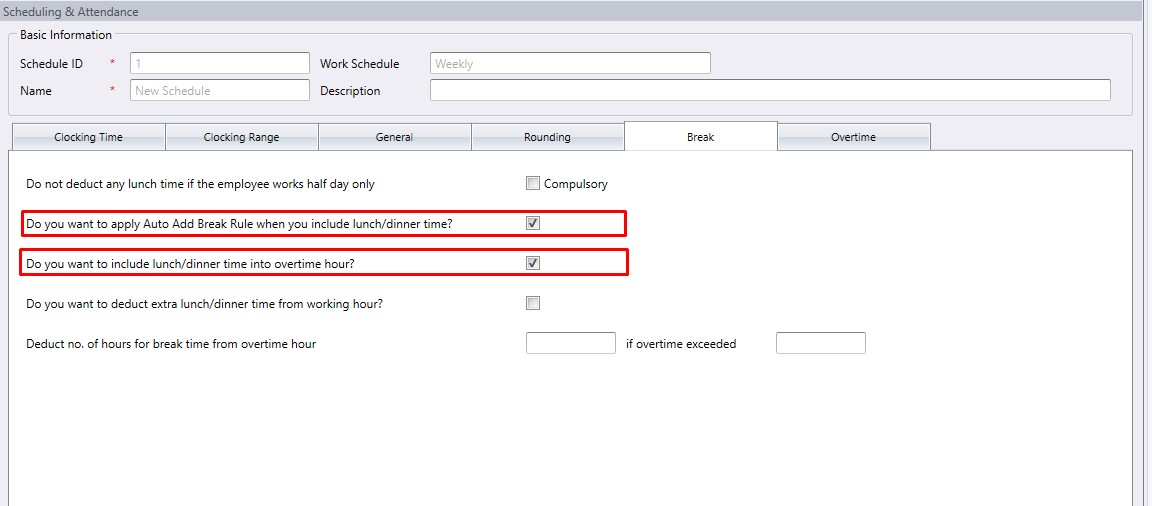
Go to the Clocking Time tab and Break tab and tick on the following options:
1. Exclude break time from working hour.

2. Do you want to apply Auto Add Break Rule when you include lunch/dinner time?

Step 3
Generate the attendance sheet to apply the new setting.
Scenario 4 – Remaining Lunch Time to become Overtime
Step 1
Create the clocking schedule.
Example: IN – 0900 / BREAK – 1300 / RESUME – 1400 / OUT – 1800

Step 2
Go to the Clocking Time tab and Break tab and tick on the following options:
1. Exclude break time from working hour.

2. Do you want to apply Auto Add Break Rule when you include lunch/dinner break?
3. Do you want to include lunch/dinner time into overtime hour?
Step 3
Generate the attendance sheet to apply the new setting.
Scenario 5 – Deducting extra Lunch Time from your working hour
Step 1
Create the clocking schedule.
Example: IN – 0900 / BREAK – 1300 / RESUME – 1400 / OUT – 1800

Step 2
Go to the Clocking Time tab and Break tab and tick on the following options:
1. Exclude break time from working hour.
2. Do you want to deduct extra lunch/dinner time from working hour?

Step 3
Generate the attendance sheet to apply the new setting.
Related Articles
Configuring the Five Lunch Time Scenarios in TCMS V2
TCMS V2’s flexibility as a software for managing time attendance allows users to manage their attendance records even better. One such method is being able to set the remaining time of their lunch break to either work time or overtime. This allows ...Ingress & TCMS V3- To Include Remaining Lunch Time into Worktime or Overtime
Introduction Company policy varies according to the country’s labour law, and the employer’s regulations. There are circumstances where an employee can go for lunch break, and comes in early to resume their work, and the remaining break time will be ...Configuring Different OT in Ingress & TCMS V3
Introduction Both TCMS V3 and Ingress can supports different OT schedule. Workers can work on different working schedule with different OT rate in a specific time. Benefit In this case, the software can view the working hours for normal OT and ...Changing Time Display Format in Ingress & TCMS V3
Introduction One of the options involve choosing between hh:mm or hh:hh. The hh:mm format displays the minute according to the amount of minutes that have passed, while the hh:hh time format displays the minute in relation to the hours that have ...Configuring Access Level by Verify Type for a Specific Time in Ingress
Introduction In FingerTec system, Verify Type is one of the verification methods that can be used to improve access security by using a combination of verification methods. This option is readily available in most of our Access Control terminals such ...