8 Common Mistakes In Attendance Sheet & How to Solve Them
Introduction
When the transaction logs are not present in attendance sheet, this might be caused by some common mistakes. Don’t panic, you can easily correct these mistakes and re-generate the data in attendance sheet to review the attendance in no time at all. All you have to do is to check and try the following solutions if you experienced the same problem in your system.
Benefits
By knowing this troubleshooting steps, it will save you a lot of valuable time because you can do this by yourself without the need to wait for support personnel to assist you through. By going through this tip, you can familiarize yourself with the software and you will know what went wrong and the way to remedy it in the future.
Mistake 1: User Expired Date has Expired!

The transactions will not appear in the attendance sheet of a user after his/her expiry date. However, the transactions will appear in the terminal data audit list.
Solution:
Therefore, If you want the transaction to reappear in the attendance sheet, go to
Users > Select the user ID > Delete the Expiry Date and regenerate the attendance sheet.
We promise you that the transaction will reappear in the attendance sheet. Give it a try!
Mistake 2: Wrong User Issuance Date!
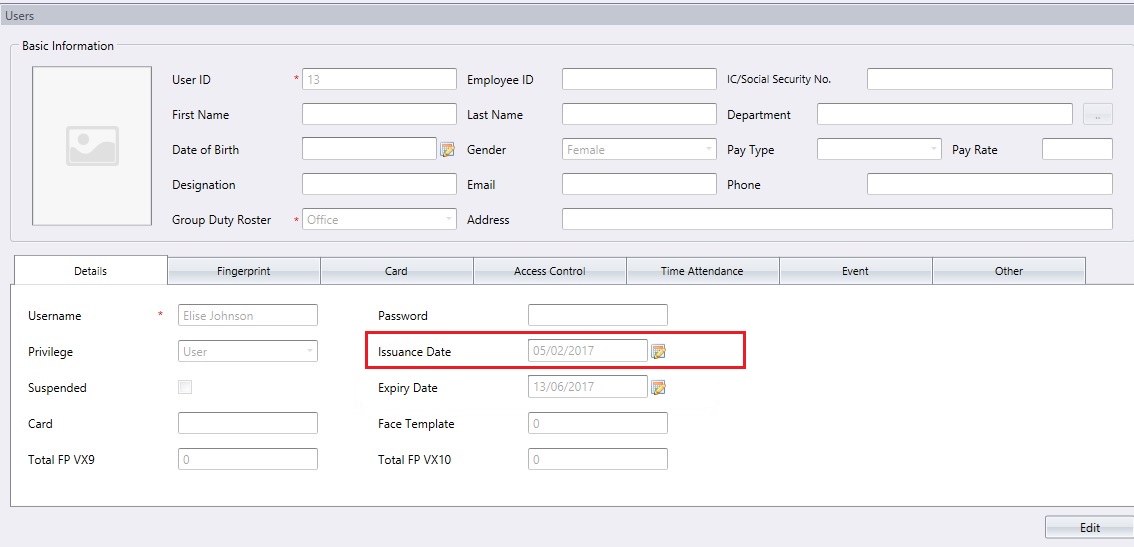
For example, you enrolled user fingerprint templates on 1 Feb 2017 and started to use the terminal on the same date. Then, four days later 5 Feb 2017, you installed the software on your computer, downloaded the fingerprint templates, and the attendance logs. After the download process, you realized that the transaction data available in the attendance sheet starts on the 5th and the transactions before that date didn’t available.
Please take note that the issued date follows the date of which you downloaded the fingerprint, password or card data. The starting date of the attendance will be based on the issued date and no sooner.
Solution:
If you want the transactions from 1 Feb until 4 Feb 2017 to reappear in the attendance sheet, you need to change the issued date to 1 Feb 2017 and generate the attendance sheet again. Voila, every data will be there!
Mistake 3: Overtime Do Not Appear in Attendance Sheet
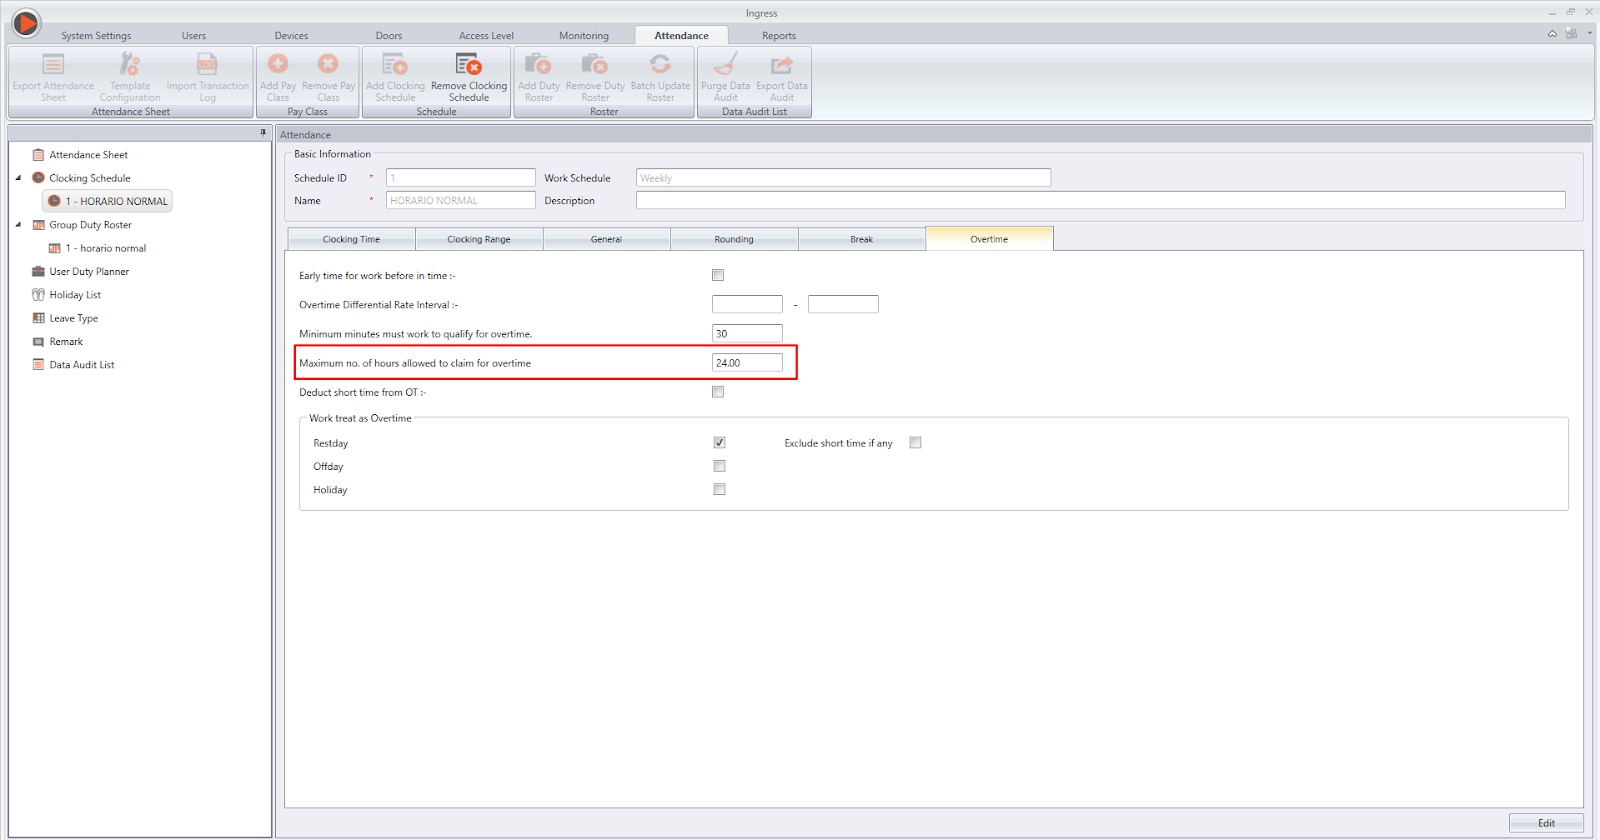
The overtime will not appear in the attendance sheet if you didn’t specify the “Maximum no. hours allowed to claim for overtime” in the clocking schedule. So, you need to determine that field.
Solution:
If you want the overtime to reappear in the attendance sheet, please specify the “Maximum no. hours allowed to claim for overtime” e.g. 24:00 at
Configuration > Clocking schedule > Select the clocking schedule that you use > Edit > Setting > the “Maximum no. hours allowed to claim for overtime”.
Please generate at the attendance sheet after making the changes and you will see the overtime data in the attendance sheet.
Mistake 4: No Transaction Appears in the Attendance Sheet
No matter what you do, you can’t get the data to appear on Attendance Sheet and you’re getting frustrated.
Solution:
Don’t sweat just yet. Please go to attendance and click the download button to download the data again because sometimes during the download process, something occurred that caused the data to not be properly downloaded. To confirm that the data has been downloaded successfully into Ingress/TCMS V3, check the attendance log at the terminal by pressing Menu> System Info > Att log
If the Att Log is “0” - the data has been downloaded into the software.
If there’s a value in it - the data has not been downloaded into the software.
This could be caused by the connection interruption between the terminal and the PC.
Mistake 5: Check on the FingerTec Terminal’s Time and Date
While you are busy finding the solution at the software itself, you need to glance over to the terminal also and check the details of the time and date because if the time and date of the device is not correct, rest assured that the transaction data will not be downloaded properly.
Solution:
You need to make sure that the time and date at the terminal are correct because the transaction that appears in the Ingress & TCMS V3 will be based on the terminal time and date. Look at your time and look at the terminal’s time, and adjust it accordingly. Please generate at the attendance sheet after making the changes to get your correct attendance sheet.
Mistake 6: The data is missing and the log has been deleted.
You are panicking because the data is missing but the logs also have been deleted. Now, how to view deleted user ID attendance log? When you deleted the user ID, the records in the attendance sheet will be deleted. However, the raw data of the user ID will remain in the terminal data audit list.
Solution:
To view the deleted user ID records in the attendance sheet, add the deleted user ID in the Users, change the issued date and assign the deleted user ID group. After that, generate the attendance sheet again and you’ll get back your lost data.
Mistake 7: Workers Work during Rest Day and You Forgot to Configure it
Your worker works during the rest day but the transaction data do not appear in the attendance sheet.
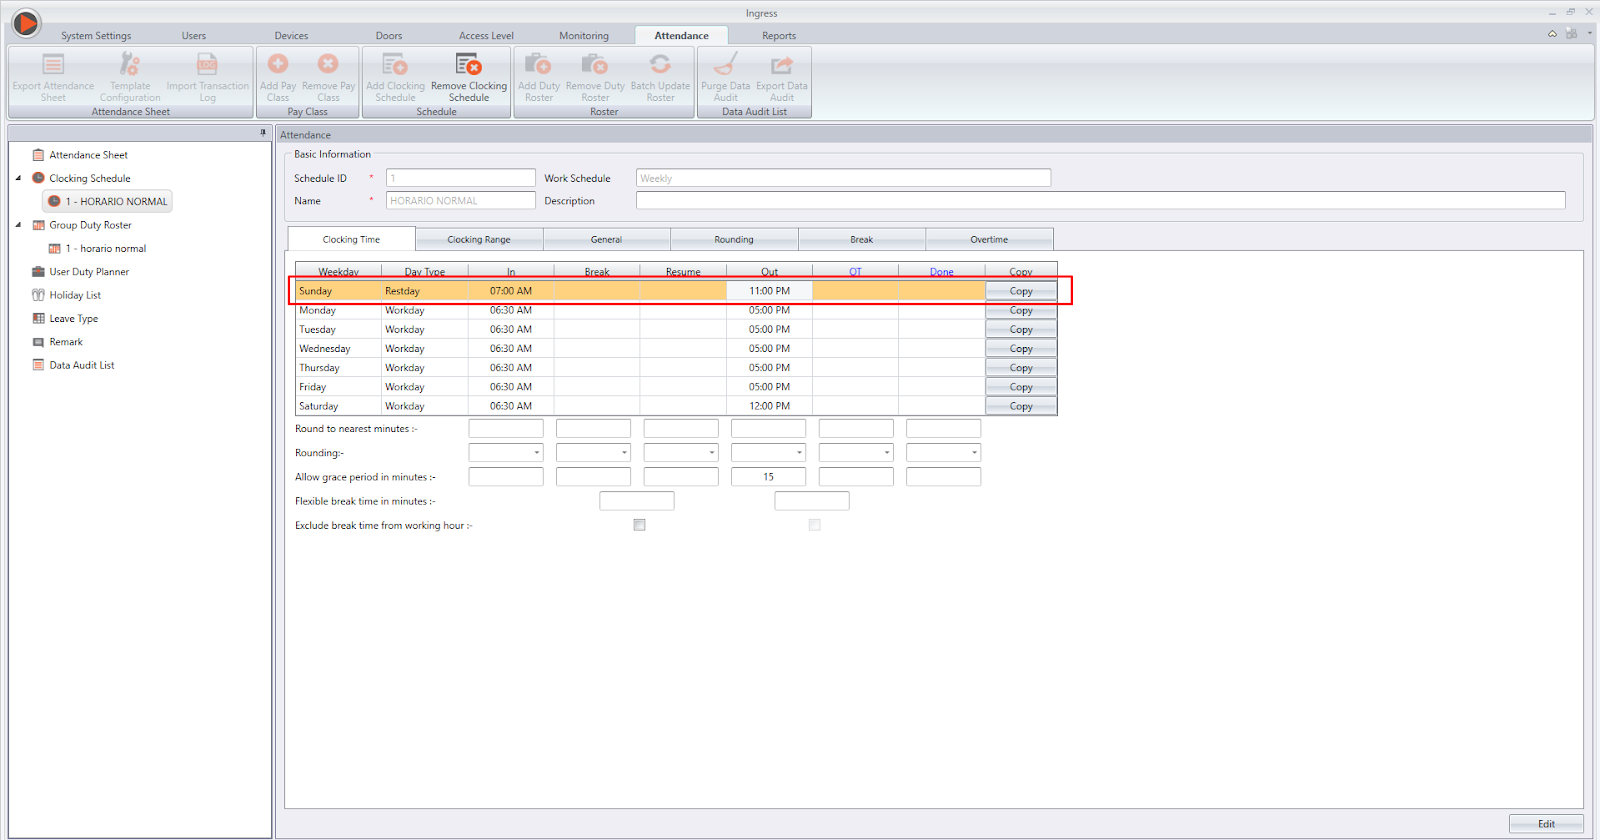
Solution:
You need to configure the time for the Rest Day because without it, the transaction will not appear in the attendance sheet. For example: - IN: 07:00 and Out: 23:00. So if the user comes during this range on the rest day, the data will appear in the attendance sheet and DO NOT FORGET to tick the option from the overtime column: work treat as overtime. When you tick this option, it will automatically treat this worktime as overtime and you’ll find all the data is in order in your Attendance Sheet. Refer to the picture below:

Mistake 8: Errors in Configuration
Sample 1: you configure the clocking schedule, IN = 09:00 and OUT = 17:00. The user punches at 13:01 and it appears in the OUT column. You are buffled as to why the transaction didn’t appear in the IN column, and how to make it appear in the IN column?
Solution:
You need to configure the range time. Because if you didn’t, the system will take the middle time as the range time.
Based on your clocking schedule settings, the range of IN time will be 13:00. So, if the user punched at 13:01 onwards, it will fall in the OUT column.
If you want the transaction to appear in the IN column, you will need to configure the range time for the IN column. Please refer below for an example:

Please generate the attendance sheet again after making the changes. Based on the above settings, after the generating process, all transactions before 15:01 will appear in the IN column.
Sample 2: IN = 09:00 and OUT = 17:00, the user works from 09:00 to 20:00 but no overtime appears in the attendance sheet. Why?

Based on the above configuration, the “minimum minutes must worked to qualify for overtime” was 360 minutes or 6 hours. The user works for overtime 3 hours, so the system will not be showing the overtime because the overtime did not exceed 6 hours.
Solution:
If you want the overtime to appear in the attendance sheet, please change the “minimum minutes must worked to qualify for overtime” setting e.g. 60 minutes or delete it. Then generate again at the attendance sheet. After the generating process, the overtime data will appear in the attendance sheet. We promise you.
There you go, 8 mistakes that you could make that are causing the attendance data to go haywire. Attempt all the tips above and if all fail, reach out to support@fingertec.com and we’ll be more than happy to give you a hand.
Related Articles
Navigate Ingress Better | Avoid These 5 Common Mistakes
Introduction Ingress is FingerTec’s bundled software with every purchase of FingerTec door access hardware. Over time, we have compiled common mistakes users made while using Ingress that have caused unnecessary frustration and wrong outcomes. Let’s ...Common Issue on Attendance Sheet Record and How to Fix It - Ingress & TCMSv3 Software
Introduction In some cases, even though you have correctly configured a Clocking Schedule and that transaction log was already captured in the Data Audit List, there are still certain factors and issues that might lead to the failure of generating ...Common Issue on Attendance Sheet Record and How to Fix It - Ingress & TCMSv3 Software
Introduction In some cases, even though you have correctly configured a Clocking Schedule and that transaction log was already captured in the Data Audit List, there are still certain factors and issues that might lead to the failure of generating ...9 Common Mistakes Committed in Ingress, Avoid Them for A Successful Installation
Introduction Ingress is an integrated access control management software that is running on MySQL or MS Access database platforms, totally different platforms but recent and better platforms as compared to the Visual FoxPro of TCMS V2. Ingress ...5 Common Errors in TCMS V3/ Ingress Software and How to Fix It
Introduction Occasionally, you might encounter into some errors when using TCMS V3 or Ingress software. Don’t close the program just yet. Here we have compiled 5 common errors in the software and how to solve it. Problem 1 - Empty Attendance Sheet ...